EasyManua.ls Logo

Whirlpool FFT CM10 8B UK - User Manual

Whirlpool FFT CM10 8B UK
4 pages
Print Icon
To Next Page IconTo Next Page
Loading...
THANK YOU FOR BUYING A WHIRLPOOL PRODUCT.
In order to receive a more complete assistance, please
register your product on www.whirlpool.eu/register
Policies, standard documentation, ordering of spare parts and additional product information can be
found by:
Visiting our website docs.whirlpool.eu and parts-selfservice.whirlpool.com
Using QR Code
Alternatively, contact our After-sales Service (See phone number in the warranty booklet). When
contacting our After-sales Service, please state the codes provided on your products identi cation plate.
EN
Quick guide
Before using the appliance carefully read the Safety
Instructions.
xxxxxxxxxxxx
xxxx
OPENING OF THE DOOR DURING THE CYCLE
Laundry can be checked while the drying cycle runs and any
garments already dry can be removed, while drying continues for
the remaining items. After closing the door, press the "Start/Pause"
button to resume machine operation.
Keep the door closed until the cycle end to save time and energy.
DAILY USE
Doing this will keep your machine working at its BEST:
- remember to empty your water tank after each drying cycle.
- remember to clean your lters after each drying cycle.
Refer to the Care & Maintenance section.
1. Plug the dryer into the power supply socket.
2. Open the door and load garments; always refer to instructions on
clothing labels and the max loads indicated in the programme
section. Empty pockets. Make sure garments do not get caught
between the door and/or the door lter. Do not load items that
are dripping wet. Do not tumble dry large, very bulky items.
3. Close the door.
4. Press the "On/O" button.
5. Select the most suitable programme
for the type of fabric in that
load.
6. Select the options, if necessary.
7. Press the "
Start/Pause"
button to begin drying.
8. At the end of the drying cycle, a buzzer will beep. An indicator on
the control panel signals the end of the cycle. Pull the load out
immediately to prevent the formation of creases on laundry.
9. Turn the machine o by pressing the "On/O" button, open the
door and pull the clothing out. If the machine is not switched o
manually, after about a quarter of an hour from the end of the
cycle , the appliance turns o automatically to save energy.
Note that some programme/option accords with "Crease Care"
system. This means that for some hours, after the end of the
drying cycle, the drum rotates at regular intervals to prevent the
formation of creases.
In case of power failure, it is necessary to press the "Start/Pause"
button to restart the cycle.
CARE LABEL
Always check the care labels, especially when placing garments in
the tumble dryer for the  rst time. Below are the most commonly
used symbols:
May be tumble dried.
Do not tumble dry.
Tumble dry – high heat.
Tumble dry – low heat.
FIRST TIME USE
Make sure that the water tank is correctly inserted. Make sure
that the drain hose on the back of the dryer is xed correctly,
either to the dryers water tank, or to your domestic drainage
system.
CONTROL PANEL
1 ON/OFF button (Reset if long pressed)
2 Programme selection Knob
3 Start/Pause
Options buttons*
4
Dryness level
5 Timed drying
6 Start delay
7 Rapid
8 FreshCare+ (Key lock if long pressed)
9 Cycle end
*Note: some models may have the wording in full instead of the icons.
INDICATORS
Dryness level: Iron dry - Hanger dry - Cupboard dry - Extra dry
Cycle phase:
Drying - Cool down - End of cycle
Empty water tank - Clean door lter - Clean bottom lter -
Refer to troubleshooting section:
Failure: Call after sales service
DEMO
Demo mode
1
3
2
9
7
8
4 56
3“
h
9h
6h
3h
1h
120’
180’
90’
60’
30
9h
6h
3h
1h
120’
180’
90’
60’
30
1
3
2
9
7
8
4 56
3“
h
Question and Answer IconNeed help?

Do you have a question about the Whirlpool FFT CM10 8B UK and is the answer not in the manual?

Overview

This document provides a comprehensive guide for operating and maintaining a Whirlpool tumble dryer. It covers the control panel, indicators, first-time use, daily operation, programs, options, care, maintenance, troubleshooting, and technical specifications.

Function Description

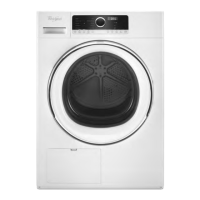
The Whirlpool tumble dryer is designed to efficiently dry various types of laundry. It features a control panel with an ON/OFF button, a program selection knob, and a Start/Pause button. Users can select from a range of programs tailored to different fabric types and load sizes, as well as customize drying cycles using various options. The dryer is equipped with indicators to show dryness level, cycle phase, and maintenance alerts.

Control Panel and Indicators

The control panel includes:

  • ON/OFF button (1): Powers the appliance on or off. A long press can reset the dryer.
  • Programme selection Knob (2): Allows users to choose from available drying programs.
  • Start/Pause button (3): Initiates or pauses the selected drying cycle.
  • Options buttons (4-9):
    • Dryness level (4): Adjusts the desired level of dryness for garments.
    • Timed drying (5): Manually sets a specific drying duration.
    • Start delay (6): Delays the start of the drying cycle.
    • Rapid (7): Enables quicker drying.
    • FreshCare+ (8): Prevents bacterial proliferation and creasing by periodically rotating the drum after the cycle ends. This button also functions as a Key Lock.
    • Cycle end (9): Activates a prolonged buzzer at the end of the cycle.

Indicators on the panel provide visual feedback:

  • Dryness level: Icons for Iron dry, Hanger dry, Cupboard dry, and Extra dry.
  • Cycle phase: Icons for Drying, Cool down, and End of cycle.
  • Maintenance alerts: Icons for Empty water tank, Clean door filter, Clean bottom filter, and Failure (call after-sales service).
  • DEMO: Indicates demo mode.

First Time Use and Daily Operation

Before first use, ensure the water tank is correctly inserted and the drain hose is properly fixed (either to the dryer's water tank or a domestic drainage system).

For daily use:

  1. Plug the dryer into a power supply socket.
  2. Open the door and load garments, ensuring pockets are empty and items are not dripping wet or excessively bulky.
  3. Close the door.
  4. Press the "On/Off" button.
  5. Select the appropriate program for the fabric type.
  6. Select any desired options.
  7. Press the "Start/Pause" button to begin drying.
  8. At the end of the cycle, a buzzer sounds, and an indicator signals completion. Remove laundry immediately to prevent creases.
  9. Turn off the machine by pressing the "On/Off" button. If not manually switched off, the appliance automatically turns off after about 15 minutes to save energy. Some programs include a "Crease Care" system, rotating the drum periodically to prevent creases.
  10. In case of power failure, press "Start/Pause" to restart the cycle.

Opening the Door During the Cycle

The door can be opened during a drying cycle to check laundry or remove dry garments. After closing the door, press the "Start/Pause" button to resume operation. Keeping the door closed until the cycle ends saves time and energy.

Programs

The dryer offers a variety of programs, with duration depending on load size, textile type, spin speed from the washer, and selected options. For models with a display, remaining time is constantly adjusted.

  • Eco (Max 8 kg, 130 min): Most energy-efficient for normal wet cotton laundry. Defaulted to "Cupboard Dry."
  • Cotton (Max kg, 120 min): For all types of cotton, ready for cupboard storage.
  • Mixed (4 kg, 100 min): Ideal for drying cotton and synthetic fabrics together.
  • Bed linen (Max kg, 170 min): For cotton sheets.
  • Duvet (Max kg, 240 min): For bulky items like single duvets.
  • Shirts (3 kg, 70 min): For cotton or cotton blend/synthetics shirts.
  • Jeans (3 kg, 80 min): For sturdy cotton, including denim trousers and jackets.
  • Easy ironing: Relaxes fibers for easier ironing and folding. Suitable for small loads of damp or dry cotton and cotton blend fabrics.
  • Refresh: Short program (approx. 20 min) using fresh air to refresh fibers and garments. Not for wet items.
  • Rapid 30' (0.5 kg): For cotton garments spun at high speed.
  • Sport (4 kg, 90 min): For synthetics or cotton sports garments.
  • Silk (0.5 kg, 95 min): Gentle drying of silk garments.
  • Wool (1 kg, 100 min): For wool clothes. Turn items inside out.
  • Delicates (2 kg, 45 min): For delicate laundry requiring gentle treatment.
  • Synthetics (4 kg, 90 min): For synthetic fabrics.

Options

These buttons personalize selected programs:

  • Dryness level: Adjusts residual moisture.
    • Iron dry: Very delicate drying, easier to iron.
    • Hanger dry: For delicate garments ready to hang.
    • Cupboard dry: Laundry ready to be folded and put away.
    • Extra dry: For laundry to be worn immediately.
  • Timed drying: Manually sets drying time.
  • Start delay: Delays the start of the cycle.
  • Rapid: Enables quicker drying.
  • FreshCare+: Prevents bacterial proliferation and creasing for up to 6 hours after the cycle ends by controlling temperature and rotating the drum. This setting remains in memory.
  • Key lock: Makes all machine controls inaccessible except "On/Off." Activate/disable by pressing and holding the button. Remains in memory.
  • Cycle end: Activates a prolonged buzzer at the end of the cycle. Remains in memory.

Important Technical Specifications

  • Max Load: 8 kg (Dry load).
  • Power Consumption:
    • Off-mode (Po): 0.50 Watts
    • Left-on mode (Pl): 1.00 Watts
  • Reference Programme (Eco Cotton):
    • 8 kg: 4.74 kWh, 130 minutes
    • 4 kg: 2.59 kWh, 80 minutes
  • Synthetics (4 kg): 1.84 kWh, 90 minutes

Care Label Symbols:

  • May be tumble dried.
  • Do not tumble dry.
  • Tumble dry - high heat.
  • Tumble dry - low heat.

Maintenance Features

Regular maintenance is crucial for optimal performance and longevity.

  • Emptying the water tank (Fig. A): After each cycle, pull out and empty the container into a sink. Do not use the dryer without the container in place.
  • Cleaning the door filter (Fig. B): After each cycle, pull out the filter, remove lint under running water or with a vacuum cleaner. Dry before reinserting. Do not use the dryer without the filter in place.
  • Cleaning the bottom filter (Fig. C): When the indicator turns on, pull out the filter, remove lint, and wash under running water or with a vacuum cleaner. This is also advisable after each cycle.
  • Cleaning the condensing unit (Fig. D): Approximately every 3 months, lower the levers, pull out the condenser, and clean it under running water.

Troubleshooting

The manual provides solutions for common malfunctions:

  • Dryer not turning on: Check plug, power supply, and fuse.
  • Dryer not starting: Check door closure, time delay settings, and "Start/Pause" button. Disable Key Lock if active.
  • Garments wet at cycle completion: Adjust dryness level, check load size, and ensure proper maintenance.
  • Long drying times: Check program suitability, load wetness, and ensure dryer is not overloaded.
  • Program not ending: Restart after power failure.
  • Lights on/flashing: Empty water tank, clean door filter, and bottom filter.
  • DEMO mode: Disable by switching off/on, then pressing "Start/Pause" until buzzer is heard, then switching off/on again.
  • Wrench symbol: Indicates a malfunction. Unplug, open door to dissipate heat, wait an hour, then reconnect and restart. If the problem persists, contact After-sales Service.

For further assistance, users can visit docs.whirlpool.eu, parts-selfservice.whirlpool.com, or contact After-sales Service using the provided codes on the product's identification plate.

Whirlpool FFT CM10 8B UK Specifications

General IconGeneral
BrandWhirlpool
ModelFFT CM10 8B UK
CategoryDryer
LanguageEnglish

Related product manuals