15
C
B
A
D
1. Remove center terminal block screw.
2. Remove neutral ground wire from
external ground conductor screw.
Connect neutral ground wire and the
neutral wire (white or center wire) of
power supply cord under center
terminal block screw. Tighten screw.
I
MPORTANT: A 4-wire connection is
required where local codes do not permit
the use of 3-wire connections.
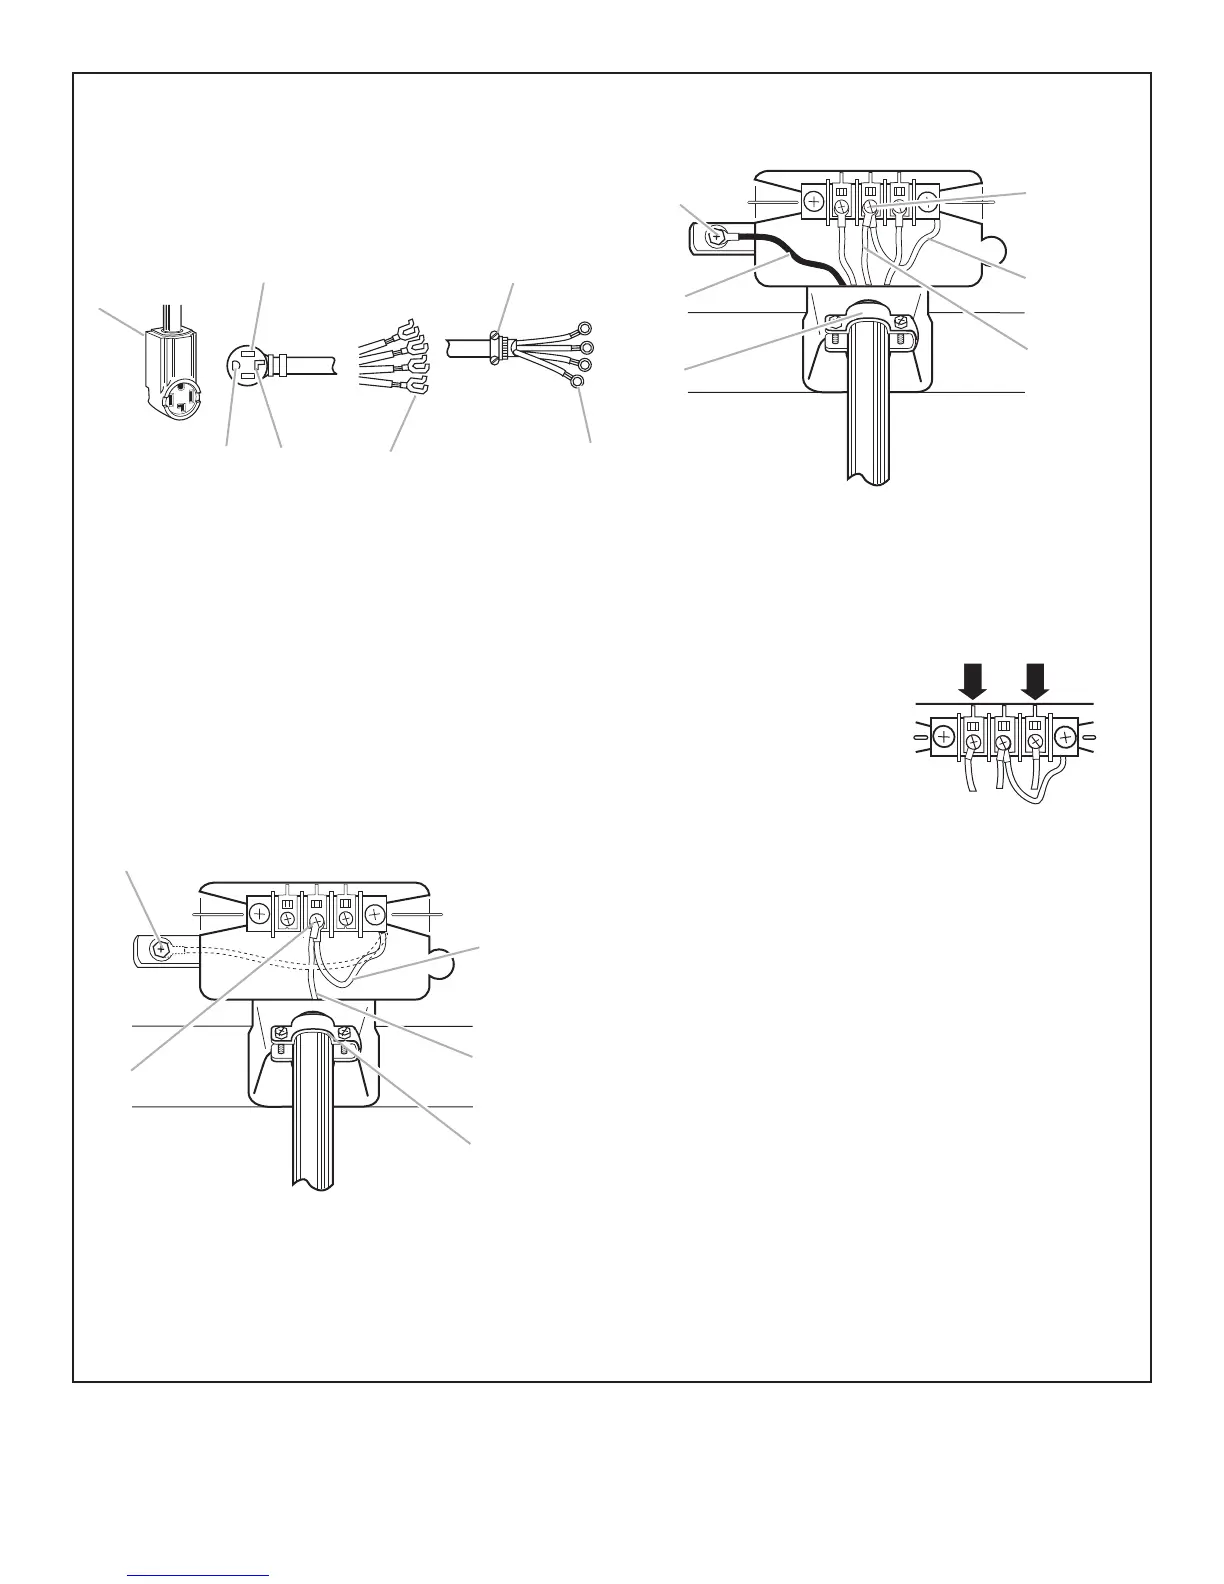
Power supply cord,
4
-wire connection:
A. 4-wire receptacle (NEMA type 14-30R)
B. 4-prong plug
C. Ground prong
D. Neutral prong
E. Spade terminals with upturned ends
F. 3/4
"
(19 mm) UL listed strain relief
G. Ring terminals
A. External ground conductor screw – Dotted line shows position of
NEUTRAL ground wire before being moved to center terminal block screw.
B. Center terminal block screw
C. Neutral ground wire
D. Neutral wire (white or center wire)
E. 3/4
"
(19 mm) UL listed strain relief
A. External ground conductor screw
B. Ground wire (green or bare) of power supply cord
C. 3/4
"
(19 mm) UL listed strain relief
D. Center terminal block screw
E. Neutral ground wire
F. Neutral wire (white or center wire)
3. Connect ground wire (green or bare) of
power supply cord to external ground
conductor screw. Tighten screw.
5. Tighten strain relief screws.
6. Insert tab of terminal block cover into
slot of dryer rear panel. Secure cover
with holddown screw.
7. You have completed your electrical
connection. Now go to “Venting
Requirements.”
4. Connect the other wires to
outer terminal block screws.
Tighten screws.
E
F
G
C
B
A
D
E
F
C
B
A
D
E





 To Next Page