This document provides a comprehensive guide for the use and maintenance of a Whirlpool dishwasher, covering everything from initial setup to troubleshooting.
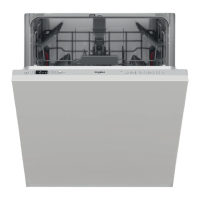
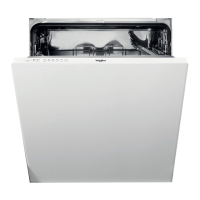
The appliance features an upper rack, foldable flaps, an upper rack height adjuster, upper and lower spray arms, a lower rack, a cutlery basket, a filter assembly, a salt reservoir, detergent and rinse aid dispensers, a rating plate, and a control panel. The control panel includes an ON-OFF/Reset button, a program selection button, indicator lights for salt refill, rinse aid refill, program number, delay time, and tablet use, a display, half load indicator lights, a Half Load button, a Delay button, and a START/Pause button.
Initial Setup and First Time Use
Before first use, it's essential to remove stoppers from the racks and elastic elements from the upper rack. The salt reservoir, located in the lower part of the dishwasher, must be filled to prevent limescale formation. To do this, remove the lower rack, unscrew the reservoir cap, and for the first time, fill the reservoir with water before adding approximately 1 kg of salt using a funnel. Ensure the cap is screwed on tightly to prevent detergent from entering. The salt refill indicator light on the control panel will illuminate when the reservoir needs refilling.
Water hardness must be set to ensure the water softener functions correctly. This involves switching the appliance on and off, holding the program selection button for 5 seconds until a beep is heard, then switching it on again. The current selection level and salt indicator light will flash, allowing you to select the desired hardness level using the program selection button, based on your local water supplier's information. Once set, switch the appliance off. Running a program without loading after this procedure is recommended. Only use salt specifically designed for dishwashers.
The rinse aid dispenser, located on the inner door, should be filled when the rinse aid refill indicator light is lit. Open the dispenser by pressing and pulling up the tab, pour in up to 110 ml of rinse aid, and close the lid until it clicks. If drying results are unsatisfactory, the rinse aid dosage can be adjusted. This involves switching the dishwasher on and off, pressing the program selection button three times until a beep is heard, switching it on again, and then selecting the desired rinse aid quantity level using the program selection button. Setting the rinse aid level to zero will prevent any rinse aid from being supplied. If bluish streaks appear on dishes, reduce the dosage; if water drops or limescale marks are present, increase it.
Detergent is introduced into the dry dispenser by opening the device C. The dispenser D has indications to aid in dosing. After adding detergent, remove any residues from the edges and close the cover until it clicks. The dispenser opens automatically during the program. For all-in-one detergents, the TABLET button should be used, which optimizes the program for best washing and drying. Using detergents not designed for dishwashers can cause malfunctions.
Loading the Racks
The upper rack is designed for delicate and light dishes like glasses, cups, saucers, and low salad bowls. The height of the upper rack can be adjusted to accommodate bulky crockery in the lower basket or to maximize space for taller items. This is done using the Upper Rack height adjuster: lift the rack by holding its sides to raise it, and press levers A on the sides to lower it. It is strongly recommended not to adjust the rack height when loaded.
The lower rack is suitable for pots, lids, plates, and salad bowls. Large plates and lids should be placed at the sides to avoid interfering with the spray arm. The cutlery basket, equipped with top grilles, should be positioned at the front of the lower rack. Knives and sharp utensils must be placed with points facing downwards or horizontally in the tip-up compartments of the upper rack.
Foldable flaps with adjustable positions on the upper rack can be folded or unfolded to optimize crockery arrangement. Wine glasses can be safely placed by inserting their stems into the corresponding slots. Depending on the model, flaps can be slid up and rotated or released from snaps to unfold, or rotated and slid down or pulled up to attach to snaps for folding.
Daily Use
To operate the dishwasher:
- Check Water Connection: Ensure the dishwasher is connected to the water supply and the tap is open.
- Switch On: Open the door and press the ON/OFF button.
- Load Racks: Arrange crockery as described in the loading section.
- Fill Detergent Dispenser: Add the appropriate amount of detergent.
- Choose Program and Customise Cycle: Select a program based on crockery type and soiling level using the program selection button, and choose any desired options.
- Start: Press the START/Pause button and close the door within 4 seconds. A single beep confirms the program start. If the door is not closed in time, an alarm sounds, requiring you to reopen the door, press START/Pause, and close it again.
- End of Wash Cycle: Beeps and the flashing program number on the display indicate the cycle's end. Open the door and press the ON/OFF button to switch off. Wait a few minutes before unloading to avoid burns, starting with the lower rack.
The machine automatically switches off after extended periods of inactivity to save electricity. If crockery is lightly soiled or pre-rinsed, reduce the detergent amount.
Modifying a Running Program: If a wrong program was selected, it can be changed if it has just begun. Open the door, press and hold the ON/OFF button to switch off the machine. Switch it back on, select the new program and options, then press START/Pause and close the door within 4 seconds.
Adding Extra Crockery: Without switching off the machine, open the door (START/Pause LED blinks, beware of hot steam), place crockery inside, press START/Pause, and close the door within 4 seconds. The cycle will resume from where it was interrupted.
Accidental Interruptions: If the door is opened or there is a power cut during the wash cycle, the cycle stops. Press START/Pause and close the door within 4 seconds to resume the cycle.
Advice and Tips
Before loading, remove all food residues and empty glasses; pre-rinsing under running water is not necessary. Arrange crockery firmly to prevent tipping, with openings facing downwards for proper water circulation. Ensure spray arms can rotate freely. Place small items in the cutlery basket. Heavily soiled dishes and pans should be in the lower basket for stronger water sprays.
Unsuitable Crockery: Avoid wooden items, delicate decorated glasses, artistic handicraft, antique crockery, synthetic materials that cannot withstand high temperatures, copper, tin, and crockery soiled with ash, wax, grease, or ink. Glass decorations and aluminum/silver pieces may change color over time.
Damage to Glass and Crockery: Use only dishwasher-safe glasses and porcelain. Use a delicate detergent. Collect glasses and cutlery promptly after the cycle.
Energy Saving Tips: Washing tableware in a dishwasher generally consumes less energy and water than hand washing. Maximize efficiency by running the dishwasher when fully loaded. Using dedicated wash options for partial loads (Half Load/Zone Wash, Multizone) can save resources. Incorrect loading or overloading increases resource usage and noise. Manual pre-rinsing is not recommended.
Hygiene: To prevent odors and sediment, run a high-temperature program at least once a month with a teaspoon of detergent and no loading.
Care and Maintenance
Cleaning the Filter Assembly: Regularly clean the filter assembly to prevent clogging and ensure proper wastewater flow. Clogged filters or foreign objects can cause malfunctions, poor performance, and increased resource usage. The assembly consists of three filters: cylindrical filter A, cup filter B, and stainless-steel plate filter C. The dishwasher must not be used without filters or if they are loose.
At least monthly or every 30 cycles, check and clean the filters under running water with a non-metallic brush:
- Turn cylindrical filter A anti-clockwise and pull it out.
- Remove cup filter B by pressing its side flaps.
- Slide out stainless-steel plate filter C.
- Remove any foreign objects carefully.
- Inspect the trap and remove food residues. Do not remove the wash-cycle pump protection.
After cleaning, replace the filter assembly correctly to maintain efficient operation.
Cleaning the Spray Arms: Food residue can encrust and block the holes of the spray arms. Check and clean them periodically with a small non-metallic brush. To remove the upper spray arm, turn the plastic locking ring clockwise. The side with more holes should face upwards when replaced. The lower spray arm can be removed by pulling it upwards.
Water Softening System: This system automatically reduces water hardness and regenerates itself with salt. Refill the salt container when empty. Regeneration frequency depends on water hardness level (e.g., once per 6 Eco cycles for hardness level 3). Regeneration consumes about 3.5L of water, takes up to 5 additional minutes, and uses less than 0.005kWh of energy.
Cleaning the Water Inlet Hose: If water hoses are new or unused for an extended period, let the water run to ensure it is clear and free of impurities before connecting to prevent blockages and damage to the dishwasher.
Troubleshooting
The manual provides a list of common problems, possible causes, and solutions. For example, if the salt or rinse aid indicator is lit, the respective reservoirs need refilling. If the dishwasher won't start, check the power plug, door closure, and ensure no power outage. If the dishwasher won't drain, check for bent drain hoses, blocked sink drain pipes, or clogged filters. Excessive noise or unclean dishes can be due to improper crockery arrangement, blocked spray arms, or incorrect detergent dosage. If the dishwasher doesn't fill with water, check the water supply, inlet hose, and sieve. Premature cycle finishes might indicate a low drain hose position or siphoning. For other issues, contact authorized After-sales Service.