9
Find the Wall Stud(s)
NOTE: If no wall studs exist within the cabinet opening, do not install the microwave oven.
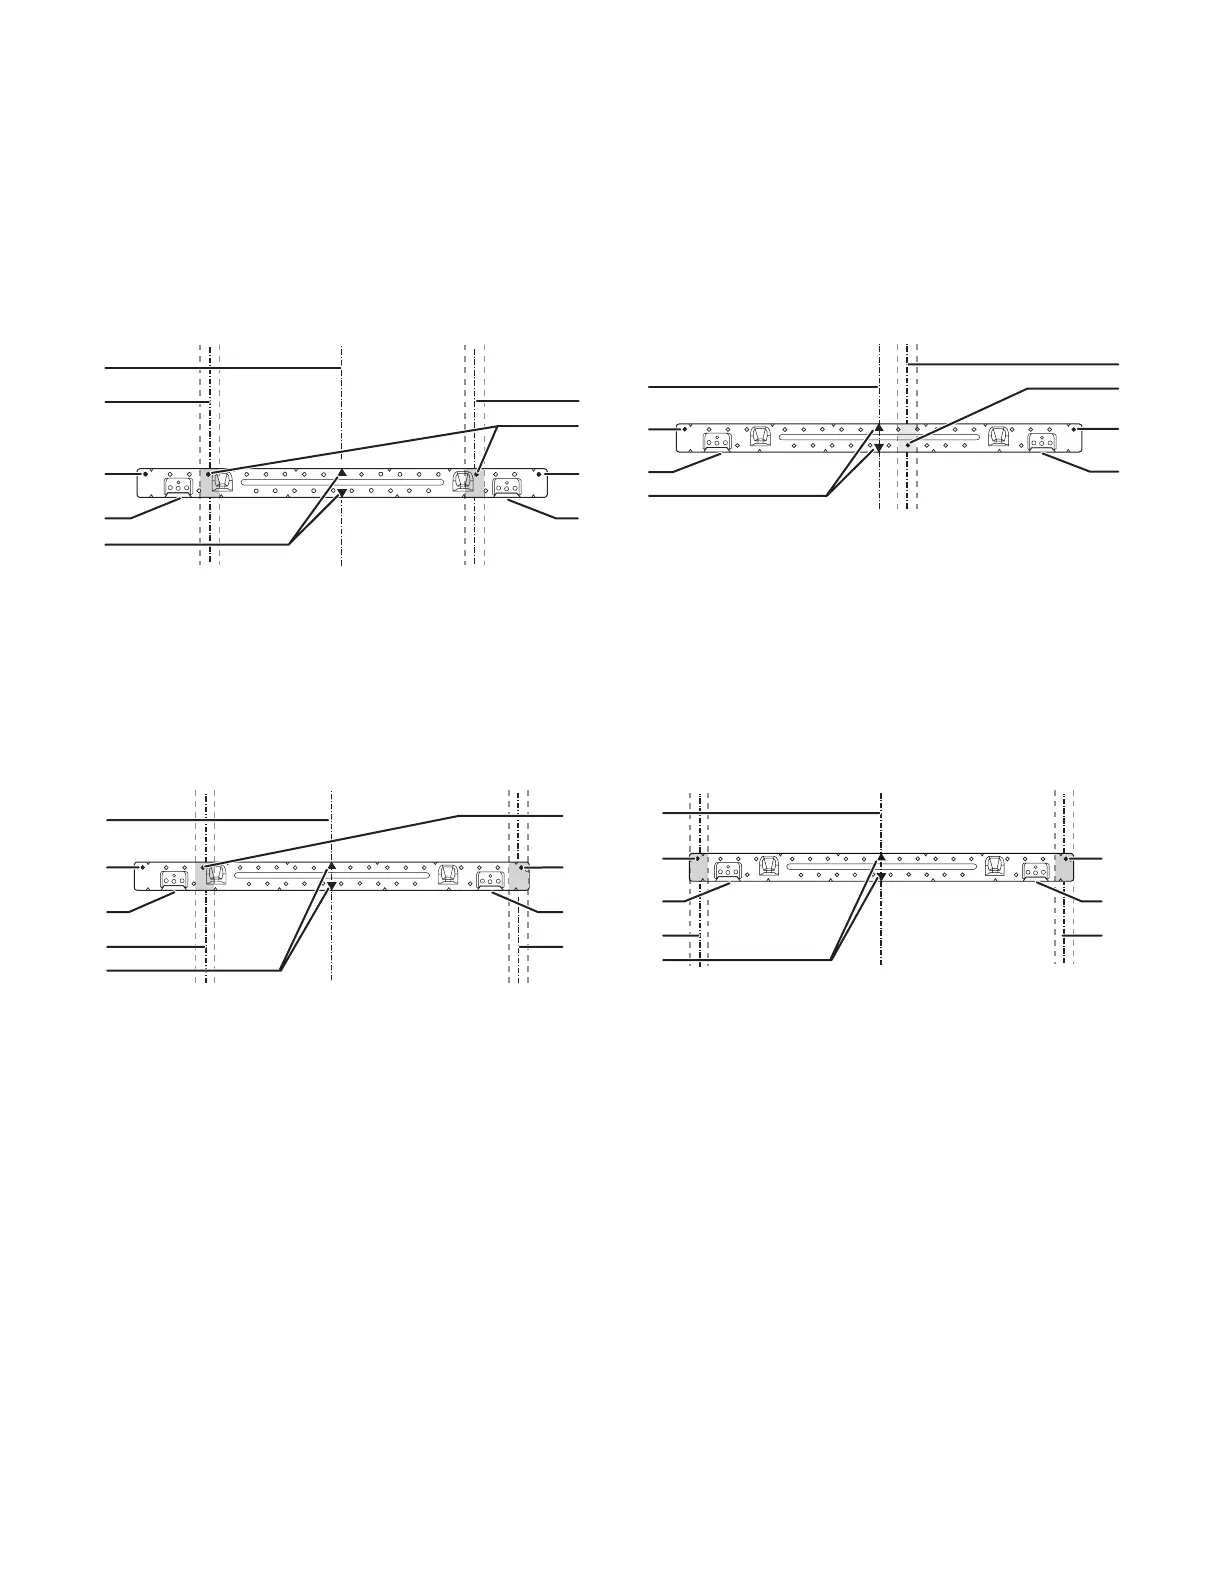
See illustrations in “Possible Wall Stud Configurations.”
1. Using a stud finder, locate the edges of the wall stud(s) within the opening.
2. Mark the center of each stud, and draw a plumb line down each stud center. See illustrations in “Possible Wall Stud Configurations.”
Possible Wall Stud Configurations
These depictions show examples of preferred installation configurations with the mounting plate.
No Wall Studs at End Holes
Figure 1
A. End holes (on mounting
plate)
B. Cabinet opening vertical
centerline
C. Wall stud centerlines 30"
(76.2 cm) minimum
D. Holes for lag screws
E. Support tabs
F. Mounting plate center
markers
No Wall Studs at End Holes
Figure 2
NOTE: If wall stud is within 6" (15.2 cm) of the vertical centerline
(see the “Mark Rear Wall” section), only recirculation or roof
venting installation can be done.
A. End holes (on mounting
plate)
B. Cabinet opening vertical
centerline
C. Wall stud centerlines
D. Holes for lag screws
E. Support tabs
F. Mounting plate center
markers
Wall Stud at End Holes
Figure 3
A. End holes (on mounting
plate)
B. Cabinet opening vertical
centerline
C. Wall stud centerlines
D. Holes for lag screws
E. Support tabs
F. Mounting plate center
markers
Wall Stud at End Holes
Figure 4
A. End holes (on mounting
plate)
B. Cabinet opening vertical
centerline
C. Wall stud centerlines Holes
for lag screws
D. Holes for lag screws
E. Support tabs
F. Mounting plate center
markers




 To Next Page