EasyManua.ls Logo

Whirlpool YWET4024EW - User Manual

Whirlpool YWET4024EW
88 pages
Print Icon
To Next Page IconTo Next Page
Loading...
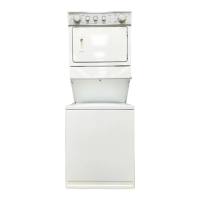
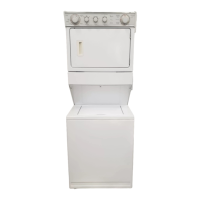
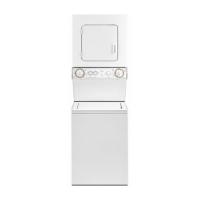
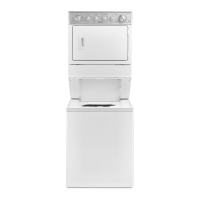
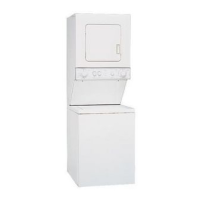
24" (61 cm) & 27" (69 cm) Electric Washer/Dryer
Installation Instructions
Instructions pour l’installation de la laveuse/sécheuse
électrique de 24" (61 cm) et 27" (69 cm)
Instrucciones de instalación de la lavadora/secadora
eléctrica de 24" (61 cm) y 27" (69 cm)
Table of Contents Table des matières
WASHER/DRYER SAFETY ..........................................................2
INSTALLATION REQUIREMENTS ............................................... 4
Tools and Parts .....................................................................4
LOCATION REQUIREMENTS ...................................................... 6
DIMENSIONS/CLEARANCES ..................................................... 7
DRAIN SYSTEM ........................................................................... 9
ELECTRICAL REQUIREMENTS – U.S.A...................................10
ELECTRICAL REQUIREMENTS – CANADA ............................. 11
REMOVE SHIPPING STRAP ...................................................... 12
INSTALL LEVELING LEGS ......................................................... 13
REMOVE FOAM PACKING (24" models) .................................. 13
ELECTRICAL CONNECTION (U.S.A. ONLY) ............................14
VENTING ..................................................................................... 26
Venting Requirements ........................................................26
Plan Vent System ................................................................27
Install Vent System .............................................................28
CONNECT DRAIN HOSE ........................................................... 29
CONNECT INLET HOSES .......................................................... 30
CONNECT VENT ........................................................................ 31
LEVEL WASHER/DRYER ...........................................................32
COMPLETE INSTALLATION CHECKLIST ................................ 33
W10843728A
INSTALLATION NOTES
Date of purchase: _________________________________________
Date of installation: _______________________________________
Installer: _________________________________________________
Model number: ___________________________________________
Serial number: ____________________________________________
Date d’achat : ____________________________________________
Date d’installation : _______________________________________
Installateur : ______________________________________________
Numéro de modèle : ______________________________________
Numéro de série : _________________________________________
NOTES CONCERNANT L’INSTALLATION
SÉCURITÉ DE LA LAVEUSE/SÉCHEUSE ................................ 34
EXIGENCES D’INSTALLATION ................................................. 36
Outillage et pièces ............................................................. 36
EXIGENCES D’EMPLACEMENT .............................................. 38
DIMENSIONS/DISTANCES DE DÉGAGEMENT ....................... 39
SYSTÈME DE VIDANGE ............................................................ 41
SPÉCIFICATIONS ÉLECTRIQUES – CANADA ......................... 42
ENLEVER LA SANGLE D’EXPÉDITION .................................... 43
INSTALLATION DES PIEDS DE NIVELLEMENT ...................... 44
ENLEVER L’EMBALLAGE EN MOUSSE (modèles de 24") ..... 44
ÉVACUATION ............................................................................. 45
Exigences concernant l’évacuation ................................. 45
Planication du système d’évacuation ............................ 46
Installation du conduit d’évacuation ................................ 47
RACCORDEMENT DU TUYAU DE VIDANGE ........................... 48
RACCORDEMENT DES TUYAUX D’ARRIVÉE D’EAU ............. 49
RACCORDEMENT DU CONDUIT D’ÉVACUATION ................. 50
ÉTABLISSEMENT DE L’APLOMB DE
LA LAVEUSE/SÉCHEUSE .......................................................... 51
LISTE DE VÉRIFICATION POUR L’ACHÈVEMENT
DE L’INSTALLATION .................................................................. 52
Índice
SEGURIDAD DE LA LAVADORA/SECADORA ......................... 54
REQUISITOS DE INSTALACIÓN ............................................... 56
Herramientas y piezas ....................................................... 56
REQUISITOS DE UBICACIÓN ................................................... 58
DIMENSIONES Y ESPACIOS LIBRES....................................... 59
SISTEMA DE DESAGÜE ............................................................ 61
REQUISITOS ELÉCTRICOS ...................................................... 62
QUITE EL FLEJE DE EMBALAJE .............................................. 64
INSTALACIÓN DE LAS PATAS NIVELADORAS........................65
QUITE EL EMBALAJE DE HULE
ESPUMA (modelos de 24") ....................................................... 65
CONEXIÓN ELÉCTRICA ............................................................ 66
VENTILACIÓN ............................................................................ 78
Requisitos de ventilación .................................................. 78
Planicación del sistema de ventilación .......................... 79
Instalación del sistema de ventilación ............................. 80
CONECTE LA MANGUERA DE DESAGÜE ............................... 81
CONECTE LAS MANGUERAS DE ENTRADA .......................... 82
CONECTE EL DUCTO DE ESCAPE .......................................... 83
NIVELACIÓN DE LA LAVADORA/SECADORA ......................... 84
LISTA DE CONTROL PARA LA REALIZACIÓN
DE LA INSTALACIÓN ................................................................. 85
NOTAS DE INSTALACIÓN
Fecha de la compra: ______________________________________
Fecha de la instalación: ___________________________________
Instalador: _______________________________________________
Número de modelo: _______________________________________
Número de serie: _________________________________________

Table of Contents

Questions and Answers

  • D
    Dana GonzalesAug 17, 2025
    Why is my Whirlpool YWET4024EW not draining/spinning, and the loads are still wet?
    • A
      Andrew WilliamsAug 17, 2025
      If your Whirlpool Washer/Dryer isn't draining or spinning, and clothes are still wet, start by checking for obstructions. Small items might be caught in the pump or between the basket and tub; empty pockets and use garment bags for small items. Also, the selected cycle might have a low spin speed, so choose a cycle with a higher spin speed suitable for your load. An unevenly distributed load can also cause this issue, so rearrange the load to ensure even distribution. Inspect the drain hose for correct installation, ensuring it’s properly attached and not taped over. Lastly, too much detergent can cause excessive suds, hindering draining and spinning; run a Rinse and Spin cycle without adding more detergent to remove extra suds.
  • M
    Melissa BartonAug 19, 2025
    Why is my load not rinsed in Whirlpool Washer/Dryer?
    • B
      Benjamin RogersAug 20, 2025
      If loads in your Whirlpool Washer/Dryer are not rinsed properly, ensure a proper water supply by checking that the hot and cold inlet hoses are not reversed. Also, using too much detergent can leave residue, so always measure detergent and follow directions based on load size and soil level. Finally, ensure the washer is loaded as recommended by loading garments in loose heaps evenly around the basket wall.
  • L
    Lynn WilsonAug 22, 2025
    What to do if my Whirlpool YWET4024EW won’t run or stops working?
    • J
      jennifer69Aug 23, 2025
      To ensure your Whirlpool Washer/Dryer runs properly, plug it into a grounded outlet or reconnect the power supply. Avoid using extension cords. Check that the outlet has power. If the issue persists, reset any tripped circuit breakers or replace blown fuses; if problems continue, consult an electrician. Make sure the door is fully closed. The washer pauses during certain cycles, so avoid interrupting it. If the load is unbalanced, remove some items, rearrange the load evenly, and add detergent before restarting. Limit adding extra items after the cycle starts.
  • J
    Joel CarpenterAug 26, 2025
    Why is my Whirlpool YWET4024EW not cleaning or removing stains?
    • M
      matthew32Aug 26, 2025
      If your Whirlpool Washer/Dryer isn't cleaning or removing stains effectively, consider the following: Using too much detergent can prevent the washer from operating correctly, so always measure detergent according to the manufacturer's directions based on load size and soil level. Ensure you're using the correct cycle for the fabric type; a higher soil level cycle option and warmer wash temperature can improve cleaning. If your model has dispensers, use them to avoid stains from chlorine bleach and fabric softener. Lastly, wash like colors together and promptly remove clothes after the cycle to prevent dye transfer.
  • E
    Elizabeth WashingtonAug 28, 2025
    Why are there dry spots on the load after Whirlpool YWET4024EW Washer/Dryer cycle?
    • J
      Justin LongAug 28, 2025
      If you notice dry spots on your load after a cycle in your Whirlpool Washer/Dryer, it's because this washer uses less water than traditional top-load washers. You can wash a smaller load, or select the Deep Water Wash option. High spin speeds extract more moisture and, combined with air flow, can cause dry spots on items near the top of the load. This is normal.
  • G
    gardnercharleneAug 31, 2025
    Why are the wash or rinse temperatures incorrect in my Whirlpool YWET4024EW Washer/Dryer?
    • S
      Sharon KnightAug 31, 2025
      If your Whirlpool Washer/Dryer displays incorrect wash or rinse temperatures, first verify that the hot and cold inlet hoses are not reversed to ensure a proper water supply. Check that the inlet valve screens are not clogged and remove any kinks in the hoses. Also, be aware that this washer uses cooler wash and rinse water temperatures than older models as part of energy-saving measures, including cooler hot and warm washes.
  • P
    patrick18Sep 2, 2025
    Why is there sand, pet hair, lint, etc. on the load after washing in my Whirlpool YWET4024EW Washer/Dryer?
    • K
      Kelly SchneiderSep 2, 2025
      If you find sand, pet hair, or lint on your load after washing in your Whirlpool Washer/Dryer, it may be due to heavy residues requiring additional rinsing. Try increasing the soil level setting to improve rinsing.
  • J
    John ReynoldsSep 5, 2025
    Why does the water level seem too low in my Whirlpool YWET4024EW Washer/Dryer?
    • C
      Christine DonaldsonSep 5, 2025
      If the water level in your Whirlpool Washer/Dryer seems too low, or the washer appears to not fill completely, it is normal. The top of the agitator is much higher than the highest water level; this is necessary for clothes to move freely.
  • D
    Dana MartinezSep 8, 2025
    Why are clothes not completely covered with water in my Whirlpool Washer/Dryer?
    • M
      Michele StewartSep 8, 2025
      If clothes are not completely covered with water in your Whirlpool Washer/Dryer, it's because this washer uses much less water than traditional top-load washers, which is normal.
  • J
    Jenny WilsonSep 12, 2025
    Why is my load tangling in my Whirlpool YWET4024EW?
    • W
      William MartinezSep 12, 2025
      If your laundry load is tangling in your Whirlpool Washer/Dryer, it may not have been loaded as recommended; refer to the 'Using Your Washer' section for guidance. Alternatively, select a cycle with a slower wash action and spin speed, but be aware that items will be wetter compared to using a higher speed spin.

Whirlpool YWET4024EW Specifications

General IconGeneral
BrandWhirlpool
ModelYWET4024EW
TypeWasher/Dryer Combo
ColorWhite
Energy Star CertifiedYes
Maximum Spin Speed1200 RPM
Voltage120V

Related product manuals