EasyManua.ls Logo

White R-86 - Drive Belt Removal and Replacement

White R-86
32 pages
Print Icon
To Next Page IconTo Next Page
To Previous Page IconTo Previous Page
Loading...
When
installing
a
tire
to
the
rim,
be
certain
rim
is
clean
and
free
of
rust.
Lubricate
both
the
tire
and
rim
generously.
Never
inflate
to
over
30
p.s.i.
to
seat
beads.
WARNING:
Excessive
pressure
(over
30
p.s.i.)
when
seating
beads
may
cause
tire/rim
assembly
to
burst
with
force
suffi*
cient
to
cause
serious
injury.
DRIVE
BELT
REMOVAL
AND
REPLACEMENT
NOTE:
It
is
recommended
that
the
entire
instructions
on
belt
removal
and
replacement
be
read
before
chang-
ing
the
belts.
1.
Disconnect
the
spark
plug
wire
and
ground
it
against
the
engine.
2.
Remove
the
deck
as
described
in
the
separate
deck
manual.
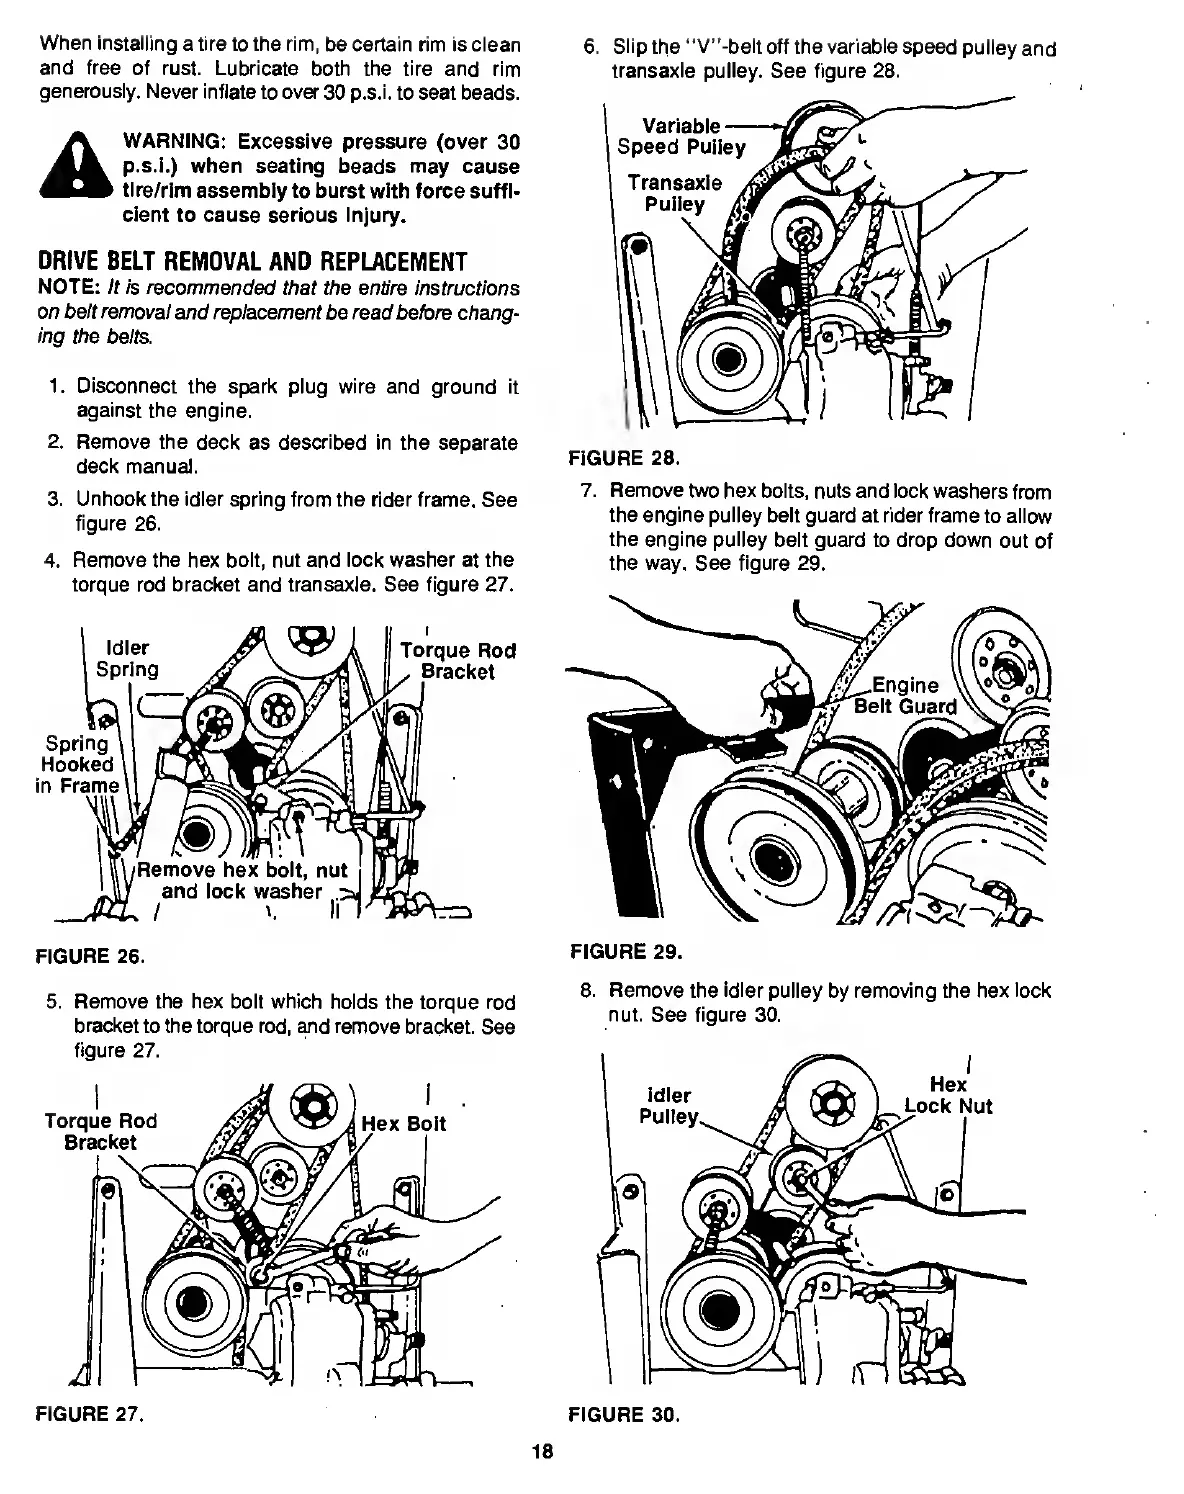
3.
Unhook
the
idler
spring
from
the
rider
frame.
See
figure
26.
4.
Remove
the
hex
bolt,
nut
and
lock
washer
at
the
torque
rod
bracket
and
transaxle.
See
figure
27.
FIGURE
26.
6.
S
lip
the
‘'V”-belt
off
the
variable
speed
pulley
and
transaxle
pulley.
See
figure
28.
FIGURE
28.
7.
R
emove
two
hex
bolts,
nuts
and
lock
washers
from
the
engine
pulley
belt
guard
at
rider
frame
to
allow
the
engine
pulley
belt
guard
to
drop
down
out
of
the
way.
See
figure
29.
FIGURE
29.
5.
R
emove
the
hex
bolt
which
holds
the
torque
rod
bracket
to
the
torque
rod,
and
remove
bracket.
See
figure
27.
8.
R
emove
the
idler
pulley
by
removing
the
hex
lock
nut.
See
figure
30.
18