CREATING AND
DETECTING A BURR
When you’re rst sharpening a blade, successfully drawing a burr from
each side of the knife is the most important step. It is very dicult to
know for certain without the presence of a burr if the bevels on each
side of the blade actually extend to the edge. If the bevels do not
extend all the way to the edge, the edge of the knife will be blunt and
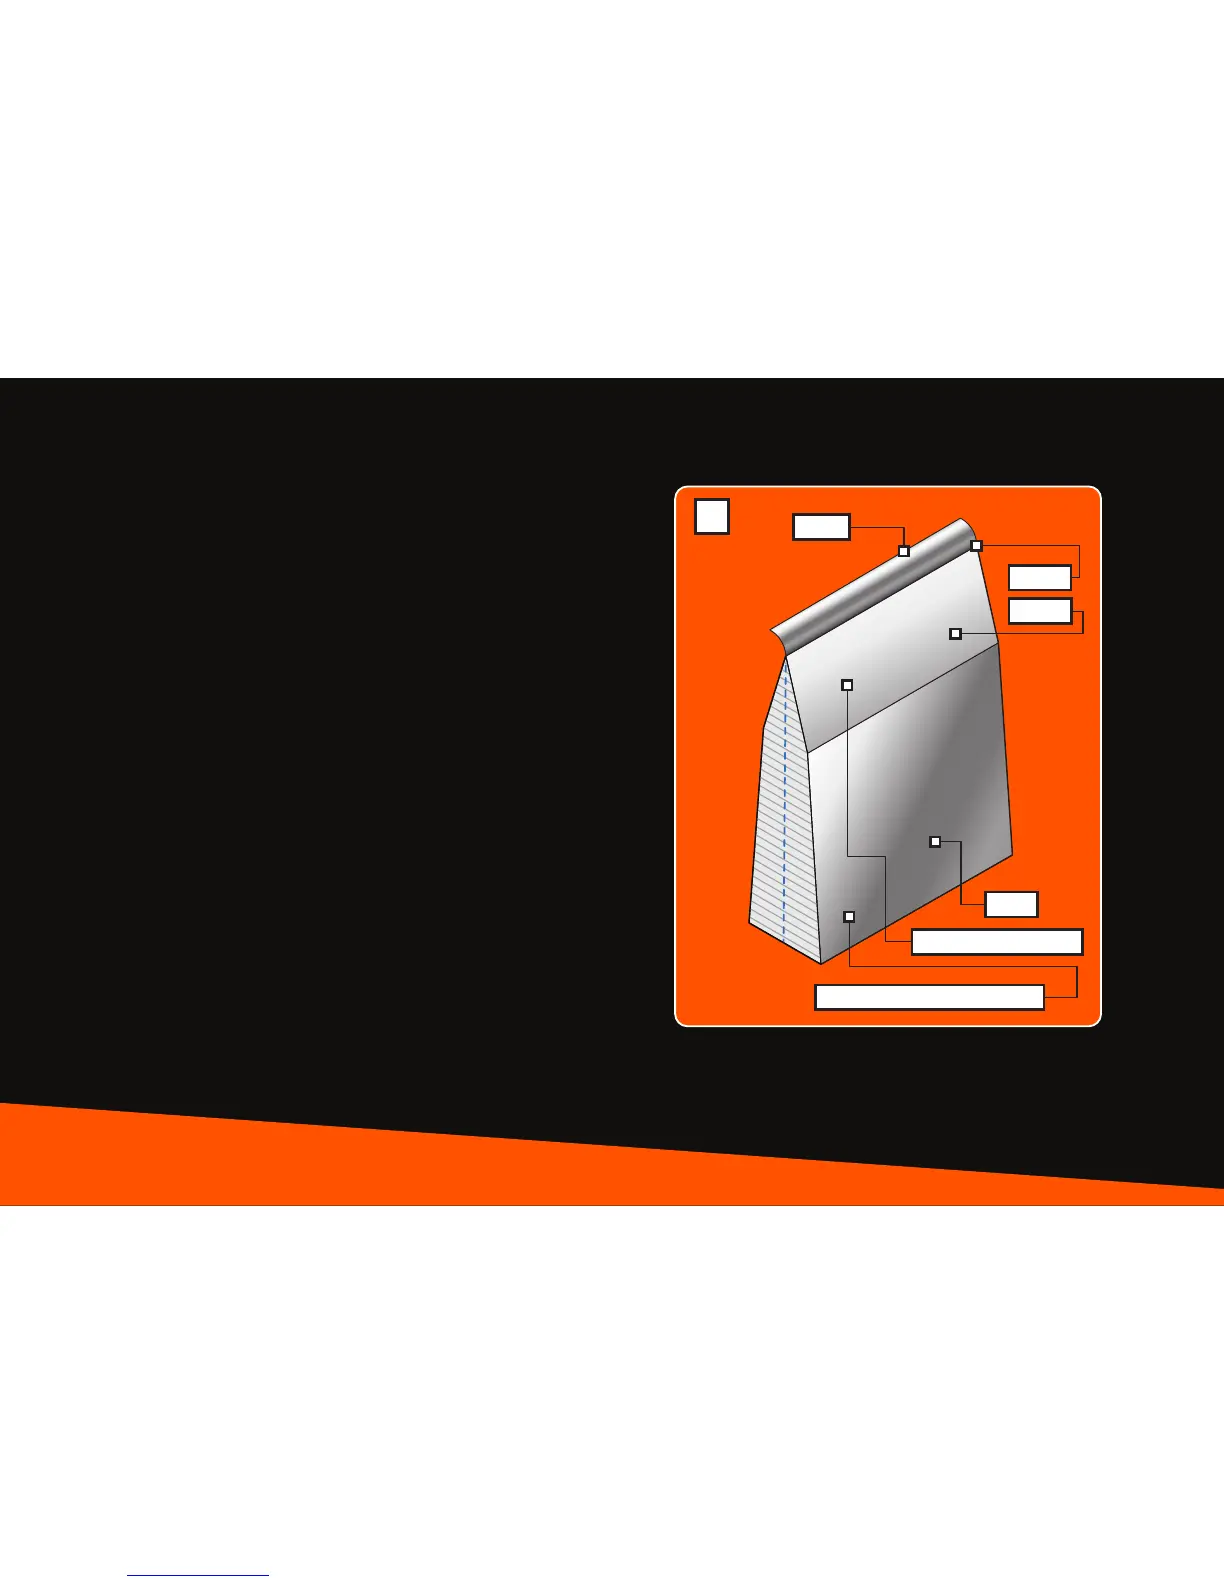
the knife will not be sharp. A burr, also called a wire edge, is created as
a result of sharpening metal. The burr forms on the edge of a knife
where the planes of bevels intersect. The diagram to the right shows
the burr projecting from the edge of the knife:
Once all the marker has been removed from the blade, try to create a
burr on one side of the knife by sharpening the opposite side only. Do
approximately 10 strokes on one side of your knife only and then check
the opposite side for a burr. You can do this by very carefully feeling
the side of the blade by rubbing your ngernail or a cotton ball up the
opposite side of the knife, from the spine toward the edge. If you feel it
snag on the edge, the burr has been properly formed. Make sure the
burr exists throughout the entire length of the knife. Dierent areas of
the knife may require more strokes to successfully form a burr. Do as
many strokes as necessary to detect a burr along the entire edge. Once
you’ve successfully created and detected a burr on one side of the
knife, repeat the procedure for the other side.
1.1
Face
Blade Detail - (Not to Scale)
Edge
Bevel
Burr
Side Just Sharpened
Fig. 10
16 • wickededgeusa.com • creating and detecting a burr