Your Curtis ADS System is Factory Pre‑Set for Optimum Performance.
After connection to water and power; the rear toggle switch must be on. You will hear a beep sound, indicating power is available to the controller.
The control displays . Press ON/OFF button and the screen will display . After three seconds, is displayed.
Water will ll the tank (approximately 2-3 minutes depending on water ow rate). When the proper level is reached will appear on the screen.
It takes approximately 20 minutes to reach setpoint temperature of 200°F.
Control will display when temperature reaches the setpoint (200°F); unit is at brewing temperature.
THERMO-PRO
WILBUR CURTIS
WILBUR CURTIS
WILBUR CURTIS
FILLING . . .
WILBUR CURTIS
HEATING . . .
WILBUR CURTIS
READY TO BREW
ThermoPro
Temporary label covers front
UCM control module. Select
batch brew before using
brewer.
32
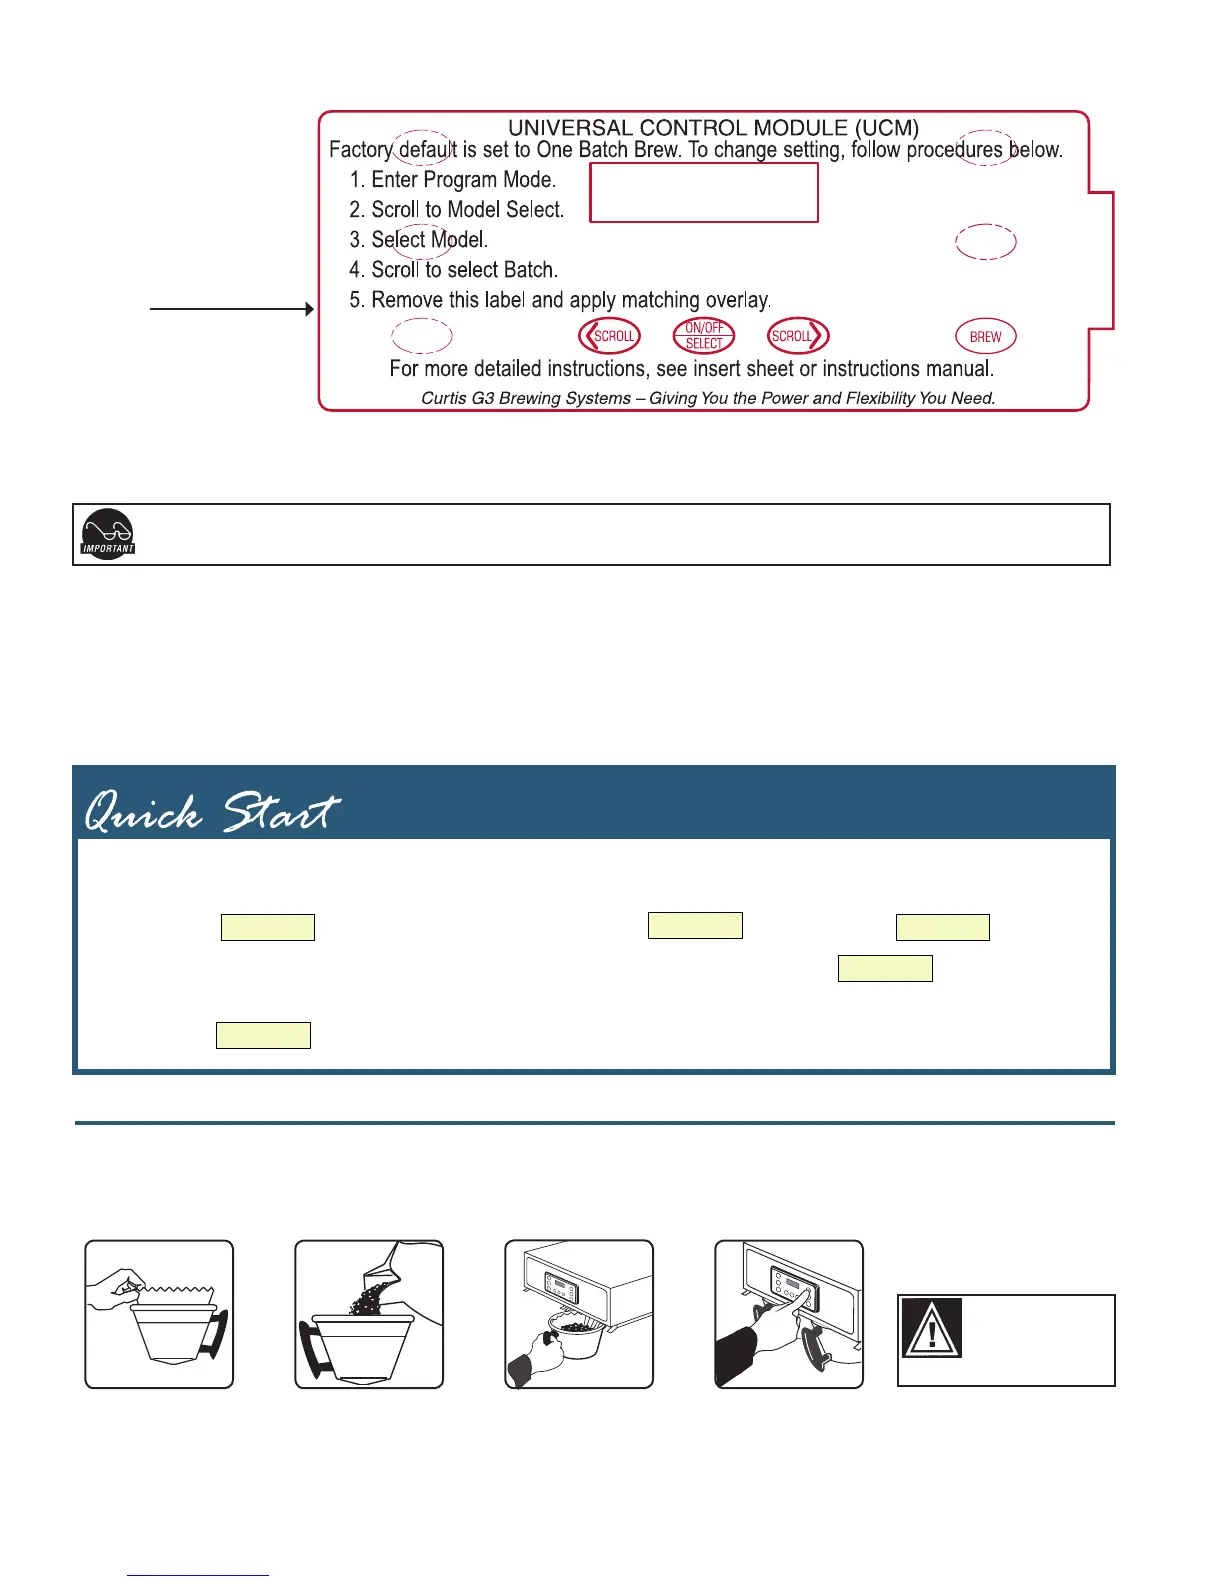
BREWING INSTRUCTIONS
1. Brewer should be ON (Conrm at rear toggle switch, then press the ON/OFF button). Ready-to-Brew should be ON. If connected to an InterLock grinder;
grinder should be on.
2. Place an empty ThermoPro server under the brewcone.
6. Press Brew button.
Brewing will begin
immediately.
5. Transfer lled
brewcone to
brewer.
3. Place a clean lter
into the brewcone.
4. Fill brewcone with
ground coffee. If
Interlocked, ll
from grinder.
WARNING TO AVOID
SCALDING, Do not
remove brewcone while
brewlightisashing.
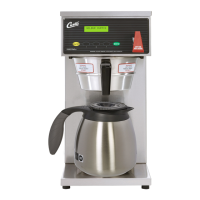
6. This step requires some preliminary program setting prior to brewing. You will notice that the control module (UCM) is covered with a thin white label (see
illustration, above). This label is a temporary covering. It contains important batch selection instructions. Decide how many brew selections you require and
follow the instructions to change the Batch Brew setting (the default is one batch).
The only way the InterLock coffee grinding system will work is with the 3-batch Model setting. If your brewer will be working with the InterLock
system, you should always select the three batch setting while programming the brewer.
7. Apply the UCM control panel label. Packaged with the brewer are three labels (one batch, two batch & three batch) with brew buttons labeled LARGE,
MEDIUM and SMALL. Take the label that corresponds to the brew batch you have selected and adhere this to the face of the UCM.
8. Prior to brewing, dispense 12 ounces of hot water through the hot water faucet.
9. Brew a cycle of at least 12 ounces, to purge the water lines of any air that may be trapped after lling.
10. The ThermoPro brewer is now ready for operation.
Setup Steps, Continued
 Loading...