© by WilTec Wildanger Technik GmbH Item 52170 Page 10
http://www.WilTec.de
http://www.aoyue.eu 05 2021-1
http://www.teichtip.de
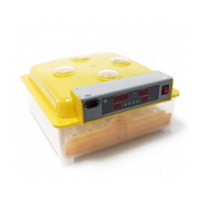
Operating surface
1. Setting switch
2. Button increase/ function selection button
3. Taste decrease/ function selection button
4. Reset
5. Temperature display
6. Air humidity display
7. Countdown/ display of breeding days
8. Heat control lamp
9. Setting lamp
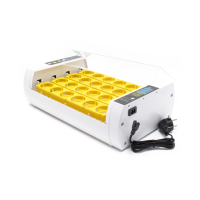
10. Water refill opening
Setting the control
When testing the incubator for the first time:
1. Connect the plug of the incubator with the control plug.
2. Connect the electricity supply cable included in the delivery to the electricity source.
3. Switch the electricity source on.
4. Switch the incubator on.
5. An alarm will sound, due to low temperature/ humidity. This is normal.
6. Press a random button to turn the alarm off.
7. Let the incubator run and fill the water channels. You will notice that the humidity will increase.
8. Push the reset button, to check the automatic turning mechanism. This will begin every two
hours and takes 10 s.
Adjusting the Temperature
1. Push the settings button.
2. Push the “+” or “–” button, to adjust the desired temperature.
3. Push the settings button again to end the adjustments.
The incubator is pre-set to 38 ℃. If the chicks already hatch on day 19 or 20, this means the tempera-
ture is set too high. Use the process as described above. A temperature adjustment of 37.6 ℃ is rec-
ommended.
 Loading...