10
www.windcrestcnp.com
© Wind Crest CNP Industries, Inc.
Installation – Installing the Insert
1. If converting UIX2916S from single internal blower to dual internal
blower make sure the conversion is done before installing insert.
Refer to page 11 for instructions
2. Install 8” round adapter to top of UIX2916S or 10” adapter on top of
UIX3816S. See page 12, step 8 for instuctions.
3. Install optional UL29xxS or UL38xxS Stainless Steel Liner. Review
manual included with liner for more details.
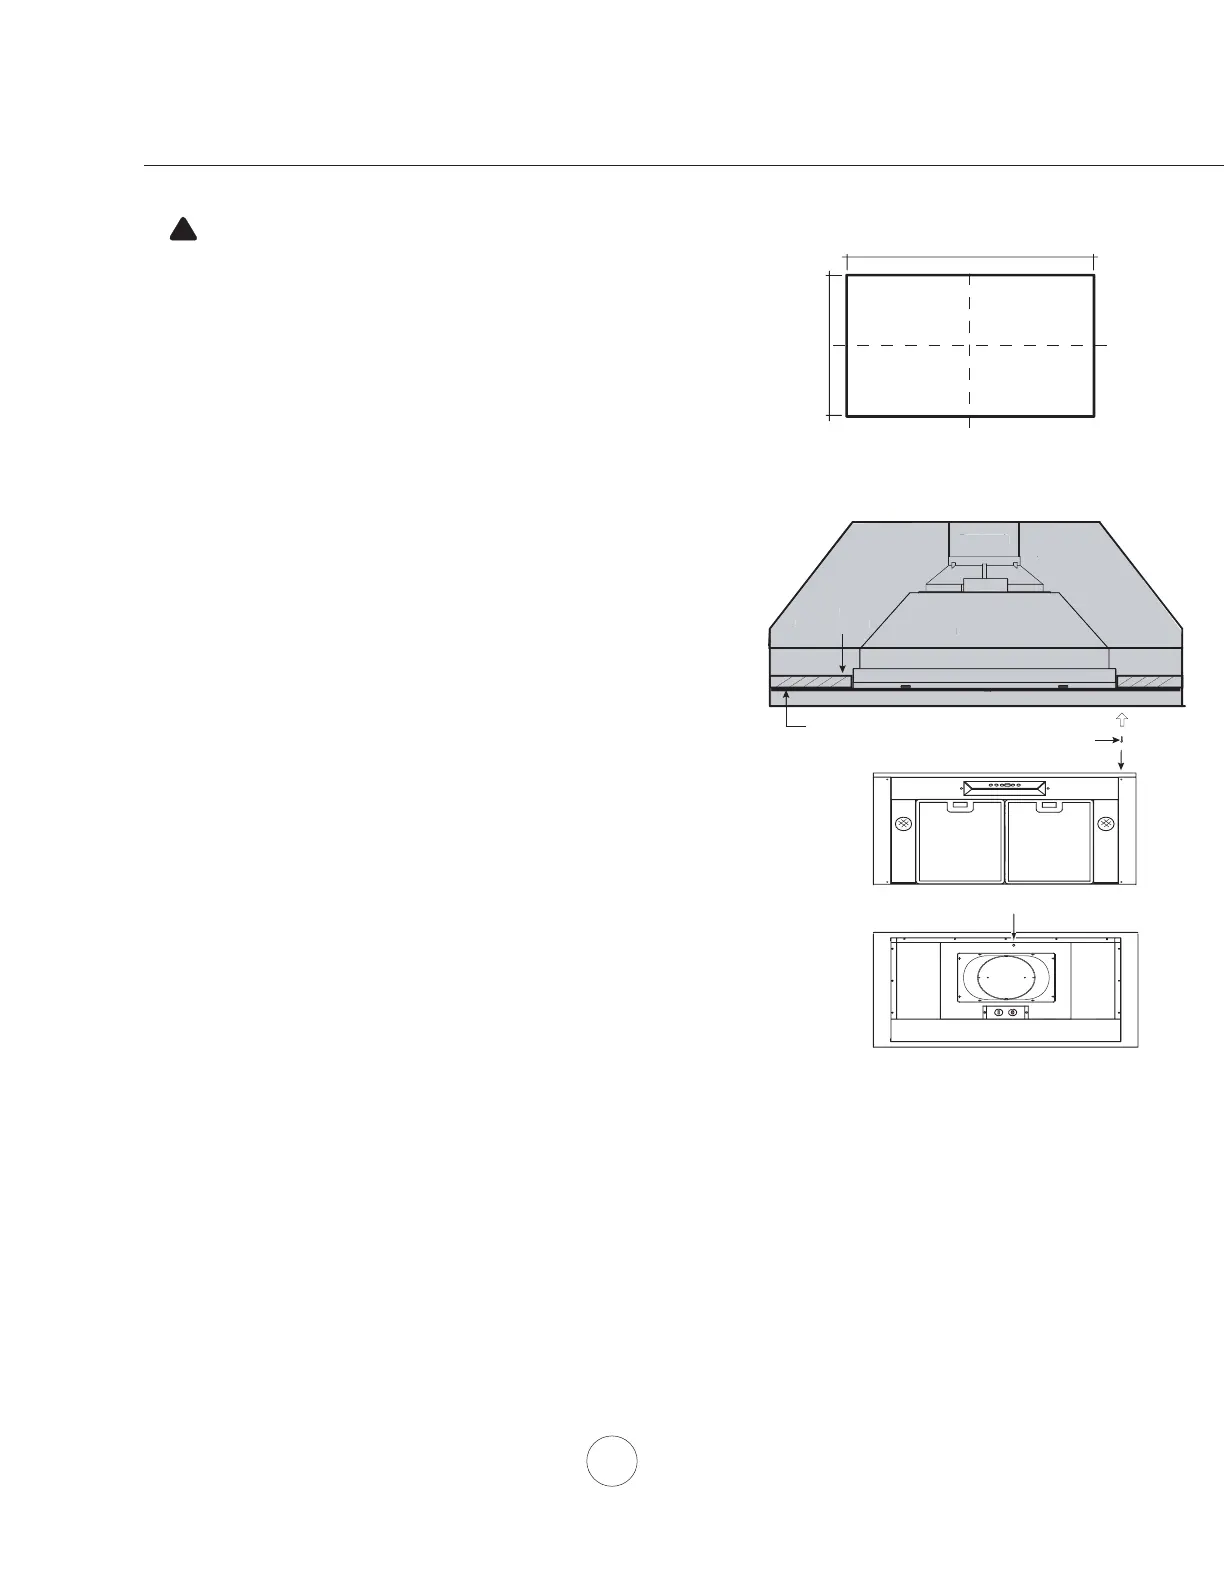
4. If no liner is used cut out an opening in the bottom of the cabinet by
following the dimensions in FIG 1.
5. Lift insert into opening and secure to bottom of cabinet using (4) M4
stainless steel screws, (1) in each corner; see FIG 2.
note: Wood blocking may need to be added to cabinet base if
additional support is needed.
6. Install duct work and seal with duct tape.
7. Install electrical.
8. Remove all packing material before using insert.
Switch power on and check for leaks around duct tape.
9. Install decorative mesh fi lters for UIX2916S or baffl e fi lters for
UIX3816S. See page 14 for more details.
WARNING:
Remove support screw from top of insert
before proceeding to step 5. FIG 2b
CAUTION: At least two installers are
required due to the weight and size of the
hood.
!
Front View
Ductwork
minimum
3/4” wood base
elec.
metal or other non
combustible material
(4) M4 ss wood screws
(1) in each corner
ront
e
tw
r
minimum
4” wood base
ec.
cabinet bottom cut-out size
26
1/16” - 34 11/16”
UIX2916S UIX3816S
14 3/4”
FIG 1
FIG 2
FIG 2b
remove support screw
C/L
C/L
 Loading...