Page 6 <&(%$*4.8"4,7%J'*#$"&8#K%/7*,#*%4,77%HLMMMLMIILNOPO1 Item 63395
?@<6AQ RS6;@ACRE D@CEA6E@ET6?6AFS
7. With assistance, place the Table Top (C) face
down on a smooth, padded surface. This will
allow installation of the sliding drawers.
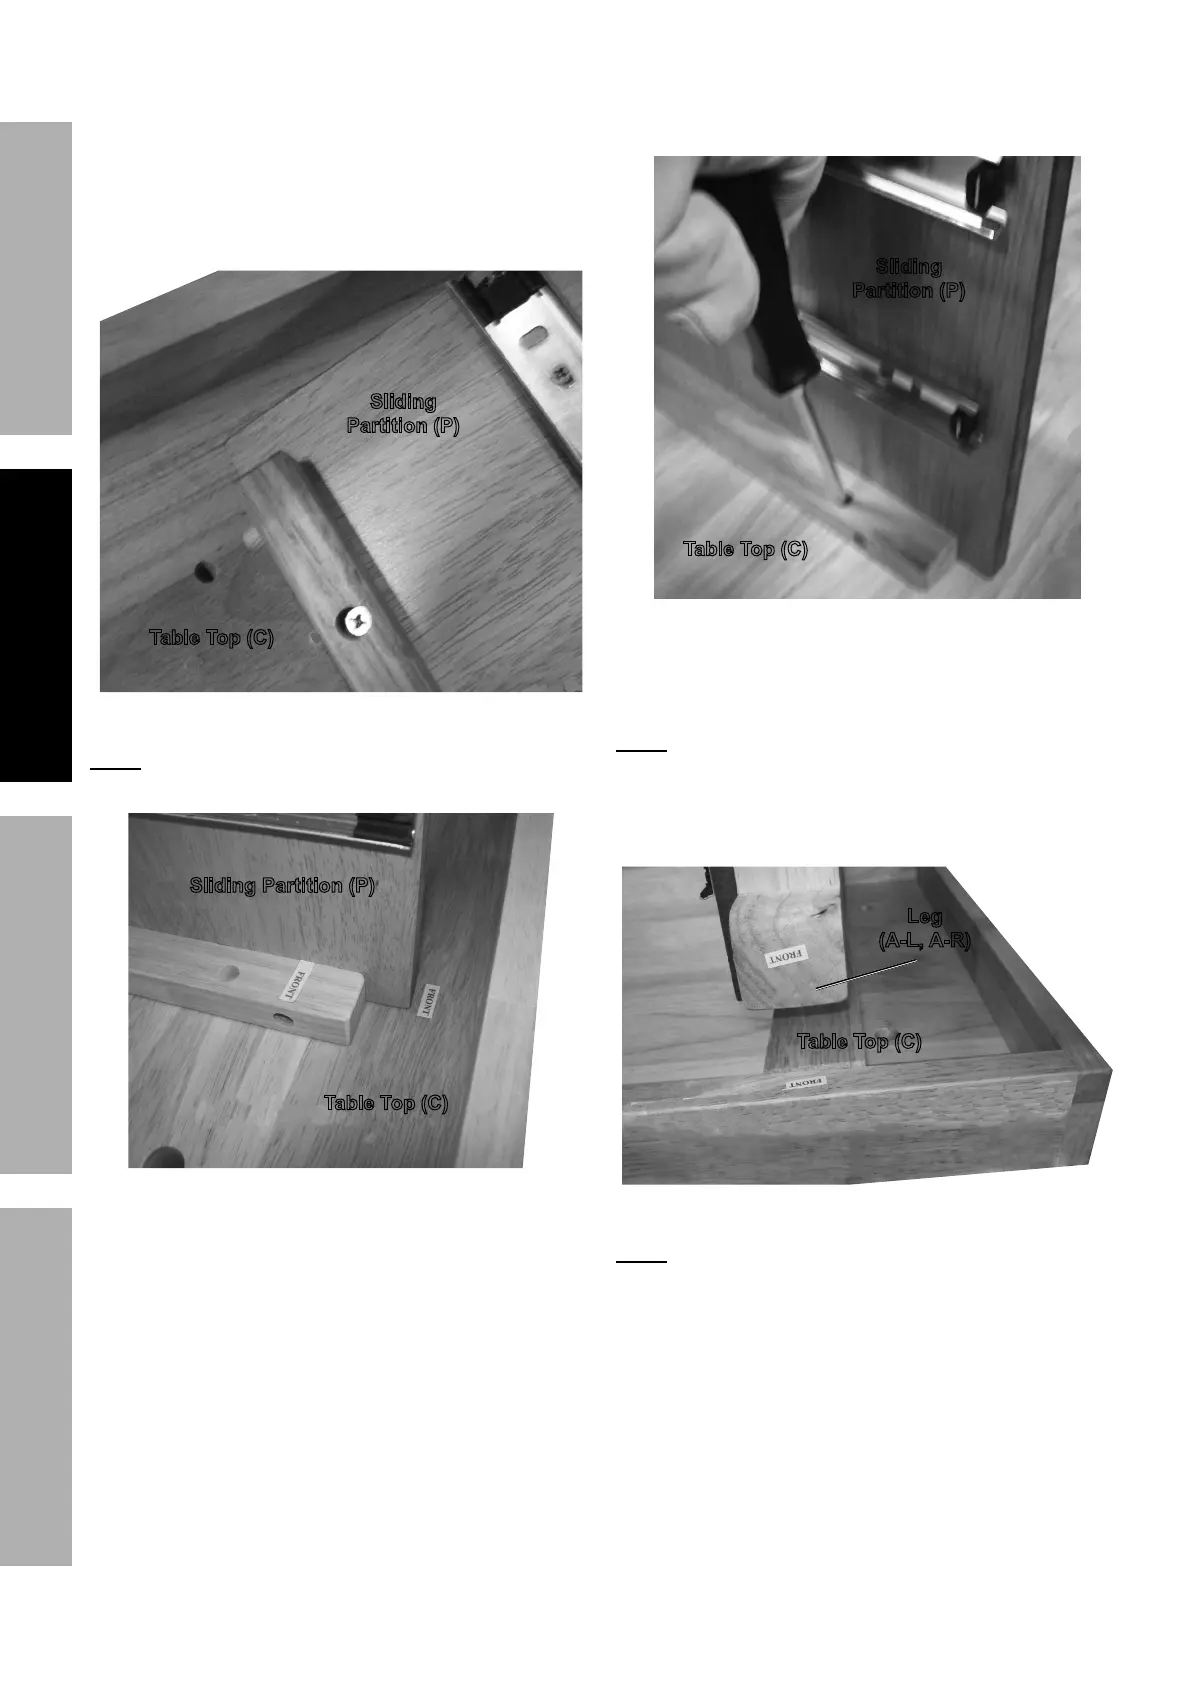
8. Set the Sliding Partition (P) into place by
inserting the tabs at the end of the Partition
into the holes at the center of the Table
Top’s underside. Refer to Figure 8.
?7"9"83%
S,($"$"&8%]S^
A,+7*%A&/%]T^%
<"3'(*%M
E&$*- Verify that the Sliding Partition and Table Top
face the same direction. Refer to Figure 8a.
?7"9"83%S,($"$"&8%]S^
A,+7*%A&/%]T^%
<"3'(*%M,
9. 8VH[PP:RRG6FUHZVWRIDVWHQ
the Sliding Partition to the middle of the
Table Top’s underside. Refer to Figure 9.
?7"9"83%
S,($"$"&8%]S^
A,+7*%A&/%]T^%
<"3'(*%P
10. With assistance, set the assembled Legs and
Bottom Shelf onto the underside of the Table Top.
E&$*-%When setting down the assembled Legs onto
the Table Top, verify both Legs and Table Top are
facing the correct direction. (Note the small “Front”
labels placed on the items. These labels can be
removed after assembly.) Refer to Figure 10.
A,+7*%A&/%]T^
G*3%
]@LGK%@L;^
<"3'(*%Hb
E&$*- Verify that the Drawer guide slots on
the Sliding Partition face the same way as
the Drawer guide slots on the Legs.
 Loading...