Page 7<&(%$*4.8"4,7%J'*#$"&8#K%/7*,#*%4,77%HLMMMLMIILNOPO1Item 63395
?@<6AQRS6;@ACRED@CEA6E@ET6 ?6AFS
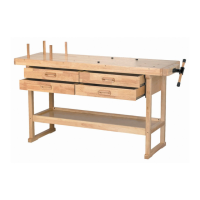
11. 8VHWKH+H[.H\DQG[PP:RRG
Screws (6) to fasten the tops of the Legs
to the Table Top underside, using three
Screws per side. Refer to Figure 11.
G*3%
]@LGK%@L;^
A,+7*%A&/%]T^%
?4(*)%]I^
<"3'(*%HH
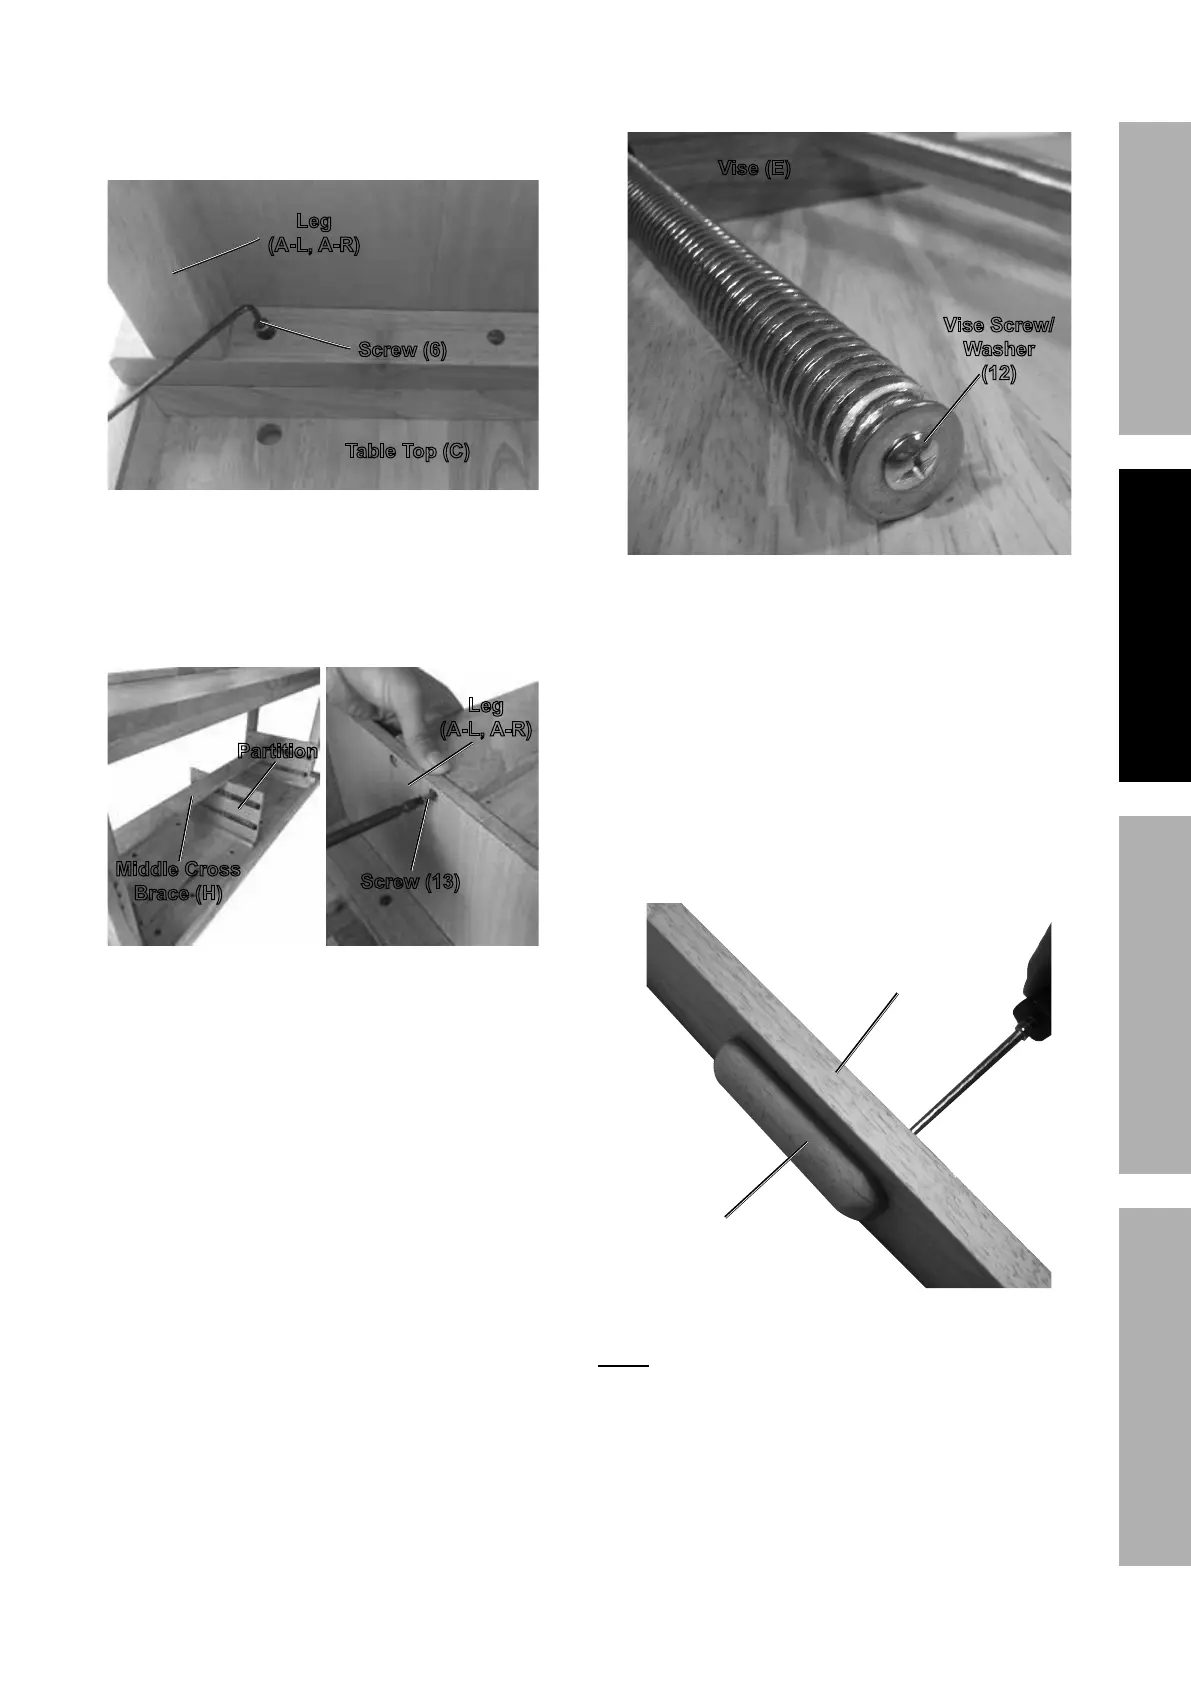
12. Put the Middle Cross Brace (H) on top of
the assembled Partition and fasten it to the
3DUWLWLRQDQG/HJV$/$5ZLWK[PP
Wood Screws (13). Refer to Figure 12.
G*3%
]@LGK%@L;^
D"997*%T(&##%
W(,4*%]B^
?4(*)%]Hc^
S,($"$"&8
<"3'(*%H`
13. With assistance, set the assembled
frame right-side up where desired.
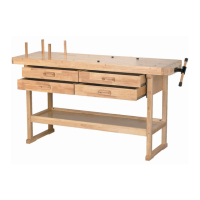
14. Remove the Vise Screw/Washer (12) from the middle
threaded rod of the Vise (E). Refer to Figure 14.
!"#*%]6^
!"#*%?4(*)0
U,#.*(%
]H`^%
<"3'(*%Ha
15. With the Vise Screw and Washer
removed, slide the Vise into the three
holes on the side of the Workbench.
16. Use the Vise handle to thread in the Vise all
the way and re-install the Vise Screw and
Washer. This will keep the Vise locked in
place on the side of the Workbench.
17. 8VHWKH[PP'UDZHU%ROWVWR
fasten the Drawer Handles (U) to the Drawer
Front Panels (Q). Refer to Figure 17.
X(,)*(%
B,897*%]F^%
X(,)*(%<(&8$%%
S,8*7%]d^%
<"3'(*%HO
E&$*- Each Drawer piece should have a sticker
designating what it is. Use the Parts List on page 10
as a reference. This will help insure correct assembly.
 Loading...