Page 8 <&(%$*4.8"4,7%J'*#$"&8#K%/7*,#*%4,77%HLMMMLMIILNOPO1 Item 63395
?@<6AQ RS6;@ACRE D@CEA6E@ET6?6AFS
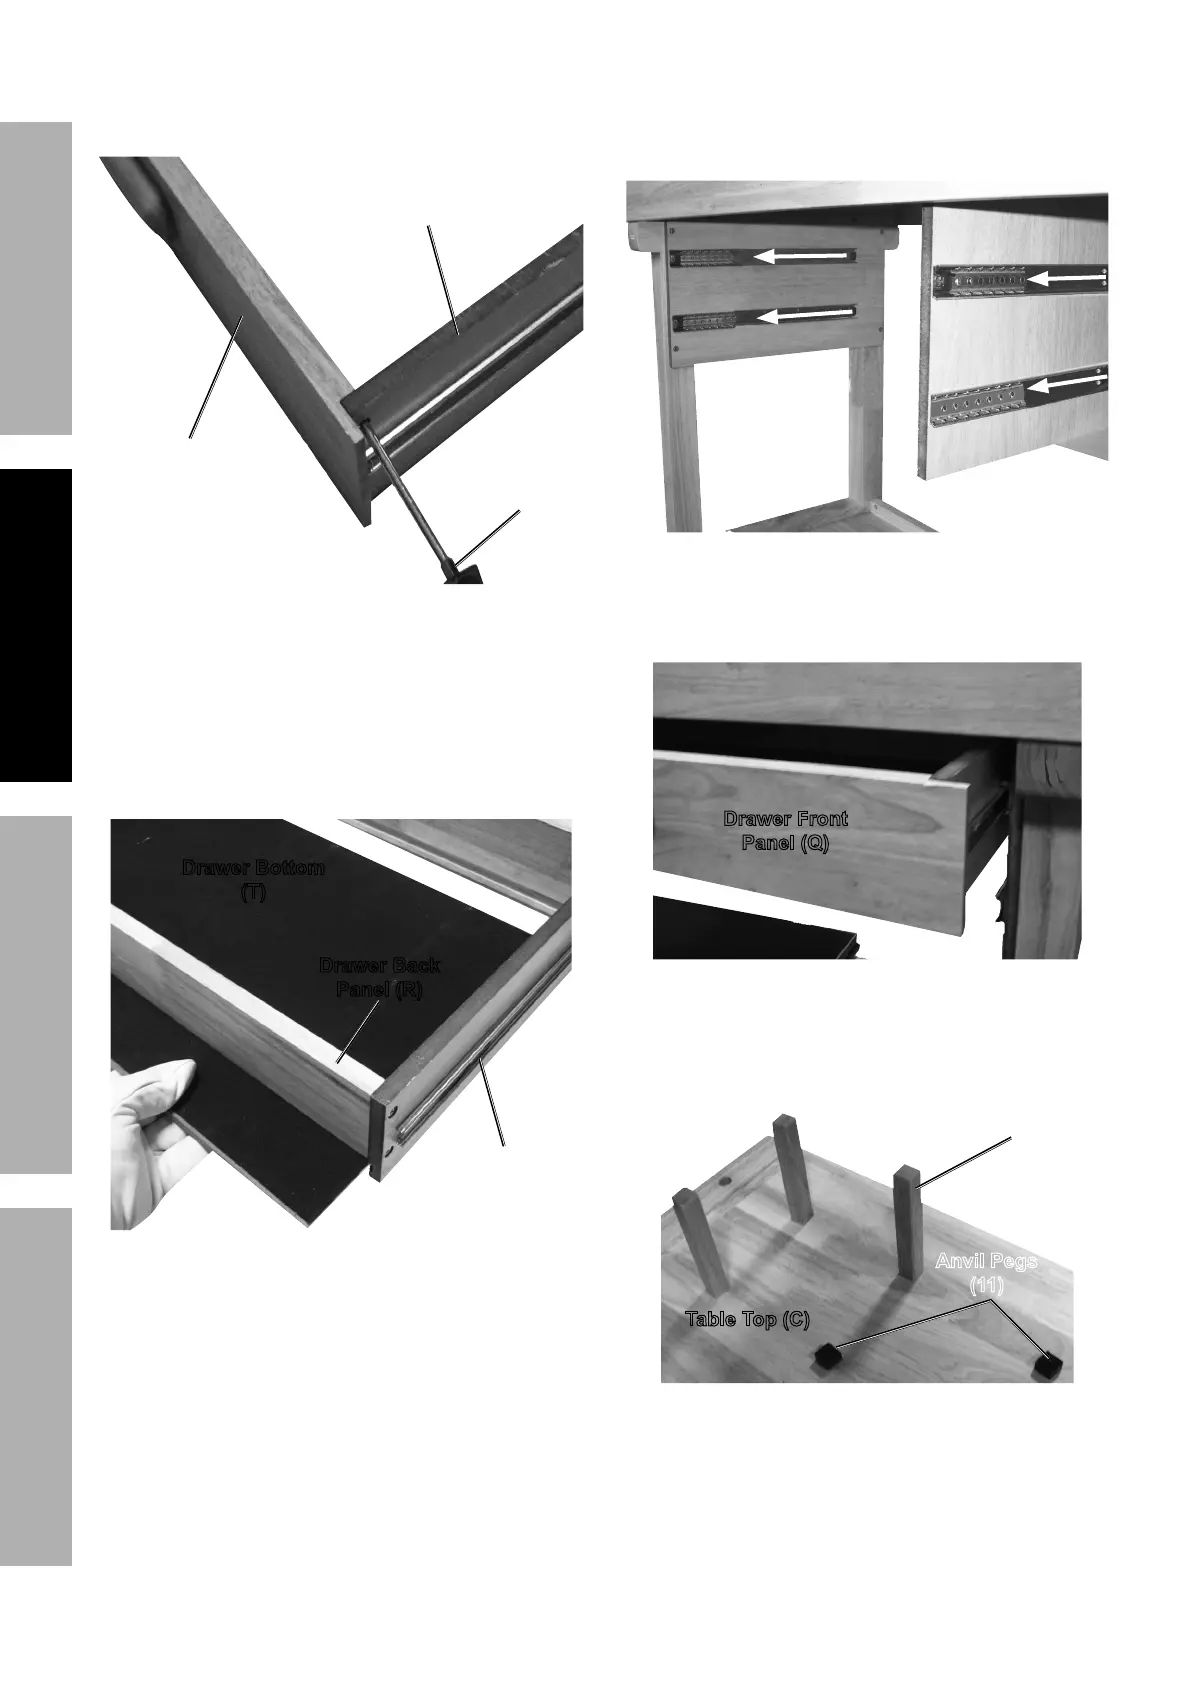
18. Fasten a Left Drawer Slot Panel (S-L) and a
Right Drawer Slot Panel (S-R) to a Drawer
Front Panel (Q). Refer to Figure 18.
X(,)*(%<(&8$%
S,8*7%]d^%
X(,)*(%?7&$%%
S,8*7%]?LGK%?L;^%
?4(*)9("Y*(
<"3'(*%HM
19. With the felt side up, slide a Drawer Bottom (T) into
the grooves along the insides of the assembled Left
and Right Drawer Slot Panels from the previous
Step. Fasten a Drawer Back Panel (R) to the
ends of the two Slot Panels, then fasten Drawer
Bottom to Drawer Back Panel. Refer to Figure 19.
X(,)*(%W&$$&5%%
]A^%
X(,)*(%?7&$%%
S,8*7%]?L;^%
X(,)*(%W,4[%%
S,8*7%];^%
<"3'(*%HP
20. Repeat Steps 18 and 19 for the other Drawers.
Once Drawers are fully assembled, verify that the
inside tracks along the Legs and Sliding Partition
are pushed forward. Refer to Figure 20.
<"3'(*%`b
21. Slide Drawers into tracks along Sliding Partition
and insides of the Legs. Refer to Figure 21.
X(,)*(%<(&8$%%
S,8*7%]d^%
<"3'(*%`H
22. Once all Drawers are inserted, tap Wood
Pegs (10) and Anvil Pegs (11) into desired
holes on the Table Top. Refer to Figure 22.
U&&9%S*3#%]Hb^%
@8Y"7%S*3#%
]HH^%
A,+7*%A&/%]T^%
<"3'(*%``
The Workbench is now fully
assembled and ready for use.
 Loading...