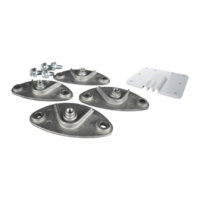
Installing the Mounting Feet
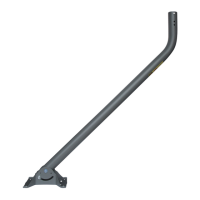
1. If the handle has been installed on the antenna, remove the
screws holding the handle to the antenna with a Phillips
screwdriver, and remove the handle.
2. Pull off the rubber foot pads from the bottom of the four
antenna feet.
3. Insert the threaded post up through the hole of each
attached foot, and with a Phillips screwdriver, tighten a
screw into each.
Installing the Antenna
1. Do not attempt to install the antenna in the rain or under
any wet conditions. Install in dry conditions only.
2. For best performance and to reduce signal acquisition
time, park the vehicle on a level surface that is free of
obstructions such as trees or large buildings. Make sure
you have a clear view of the southern sky.
3. Select a level spot on your roof for installation. Level the
base front-to-back and side-to-side. If the base is not
level, the antenna may require more time to locate the
correct satellite or may not locate the correct satellite.
4. Ensure proper distance to other rooftop equipment
is maintained. Be sure no roof-mounted equipment
is blocking the satellite “line of sight”; see clearance
requirements below.
Mounting foot (4)
with Screw (4)
Cable entry plate
Cable tie (2)
Mounting
screw (20)
Remove the four
rubber foot pads
Remove Handle
Threaded Post
Screw
Attached
Foot
Mounting Foot
18.8 in.
24.9 in.
31.1 in.
15 in.
40.3 in.
8 in.
12 in.
10 in.
Obstruction Height
Minimum Distance to be Maintained from Antenna
Signal Obstruction Chart
Roof Mount Kit RK-4000
For a complete list of compatible antennas, visit
www.winegard.com/mounts
For help, email help@winegard.com
or call 1-800-788-4417
2452390
Rev0 5-17