Instructions to Build:
The Backstop (Sides)
PART NO. SKETCH QTY
2
2
4
1
1
1
1
4
4
2
8
8
1
1
2
3
3
6
7
1
2 828
3
3
4
5
1
3
4
5
6
7
8
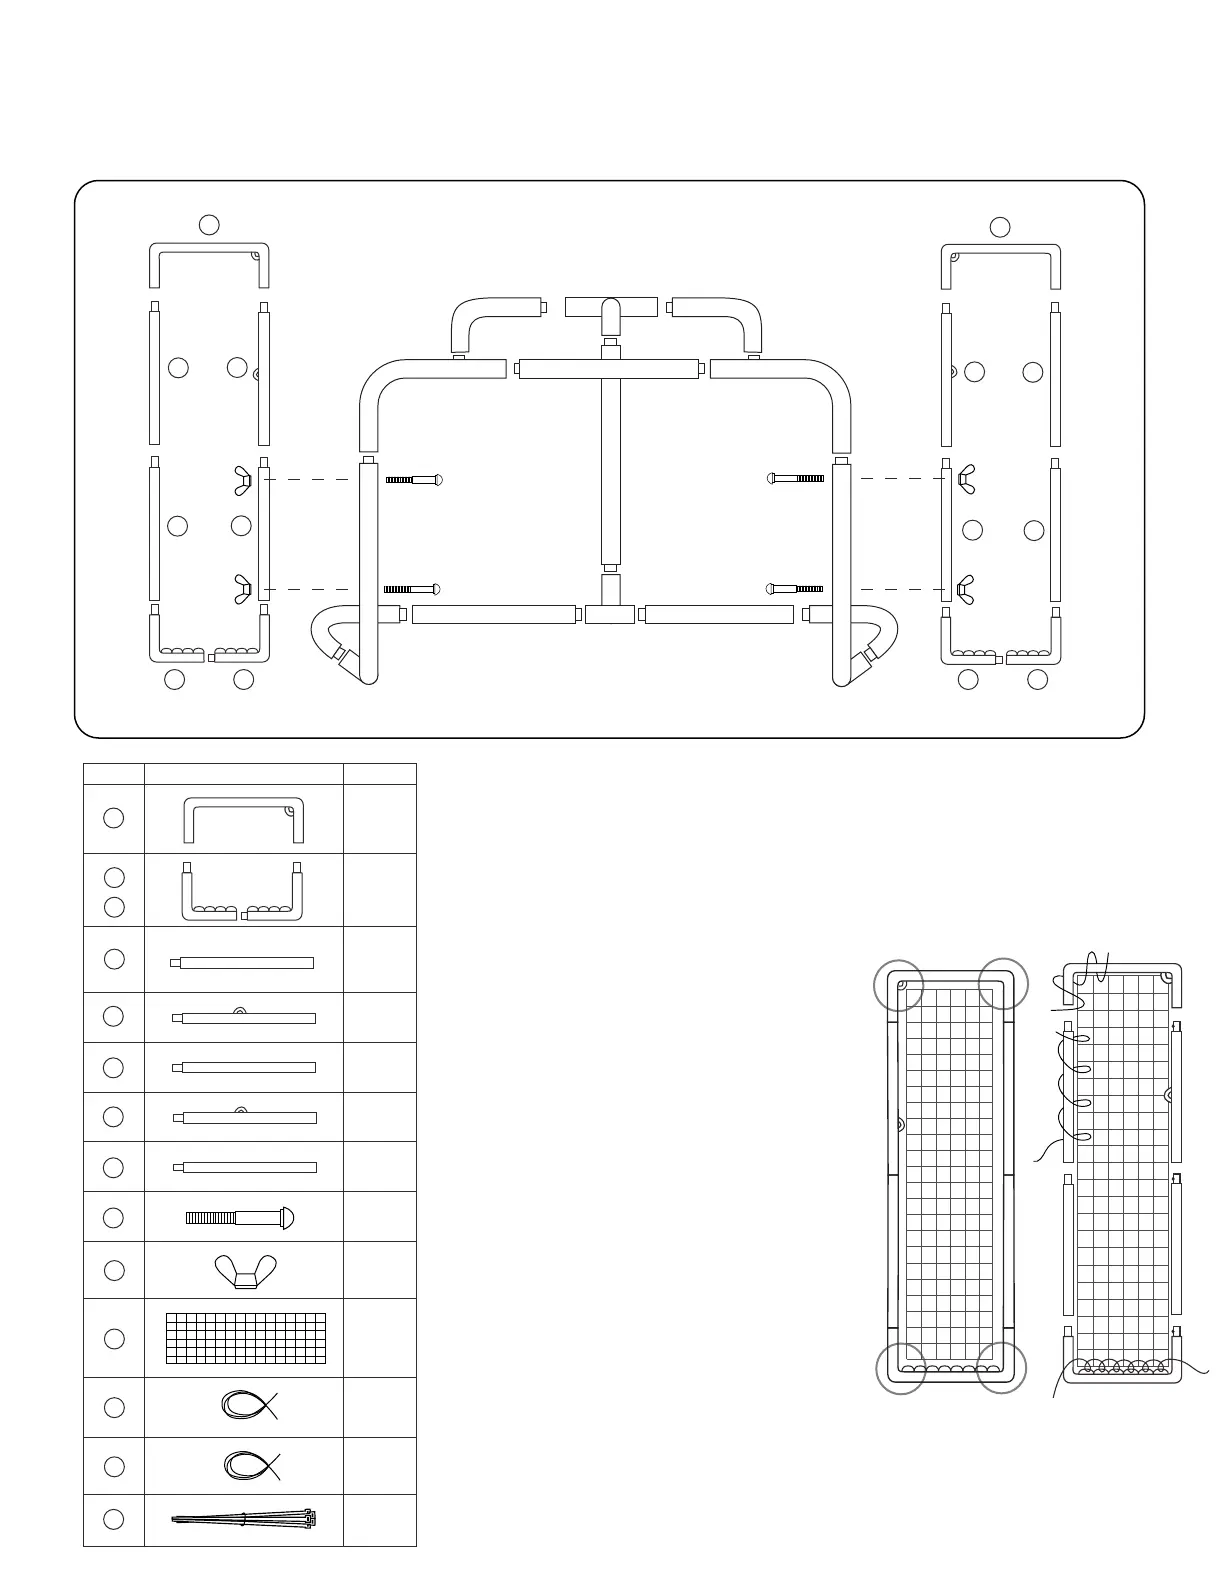
1. Begin by gathering parts (1)-(8).
2. Refer to the diagram above for assembly
(Note: Connections may t snugly so if necessary use a rubber mallet)
3. Once the two frames have been assembled, you can attach the netting
4. Begin by fastening the 4 corners of the netting to the 4 corners of the
frame using the zip ties provided (see Figure 1)
5. You will need 2 of the 14’ strings to
fasten the netting to one side frame.
6. Begin by tying o one end of the
14’ string to the frame.
7. Figure 2 illustrates how the netting
should then be wrapped:
(i) Corners - lace every square box
(ii) Sides - lace every other square box
(iii) Bottom - lace every square box to
opposing wire weld
8. Once the entire net is fastened
ensure the strings are tied o tightly
with good knots.
9. With both side panels completed you
can now fasten them to the goal.
10. Using the pre-drilled holes line up
the side panels to the goal and fasten
using the bolts and buttery nuts provided
(Refer to diagram above).
-Page 3-
9
10
11
12
14
13
14’
1’
Figure 1
Figure 2
 Loading...