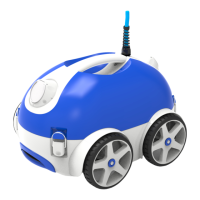
This document describes the Winny Robotic Pool Cleaner, model OPTIMUS PRO® HJ3052, a highly efficient and energy-saving swimming pool cleaning robot. It is designed to clean pool walls and bottom automatically, filtering suspended particles without replacing the pool water, and operates on 28V direct current.
Important Precautions
Before operating the cleaner, it is crucial to read the manual carefully and understand all safety guidelines. The cleaner should not be used by children or as a toy. To prevent severe damage, never power on the cleaner when it is out of the swimming pool. It is forbidden to operate the cleaner when people are in the pool, and the power supply should be connected to a leakage-protected and earthed socket. Avoid overheating and potential damage to components by never covering the power supply. In case of any accident or damage, it is strongly recommended to fix the power supply indoors, at least 3.5m away from the swimming pool edge, and connect the power supply with a fixed holder using the safety rope.
Before power-on, ensure the filters are assembled and the cable is fully released to avoid winding, which could affect the cleaner's performance or cause damage. Always hold the top handle when putting the cleaner into or lifting it out of the water. Do not pull the cable. It is forbidden to use the cleaner beyond its working conditions stated in the manual. The cleaner should be stored in a cool and ventilated place, away from direct sunshine. Only professionals can disassemble the cleaner and its power supply; otherwise, the warranty will be invalidated. It is forbidden to drop and hammer the battery and cleaner. Use only accessories recommended or sold by the manufacturer. It is strictly forbidden to place drugs for water treatment inside the cleaner for dosing; otherwise, the warranty will be invalidated.
Attention during Operation
When putting the cleaner into or lifting it out of the pool, always hold the top handle and gently immerse it into the pool. Let the cleaner immerse into the pool floor after emptying the air inside it (the air inside should be exhausted completely, otherwise its normal working will be affected). When lifting the cleaner out of the pool, hold the top handle only and never pull the cable.
Technical Specifications
The Winny Robotic Pool Cleaner HJ3052 boasts the following specifications:
- Rated input voltage: 220VAC (230VAC)/110VAC (120VAC)
- Frequency: 50Hz/60Hz
- Output voltage: DC28V
- Power: 140W
- Cleaning cycle: 1/2/3 hours
- Filter capacity: approximately 16m³/h
- Filter density: 180µm
- Moving speed: approximately 10.5m/min
- IP grade: Cleaner IPX8; Power supply: IPX5
- Max. water depth: 2m
- Working temperature: 0°C - 40°C
- Remote distance: >20m
- Frequency of remote control: 433MHz
Operation Instructions
The cleaner is controlled via an operation panel with several buttons and indicators, and also via a smartphone app using Bluetooth.
Operation Panel:
The operation panel features buttons for ON/OFF, MODE, TIME, and AUTO START.
- ON/OFF: Press once to power on the cleaner. Press a second time to power off.
- MODE: This button allows selection of cleaning modes:
- ALL: Cleans pool floor, walls, and waterline (once floor, once wall).
- WALL: Cleans pool walls only.
- FLOOR: Cleans pool floor only.
- ALL + FLOOR: Cleans pool floor three times and pool walls once.
- TIME: Sets the cleaning duration:
- 1H: Cleaner runs for 1 hour.
- 2H: Cleaner runs for 2 hours.
- 3H: Cleaner runs for 3 hours.
- Indicators: LEDs on the panel indicate the current operation mode and status.
- 2 or 3 indicators on: Cleaner stopped.
- "1H" flashes slowly: Cleaner running for 1 hour.
- "2H" flashes slowly: Cleaner running for 2 hours.
- "3H" flashes slowly: Cleaner running for 3 hours.
- "ALL" on: Working under mode "ALL".
- "WALL" on: Working under mode "WALL".
- "FLOOR" on: Working under mode "FLOOR".
- "ALL" & "FLOOR" on: Working under mode "ALL" & "FLOOR".
- "ALL" >> "WALL" >> "FLOOR" flash in order: Manual: forward.
- "FLOOR" >> "WALL" >> "ALL" flash in order: Manual: backward.
- "3H" >> "2H" >> "1H" flash in order: Manual: left turning.
- "1H" >> "2H" >> "3H" flash in order: Manual: right turning.
- All indicators flash slowly: Auto-running finished.
- AUTO START: This button is for auto-start function.
- Indicator off: No reservation.
- Indicator on steadily: Reserve successfully, and wait for the start.
- Indicator flashes: Start working.
Diagnose (Fault/Suggestion):
- All indicators flash quickly with buzz: Power supply is overloaded. Suggestion: Stop using and contact after-sales.
- "WALL" & "2H" flash quickly with buzz: Driving motor 1 is overloaded. Suggestion: Check the belt.
- "FLOOR" & "3H" flash quickly with buzz: Driving motor 2 is overloaded. Suggestion: Check the belt.
- "WALL", "FLOOR", "2H" & "3H" flash quickly with buzz: Cleaner is out of water and cannot be restarted. Suggestion: Empty the air inside the cleaner and restart it.
Remote Control (Built-in antenna version):
The remote control allows manual movement of the cleaner:
- Work automatically: Initiates automatic cleaning.
- Forward: Moves the cleaner forward.
- Left: Turns the cleaner left.
- Backward: Moves the cleaner backward.
- Right: Turns the cleaner right.
- Stop: Stops the cleaner.
Users need to press "forward" or "backward" all the time to achieve left or right turning. The remote control assembly requires correct battery installation.
App Control via Bluetooth:
The Winny app, available on Google Play (Android) and Apple App Store (iOS), provides an intuitive interface for controlling the cleaner.
- Initial Interface: Displays search icon, language icon, and connection status.
- Manual Operation Interface:
- Connection status: Disconnected or Connected.
- Buttons: "FORWARD", "BACKWARD", "LEFT", "RIGHT", "STOP". Users need to press "forward" or "backward" all the time to achieve left or right turning.
- Automatic Operation Interface:
- Connection status: Disconnected or Connected.
- Auto mode:
- Pool floor - cleaning floor only: Cleans the pool floor.
- Pool wall - cleaning wall only: Cleans the pool walls.
- Once floor once wall: Cleans the floor once and walls once.
- Three times floor once walls: Cleans the floor three times and walls once.
- Auto Play: Works automatically according to your settings.
- Start cleaning: Initiates cleaning.
- Stop: Stops automatic working.
- "Auto Start" Interface:
- Delay Mode: Sets a delay for the start of cleaning (e.g., 1-23 hours).
- Periodic Time: Sets a periodic cleaning schedule (e.g., 1-10 days).
- Confirm: Sends the current reservation settings to the power supply via Bluetooth and starts the timing.
- Cancel: Cancels the current reservation.
- Current mode: Displays the current operating mode.
- Time left for next operation: Shows remaining time until the next scheduled operation.
Maintenance Features
Filter Cleaning:
- Take out the filter baskets:
- Press the opening button (Figure 1).
- The top cover will pop-up automatically (Figure 2).
- Open the top cover (Figure 3).
- Take out the filter basket (Figure 4).
- Clean the filter baskets: Rinse the filter baskets to remove debris.
- Re-install the filter baskets: Pay attention to the installation position and close the top cover. Ensure the wide side of the filter basket is in the middle when reinstalling. Press down firmly to secure the cover.
Float Block:
If it is difficult for the cleaner to climb the wall and clean the waterline, it may be necessary to adjust or re-glue the float block. Open the top cover and glue the float block at the position shown in the picture. The other side is also glued.
- You can also glue the float block on the top cover without removing the cover. Touch the position with your hands and glue it according to the picture.
- The float block has glue on its back, so it has to be glued on the top cover tightly and then put it into the pool 24 hours later.
Transport Caddy (Optional)
The transport caddy needs to be assembled.
- Open the package for assembling.
- Put the connection part onto the plate.
- Insert the wheel axle.
- Assemble the protecting cover and axle cover.
- Assemble wheels.
- Put on the nut.
- Tighten the nut.
- Assemble the top handle.
- Assemble power supply holder.
- Assemble cable holder.
Packing List
The standard packing list includes:
- Cleaner body (HJ3052): 1 pc (in carton)
- Power supply (HJ3052): 1 pc (in carton)
- User manual, certificate & safety rope: 1 pc (in plastic bag)
Warranty
The product has passed all quality control and safety tests, conducted by the technical department of the factory.
Warranty information:
- The warranty is covered for 24 months (only for motors & PCB) from the date of its original purchase.
- This warranty is void if the product has been altered, misused, or has been repaired by unauthorized personnel.
- The warranty extends only to manufacturing defects and does not cover any damage resulting from mishandling of the product by the owner.
- The sales invoice must be presented for any claim or repair during the warranty period.
Please contact your local dealer for any warranty issues.