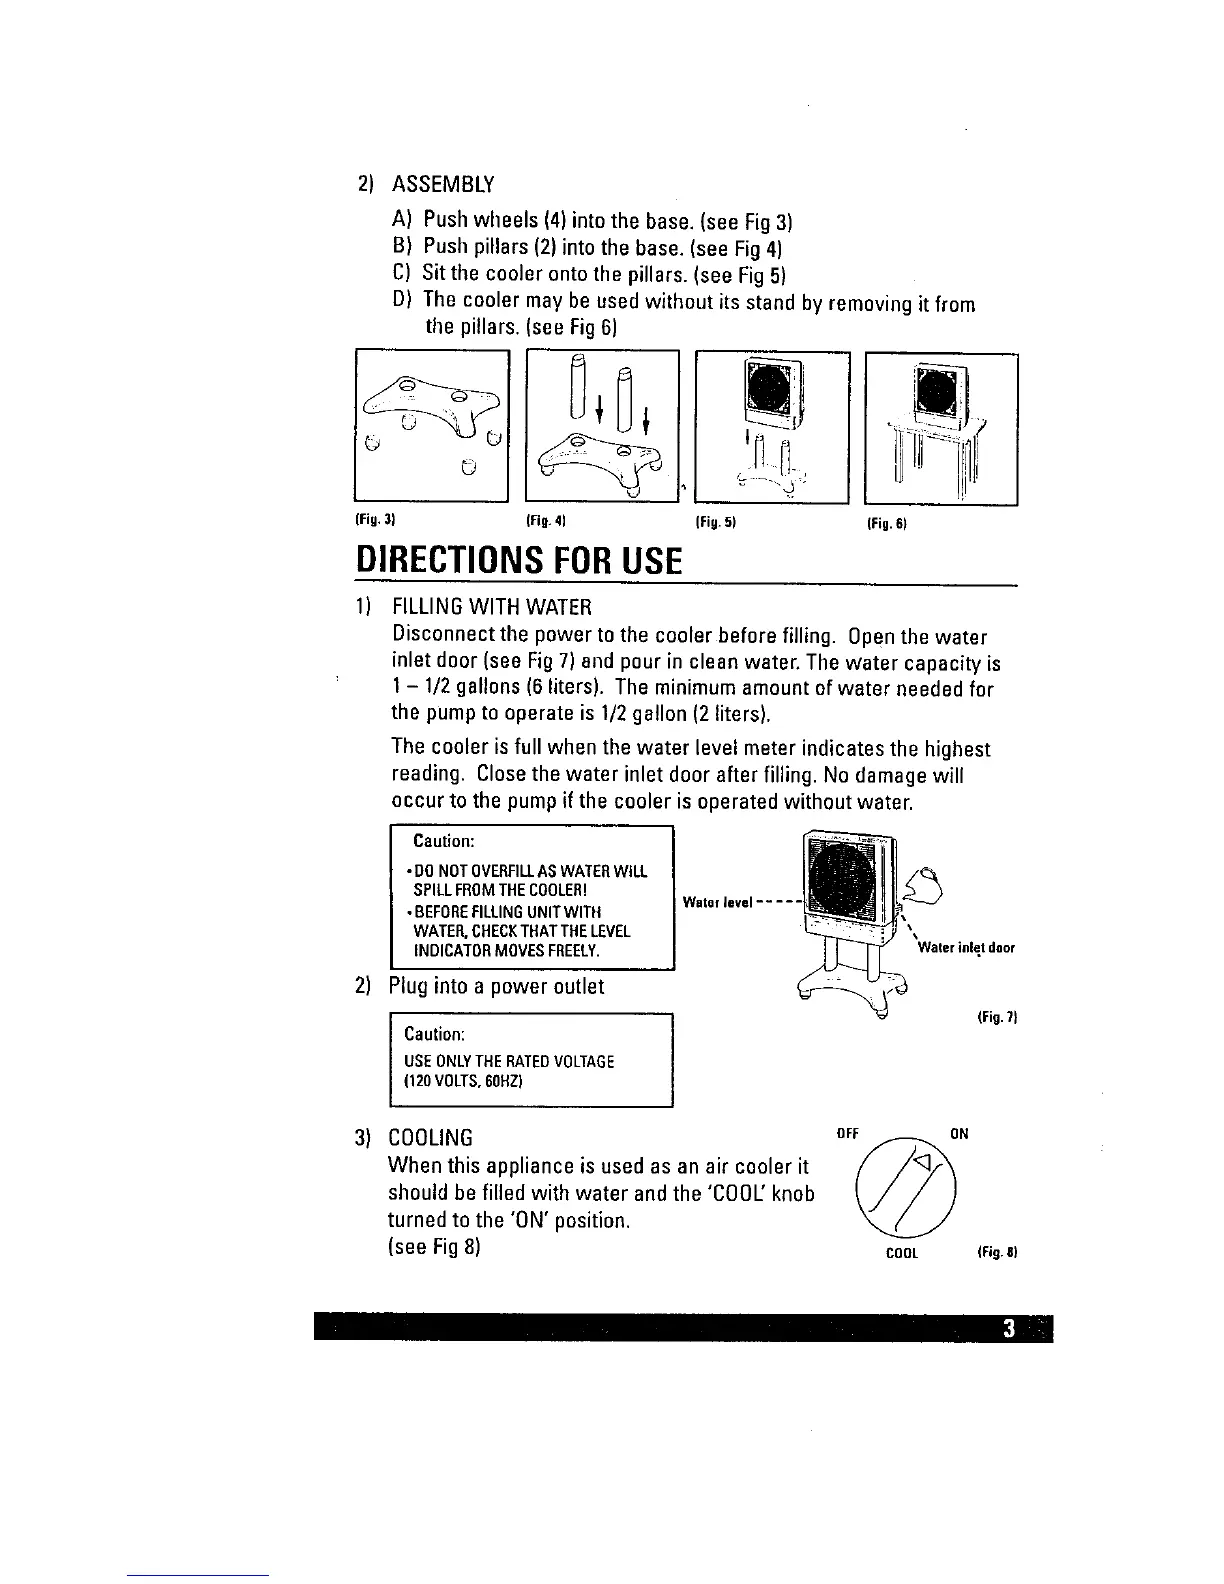
2) ASSEMBLY
A) Push wheels (4) into the base. (see Fig 3)
B) Push pillars (2) into the base. (see Fig 4)
C) Sitthe cooler onto the pillars. (see Fig 5)
D) The cooler may be used without its stand by removing it from
the pillars. (see Fig 6)
©
(Fig.3)
(Fig. 4)
(Fig.5) (Fig.6)
DIRECTIONSFORUSE
1)
2)
3)
FILLING WITH WATER
Disconnect the power to the cooler before filling. Open the water
inlet door (see Fig 7) and pour in clean water. The water capacity is
1 - 1/2 gallons (6 liters). The minimum amount of water needed for
the pump to operate is 1/2 gallon (2 liters).
The cooler is full when the water level meter indicates the highest
reading. Close the water inlet door after filling. No damage will
occur to the pump if the cooler is operated without water.
Caution:
•DONOTOVERFILLASWATERWILL
SPILLFROMTHECOOLER!
• BEFOREFILLINGUNITWITH
WATER,CHECKTHATTHELEVEL
INDICATORMOVESFREELY.
Waterievel .....
'Water inlet door
Plug into a power outlet
Caution: j
USEONLYTHERATEDVOLTAGE
(120VOLTS,60HZ)
(Fig.T}
COOLING
When this appliance is used as an air cooler it
should be filled with water and the 'COOL' knob
turned to the 'ON' position.
(see Fig 8)
OFF ON
COOL IFig.81
_;] .i

 Loading...