wolfappliance.com | 7
Installation
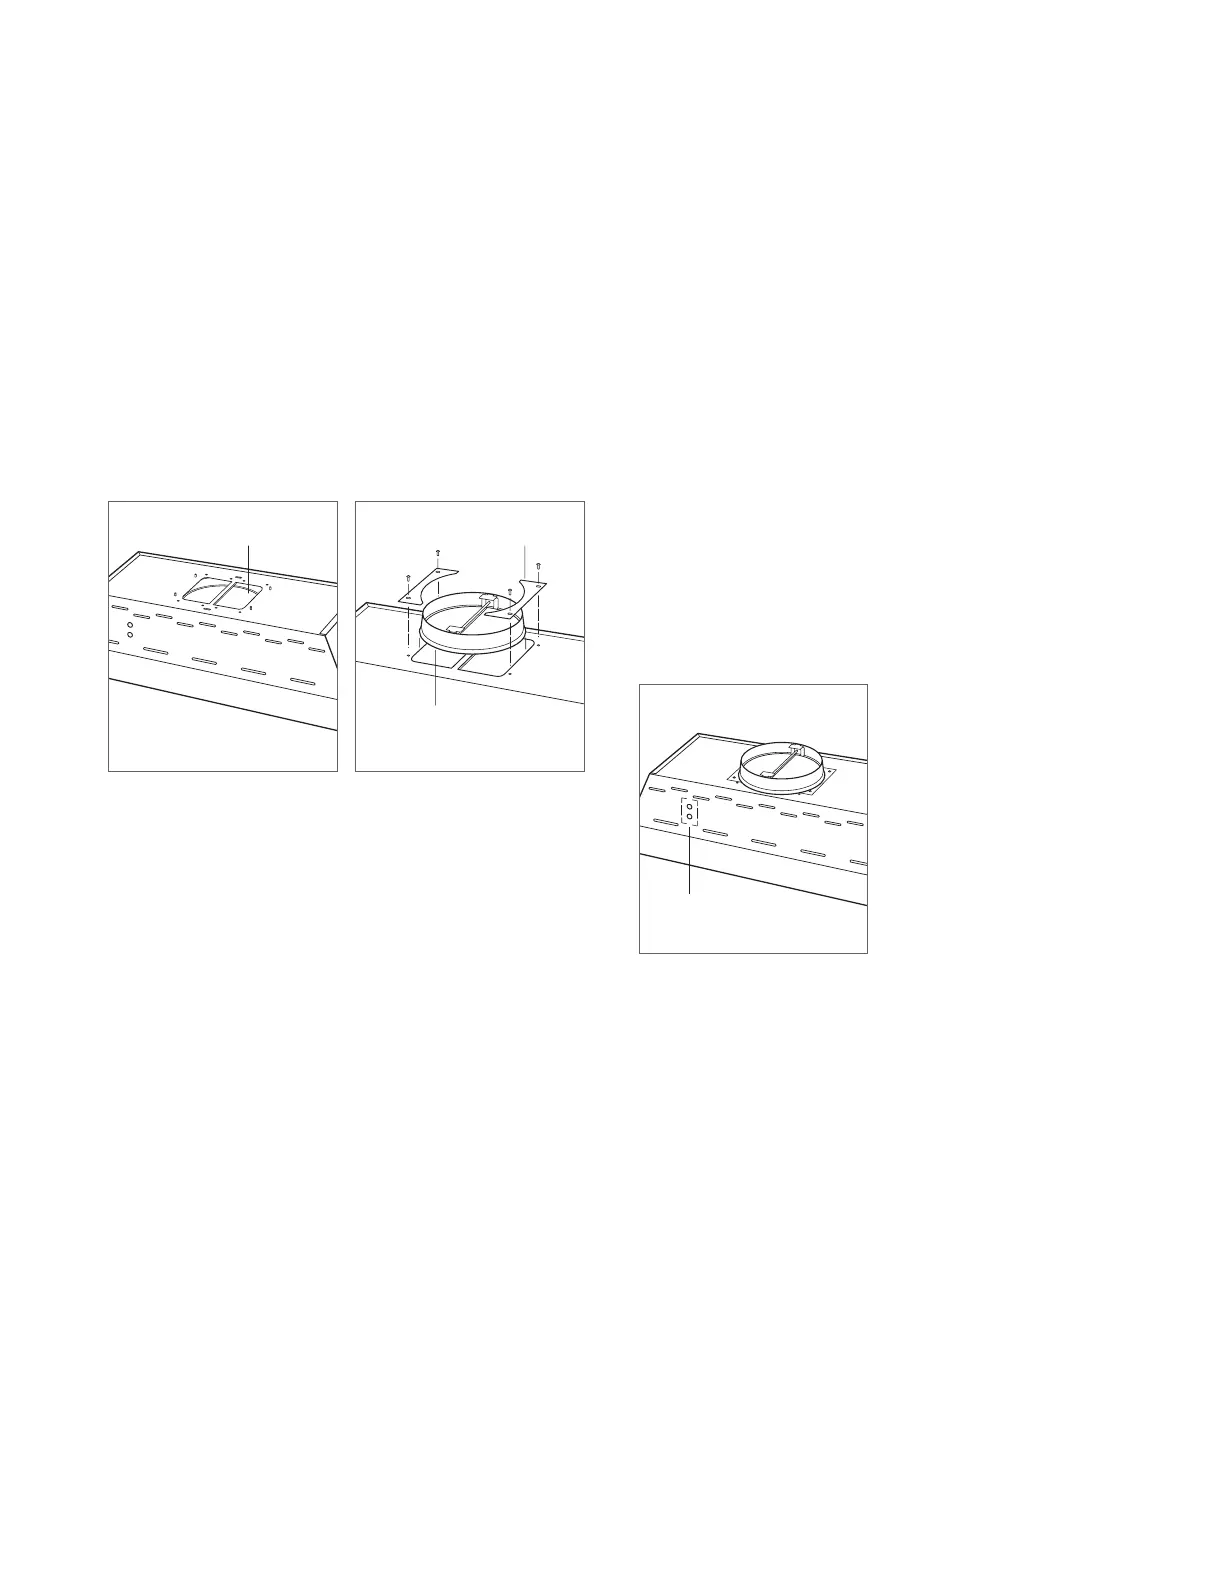
2 Remove the transition from inside the hood by removing
the hold-down brackets. Remove the shipping material
from the damper. Refer to the illustration below.
3 Mount the transition and hold-down brackets to the top
of the hood using the existing screws. Refer to the illus-
tration below.
TRANSITION
HOLD-DOWN
BRACKET
TRANSITION
Transition position (shipping)
Transition mounting
4 Remove the electrical box from the inside of the hood.
Refer to the illustration below.
5 For internal blowers, install the blower prior to mounting
the hood. Refer to the instructions provided with the
blower.
6 Lift the hood into position and insert Romex
®
wire(s)
into the electrical knockout and secure with a UL or
C/UL approved connector (not provided).
7 Secure the hood to the wall structure with the provided
screws and washers.
8 Connect the ducting to the transition and secure with
duct sealing tape.
INSTALLATION
ELECTRICAL BOX
(INSIDE HOOD)
Location of electrical box
 Loading...