18
INSTALL DUCT COVER
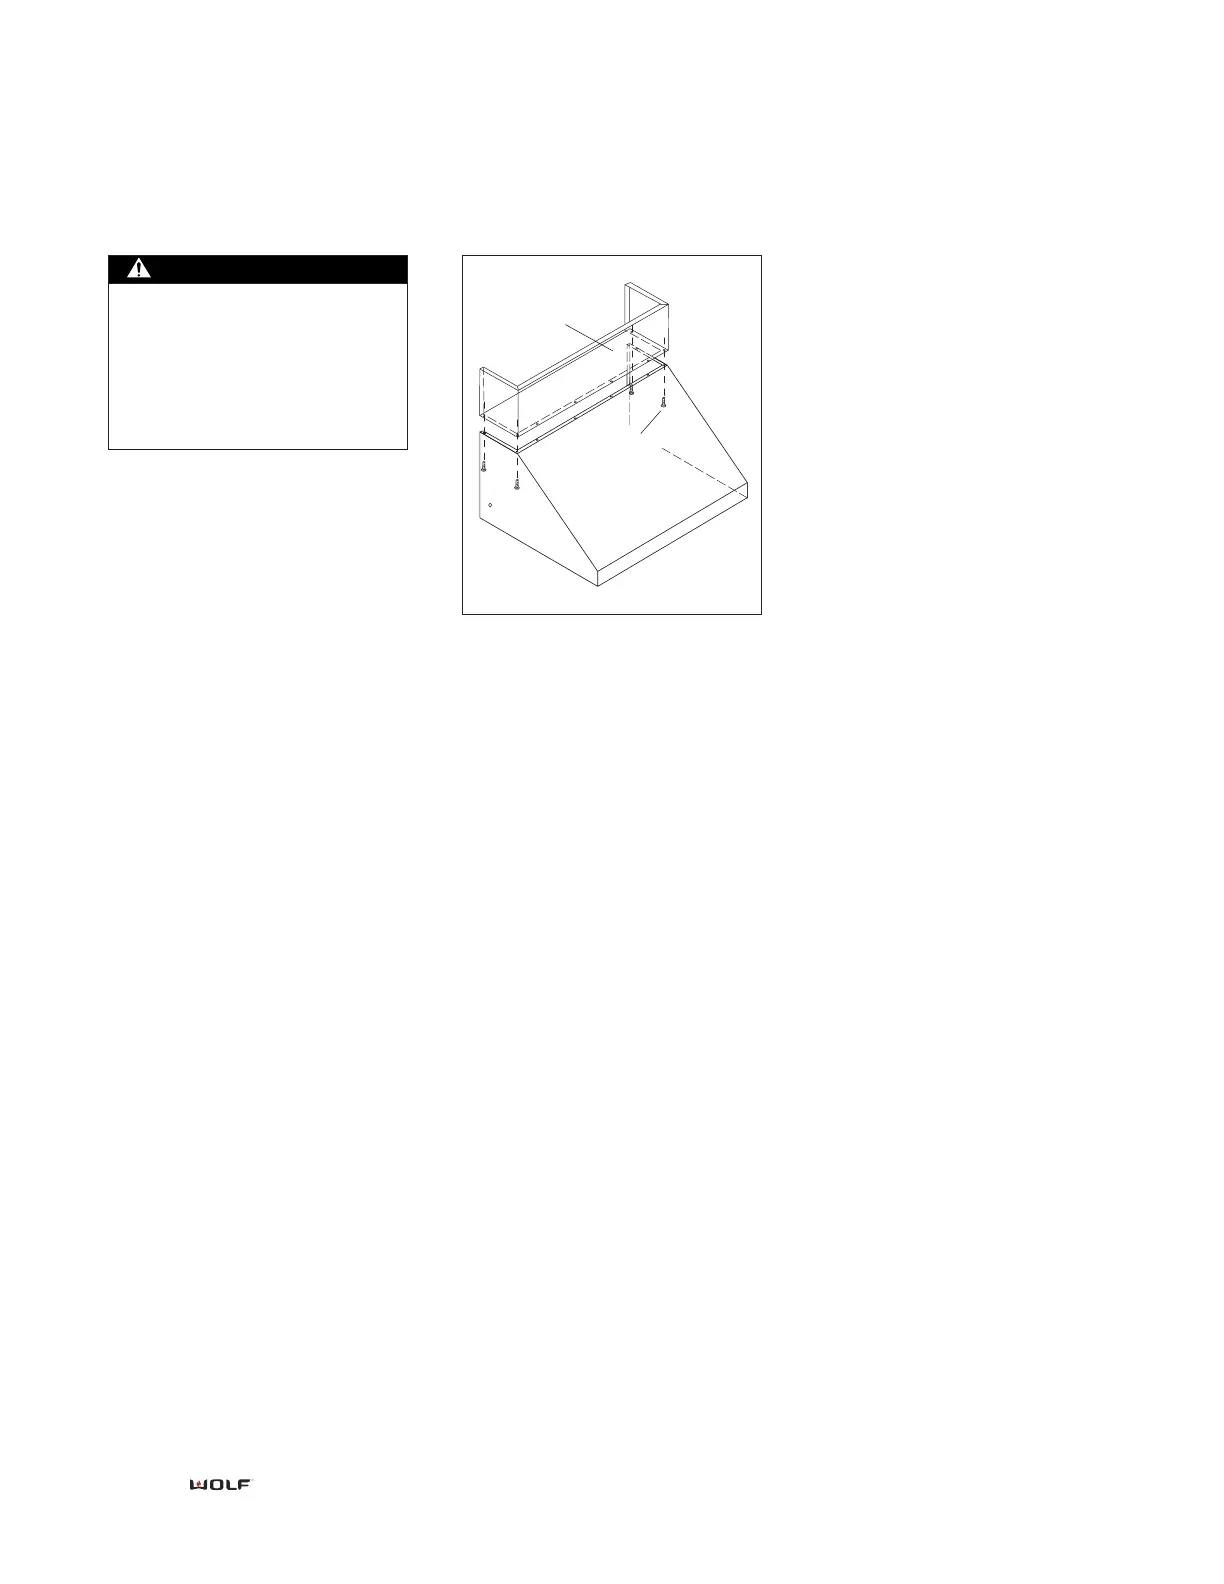
1) Attach duct cover from the inside
of the hood through the filter open-
ing using the screws provided.
2) Leave the screws partially loose
until all are installed. Check the align-
ment of the cover to the hood and
tighten the four corners first to secure
duct. Tighten all remaining screws.
3) Install the hood as described.
INSTALL LOGO
The nameplate is not pre-assembled
because there are various locations
that the logo can be installed.
Additionally, some customers prefer
not to have a nameplate on their
hood. For your convenience, Wolf has
created a template for a standardized
logo location. Please see the back
page of these installation instructions
for the Wolf logo template.
1) Decide on the location for the
nameplate.
2) Clean mounting area with rubbing
alcohol.
3) If desired, cut-out template for
nameplate location.
4) Fold template, locate placement
on hood and tape to hood surface.
5) Check alignment and adjust if
necessary.
6) Remove backing paper from
nameplate.
7) Position nameplate in template
cutout and press into place.
8) Remove template and any tape
residue.
Installing a duct cover assem-
bly will impact all aspects of
hood installation including
hood location, ducting, electri-
cal placement and adequacy of
mounting surfaces.
Duct cover installation