Page 6
www.wolverineairsoft.com
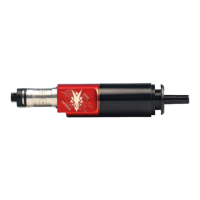
STORM OnTank/HighPressure
Installation
To install the STORM InGrip regulator remove the stock airline from
the back of your Wolverine Airsoft HPA engine using a 5/16” wrench.
Install the airline with the ¼” macro line onto the engine and reinstall
engine and gearbox in the gun.
Slide the InGrip base over the tubing up flush against the bottom
of the gearbox. Trim the tubing with a sharp pair of scissors 1/8”
past the end of the InGrip base. Remove the InGrip base. Install the
grip and the InGrip base using the four included M3 screws. If your
gearbox only has two threaded holes for attaching the grip, just use
two of the included screws.
Screw the regulator into the InGrip base and tighten using the includ-
ed spanner wrench. The standard ASA to remote adapter included
with most remote lines can be screwed directly into the base of the
regulator.
Removal
Disconnect the remote line from the gun. Fire the gun until all pres-
sure is vented. Unscrew the ASA to remote adapter from the bot-
tom of the InGrip regulator. You may find a set of channel lock pliers
to be helpful in this. Use the included spanner wrench to unscrew the
regulator from the InGrip base.
Tuning
In order to change the pressure, the regulator must be removed
from the grip of the gun. Adjust the pressure with the regulator
removed from the gun. One complete turn of the adjustment screw
adjusts the pressure approximately 15psi and 25FPS.
 Loading...