24 Operation
MAN0988 (11/5/2012)
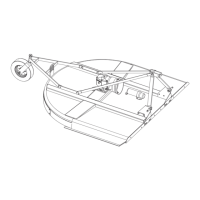
Cultipacker
The optional cultipacker can be used to firm the seed
bed for small seeds and increase seed to soil contact.
The cultipacker is equipped to operate through an
inclusive angle of 37°. The cast iron cultipacker weight
provides the down pressure needed for an optimized
seedbed. When raising the seeder, the cultipacker will
swing until it reaches its lower stop. When raising the
seeder, use a slow and steady motion to reduce the
impact loading of the cultipacker on the frame stop. A
slot and 1/2" hardware are provided to secure the culti-
packer in a fixed position. To achieve a raised position,
move the cultipacker into a ditch or trailer ramp to
assist in lifting. Stop the engine of the power unit and
then tighten the cultipacker retainer to keep the culti-
packer "raised". See Figure 31.
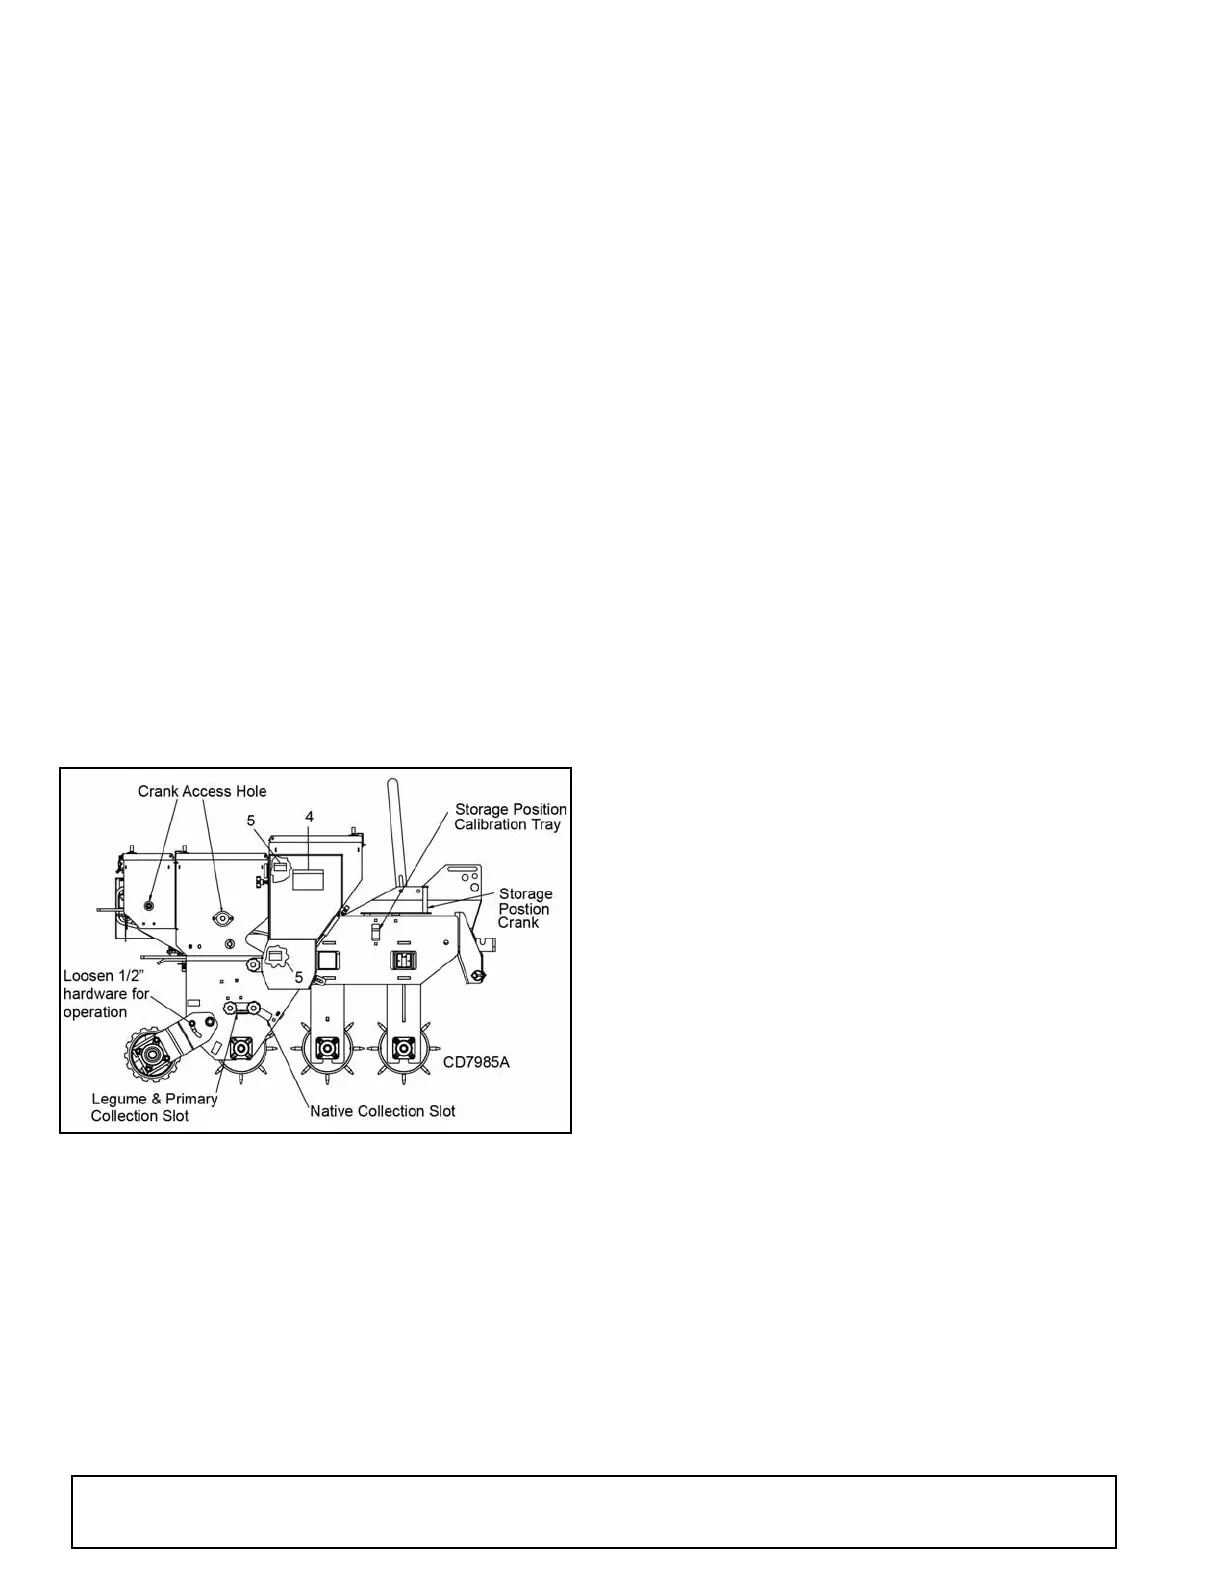
Calibration Tray
The Precision Super Seeder comes equipped with a
calibration tray to assist in adjusting the seed cups for
the desired seeding rate. The calibration tray can be
used with the seeder in the stationary position or as it is
pulled over a short distance of the seedbed. See Figure
31.
Figure 31. Calibration Tray
Stationary Calibration Procedure - Legume
and Primary Seed Boxes
Equipment
1. One or two pounds of sample seed.
2. Calibration tray.
3. One scale capable of measuring ounces or
hundreths of a pound.
Procedure
1. Position tractor and seeder on a level surface.
2. Adjust seed meter to closed position if applicable.
3. Stop engine and set parking brake.
4. Disconnect seed box from seeder chain drive by
removing pin from seed box driven sprocket
(Primary or Legume). For the native seed box,
leave chain drives connected between primary
seed cup shaft and picker wheels. Disconnect the
ground drive and legume seed box. Drive picker
wheels with primary seed cup shaft.
5. Place seed over two seed meters closest to right
end of seeder.
6. Remove calibration tray (34 cu. in. capacity) from
storage location. Install tray in designated
collection slot and tighten against frame with two
plastic nuts.
7. Open seed cups to desired position (refer to chart
for estimate) and lock into place. (Primary &
Legume Only)
8. Use crank or a 12-pt socket and turn primary seed
cup shaft clockwise or legume seed cup shaft
counter-clockwise. See stationary calibration chart
for number of shaft turns. (12-pt –3/4" or 19 mm
socket fits over Primary seed cup shaft. 12-pt 12
mm socket fits over Legume seed cup shaft)
9. Carefully remove calibration tray to retrieve
collected seed. Weigh seed and use formula to
determine seed rate. See page 20.
10. If seed rate is not correct, adjust seed cup
openings and repeat steps 7 through 9.
11. Return calibration tray and crank to storage
positions when finished.
Mobile Calibration Procedure - All Seed
Boxes
Equipment
1. One or two pounds of sample seed.
2. Calibration tray.
3. One scale capable of measuring ounces or
hundreths of a pound.
Procedure
1. Position tractor and seeder on a level surface.
2. Adjust seed meter to closed position if applicable.
3. Place seed over two seed meters closest to right
end of seeder.
4. Make sure the seed box being calibrated is
connected to chain drive. Disconnect other seed
boxes by removing pin from seed box driven
sprocket.
(Rev. 4/24/2018)

 Loading...