30 Assembly
MAN0988 (11/5/2012)
ASSEMBLY
DEALER SET-UP INSTRUCTIONS
Assembly of this equipment is the responsibility of the
Woods dealer. It should be delivered to the owner com-
pletely assembled, lubricated, and adjusted for normal
operating conditions.
In most cases the Precision Super Seeder is shipped
completely assembled from the factory. The native and
legume seed boxes, front disc roller, front studded
roller and cultipacker are options that can be added to
the Precision Super Seeder at a later time if desired.
OPTIONAL ACCESSORIES
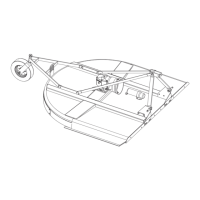
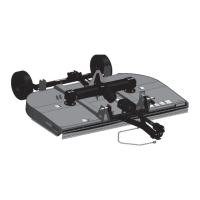
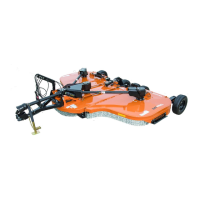
Front Spike Roller (For illustration, see page 41)
1. Place seeder on level surface with jack stands on
frame 3 x 3 tubes.
2. Stop engine and set parking brake.
3. Place hoist strap over 3 x 3 disc gang.
4. Remove 3/4” U-bolts and nuts connecting 3 x 3
tube to disc slide.
5. Carefully remove disc gangs from underneath
seeder.
■ Notched disc blades are sharp. Wear gloves
and tight-fitting clothing.
6. Remove bent pin and hair pin clip from disc slide.
7. Remove 3/4” bolt, nut, washer and sleeve from
disc slide.
8. Remove disc slide and replace with roller slide,
sleeves, and 3/4” hardware.
9. Carefully position front rollers into frame receiving
holes and attach to front roller slide with 3/4”
hardware and sleeves.
10. Install bent pin into roller slide and lock with hair pin
clip.
Front Disc (For illustration, see page 46)
1. Place seeder on level surface.
2. Stop engine and set parking brake.
3. Remove 3/4” hardware connecting 3 x 3 tubes to
roller slide.
4. Using hoist strap, carefully remove rollers from
underneath seeder.
5. Remove bent pin and hair pin clip from roller slide.
6. Remove roller slide and sleeves from frame rails.
7. Install disc slide on frame rails using 3/4” hardware,
3/8” thick washer and sleeves.
8. Install bent pin and hair pin clip on disc slide in
fourth hole from rear.
9. Install disc gang in frame receiver hole and on disc
slide with 3/4” hardware.
Native Seed Box (For Illustration, see page 44)
1. Place seeder on level surface.
2. Stop engine and set parking brake.
3. Remove seed box braces from front of primary
seed box.
4. Remove shields from native seed box.
5. Open shield from primary box.
6. Install native transition tray using 3/8” hardware.
7. Move front transition tray of primary seed box to
bottom of native transition tray and attach with 3/8”
hardware. Also, attach front transition tray to frame
with 3/8” hardware.
8. Place picker wheel shaft in frame of seeder with
teeth fingerpoints rotating forward and downward.
9. Install 3/4” flanged bearings on either side of picker
wheel shaft and connect to frame using 5/16”
hardware.
10. Attach native seed box to frame and primary seed
box using 3/8” hardware (the primary seed box
mounts may need to be loosened).
11. Attach middle bearing of picker wheel to native
seed box with 3/8” hardware.
12. Adjust picker wheel positions so they are centered
in seed box slots. Tighten picker wheels and
bearings to shaft.
13. Install 15 tooth sprocket on primary box agitator
shaft. Sprocket goes inside primary bearing mount
and 15 tooth sprocket that is connected to the
frame chain drive sprocket.
14. Install 15 tooth sprocket on left side of picker wheel
shaft and align sprocket and shaft with sprocket on
seed box.
15. Install left hand idler sprocket using 1/2” hardware.
16. Install left hand drive chain on native seed box
agitator shaft, power transmission shaft and
primary box agitator shaft.
17. Install right hand idler sprocket using 1/2”
hardware.
18. Install right hand drive chain on power
transmission shaft and picker wheel shaft.
(Rev. 4/24/2018)

 Loading...