34 Service & Maintenance
MAN0943 (11/1/2013)
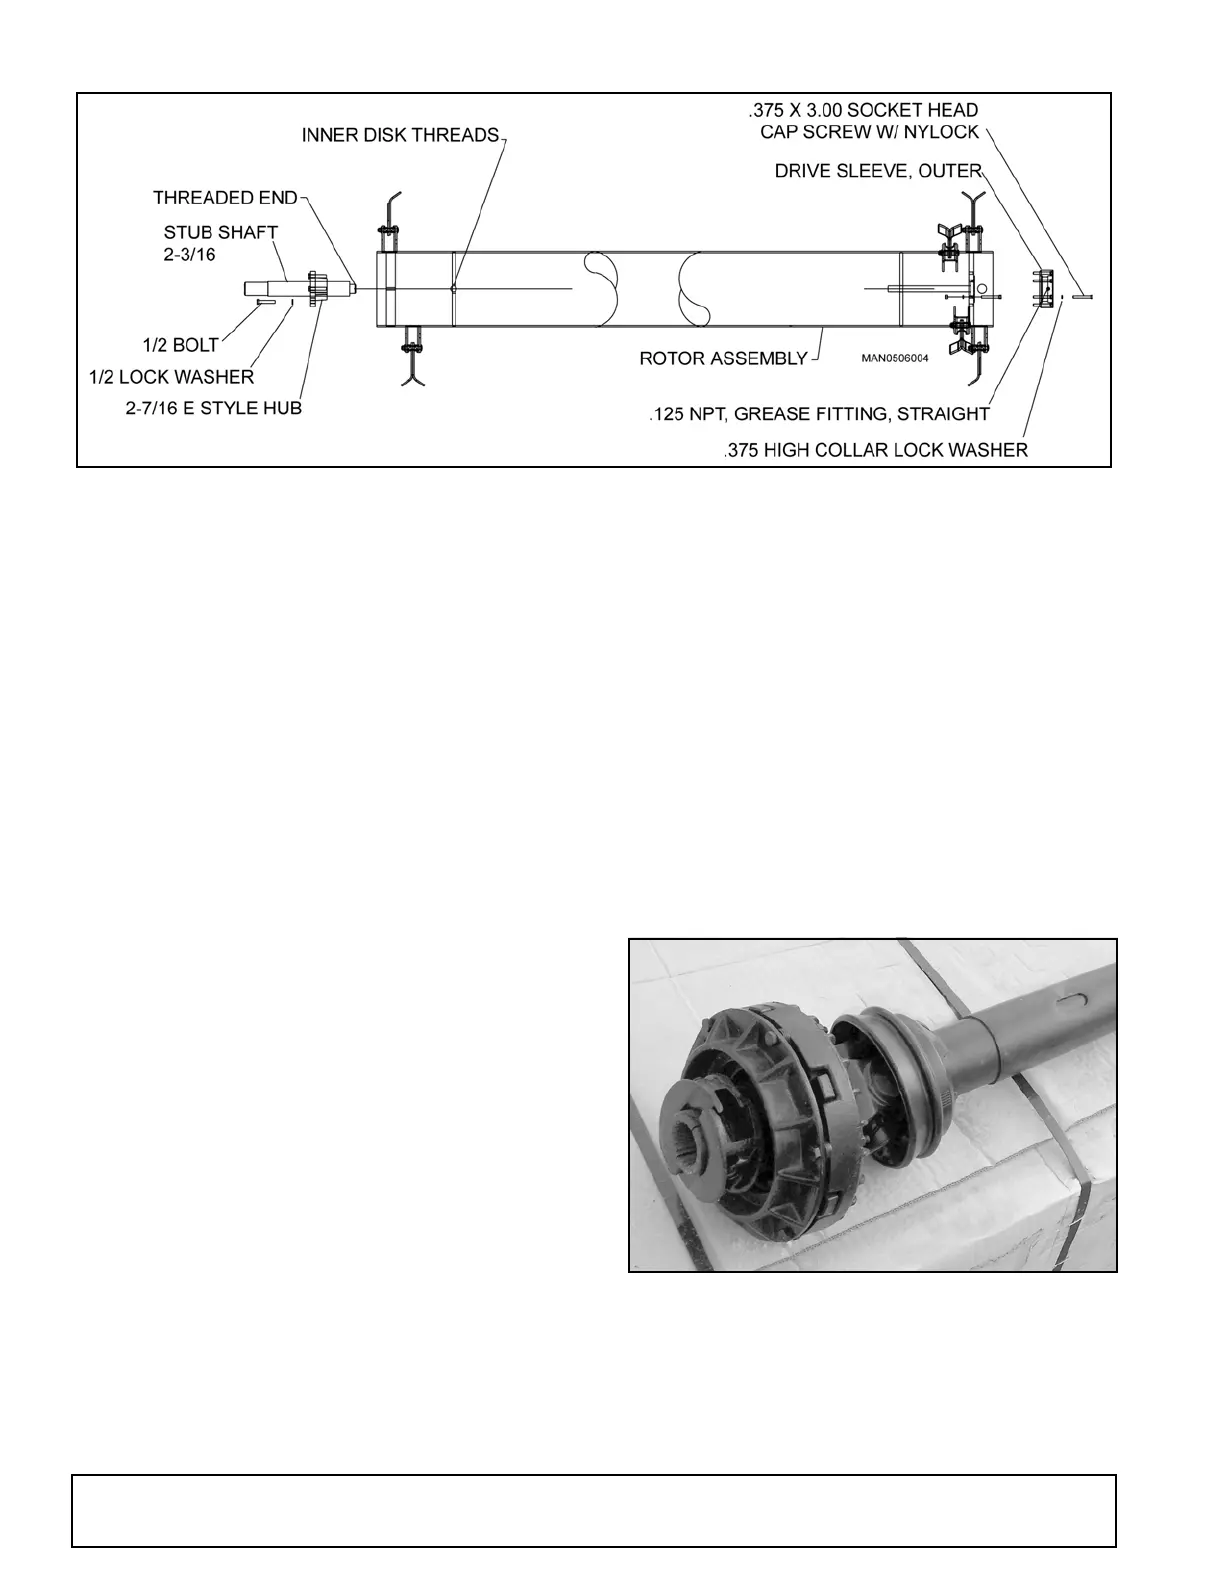
Figure 42. Stub Shaft Assembly
Removing the Driveline
1. Shut off tractor and disengage PTO.
2. Disconnect driveline from PTO shaft.
3. Remove the bolts and clamp that attaches the
clutch to the shredder’s input shaft.
NOTE: The shaft is heavy. Grasp the clutch firmly
with both hands and slide off the input shaft.
Rebuilding Friction Pack
Disassembly
1. Position clutch and universal joint assembly on a
bench so that end is accessible.
2. Remove the long bolts on the outside of the
housing that hold the friction pack together.
3. Remove the plate(s) and all internal components.
Leave the yoke/hub intact.
4. Discard friction discs.
5. If rebuilding the overrunning clutch, refer to
Rebuilding Overrunning Clutch, page 35,
beginning with Step 2.
Inspection
1. Inspect the steel and iron parts for wear, warping,
or cracks, and replace if necessary.
2. Inspect the yoke/hub for looseness. If there is more
than.03 end play, replace.
3. Clean any rust or dust from the plate surfaces with
a wire brush or steel wool.
Assembly
1. Place one new friction disc, then separator plate,
then second friction disc into housing.
2. Add the pressure plate so that the flat surface rests
on the friction disc. NOTE: The tangs on the plate
must fall into the reliefs in the housing.
3. Add the disc spring so that its inside diameter
contacts the fins of the pressure plate.
4. Assemble the compression plate and all the long
bolts. Make sure all nuts rest in their pockets.
5. Tighten all long bolts to 30 lbs-ft.
Figure 43. Weasler Modular Friction Clutch (24K)