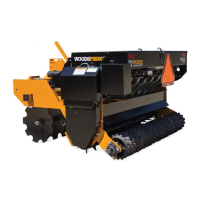
What causes a damaged belt on Woods TURFKEEPER TK60.20 Farm Equipment?
- AAnne MontoyaAug 13, 2025
If the belt on your Woods Farm Equipment is damaged, it could be due to rollover, high shock loads, or installation damage. Replace the belt.
What causes a damaged belt on Woods TURFKEEPER TK60.20 Farm Equipment?
If the belt on your Woods Farm Equipment is damaged, it could be due to rollover, high shock loads, or installation damage. Replace the belt.
What causes belt breakage on Woods TURFKEEPER TK60.20 Farm Equipment?
If the belt on your Woods Farm Equipment is breaking, it could be due to high shock loads. Avoid abusive mowing and hitting the ground or large obstructions. It could also be because the belt came off the drive. Check the pulleys for foreign material in the grooves and avoid hitting solid objects or the ground.
Why is my Woods TURFKEEPER TK60.20 belt squealing?
If the Woods Farm Equipment mower is overloading due to tall or heavy material, reduce the tractor's ground speed while maintaining full PTO RPM. Alternatively, cut the material twice: first with a high pass, then mow at the desired height, cutting at a 90-degree angle to the first pass. If the belt has oil on it, avoid over-lubricating. Clean any lubricant from the belt and pulleys with a clean rag and replace the oil-soaked belt. If the belt is hung up or rubbing, check its position in the pulleys and idlers, ensuring free travel. Inspect under the mower and around the blade spindle shaft for any obstructions like wire or rags, and clean them away. If there is a bearing failure, check that the spindles turn freely and replace any that do not.
How to fix streaking conditions in Woods TURFKEEPER TK60.20 swath?
When using Woods Farm Equipment and experiencing streaking conditions in the swath, first ensure the grass is dry before mowing. If the grass is wet, allow it to dry. Reduce the tractor's ground speed while keeping the engine running at full PTO RPM. Lowering the cutting height may also help. If possible, adjust the tractor tire spacing. If the blades are dull, sharpen or replace them. Also, check the blade hardware if the blade is loose.
What to do if Woods TURFKEEPER TK60.20 Farm Equipment discharges material unevenly?
If the Woods Farm Equipment is discharging material unevenly, resulting in bunches along the swath, it could be due to the material being too high and too much of it. Reduce ground speed while maintaining 540 RPM at the tractor PTO, or make two passes over the material. For the first pass, raise the mower, and for the second, lower it, cutting at a 90-degree angle to the first pass. Raise the rear of the mower high enough to allow material discharge, but not so high as to cause other issues. Also, if the grass is wet, allow it to dry before mowing and slow down the tractor's ground speed while keeping the engine running at full PTO RPM.
How to fix Woods TURFKEEPER TK60.20 Farm Equipment cutting higher in center?
If your Woods Farm Equipment cuts grass higher in the center of the swath than at the edge, adjust the mower height so that the rear and front are within 1/2 inch of the same height. Also, check the blade hardware if the blade is loose.
How to fix Woods TURFKEEPER TK60.20 cutting lower in center?
If your Woods Farm Equipment cuts grass lower in the center of the swath than at the edge, adjust the mower height so that the rear and front are within 1/2 inch of the same height. Also, check the blade hardware if the blade is loose.
Why does my Woods Farm Equipment have frayed edges on the belt cover?
If the belt cover on your Woods Farm Equipment has frayed edges, it may be due to a misaligned belt. Re-align the belt, ensuring it does not rub against any other part while running. Alternatively, the pulley might be misaligned. Inspect to ensure the belt runs in the center of the backside idler, and shim the idler as necessary to achieve alignment.
Provides context and guidelines for using the operator's manual and understanding its content.
Emphasizes operator training, reading manuals, and understanding controls before operation.
Details essential safety checks and preparation steps before starting the equipment.
Outlines critical safety rules for operating the mower, including protective gear and hazard avoidance.
Provides safety guidelines for transporting the mower, including speed limits and weight distribution.
Details safety procedures and precautions to follow before and during maintenance.
Highlights safety considerations when storing the mower, especially regarding bystanders.
Explains the importance of tractor front wheel weight for stability when using attachments.
Provides instructions on how to properly attach the mower to the tractor's 3-point hitch system.
Detailed steps for attaching the mower using a Category 1 hitch system.
Instructions for attaching the mower using a Category 1 quick hitch system.
Guides on connecting and disconnecting the driveline between the tractor PTO and mower.
Procedure to check for interference between mower caster wheels and tractor tires.
Step-by-step guide on how to shorten the driveline for correct mower operation and safety.
Checks for adequate clearance between the driveline and mower deck.
Detailed instructions on how to adjust the mower's cutting height using caster wheels.
Guidance on adjusting the tractor's top link for proper mower attitude and ground following.
Information on the optional front roller to prevent scalping.
Details on installing optional rear anti-scalp rollers to prevent deck corner contact.
Safety and technique advice for operating the mower on slopes and uneven ground.
Procedures and warnings related to transporting the mower.
Instructions for safely detaching and storing the mower from the tractor.
Covers safe startup and shutdown procedures for the tractor and mower.
Provides guidance on ground speed, PTO speed, and cutting techniques for optimal results.
Steps to take if the mower becomes plugged or experiences belt slippage.
Detailed instructions on how to securely block the mower for safe under-machine work.
Provides details on lubrication points, frequency, and types of lubricants required.
Instructions for lubricating the driveshaft slip joint and U-joints.
Details on the importance and function of chain shielding for safety.
Steps to inspect the belt and pulleys for wear and damage before servicing.
Procedure for safely removing the drive belt from the mower's pulleys.
Instructions for correctly installing the drive belt, including precautions.
Steps for safely removing mower blades, including handling precautions.
Guidance on sharpening blades, maintaining balance, and proper edge specifications.
Instructions for installing mower blades, including torque specifications.
Procedures for cleaning the mower after each use to maintain performance and appearance.
Instructions for cleaning the mower before extended storage, including paint care.
Safety procedures for blocking the mower securely before dealer service work.
Instructions for removing and repairing the blade spindle assembly.
Covers gearbox repair limitations, inspection, and seal replacement procedures.
Detailed instructions for proper installation of gearbox seals to prevent leaks.
Procedure for replacing the horizontal shaft seal on the gearbox.
Instructions for safely removing the heavy gearbox assembly from the mower deck.
Procedure for replacing the vertical shaft seal on the gearbox.
Steps to disassemble the gearbox for internal component inspection and replacement.
Instructions for reassembling the gearbox after repair, including parts cleaning.
Instructions for filling the gearbox with the correct type and amount of gear lube.
Steps for disassembling the universal joint assembly.
Instructions for reassembling the universal joint, ensuring proper movement.
Guidelines for dealers to assemble, lubricate, and adjust the mower for delivery.
Procedure for safely removing the mower from its shipping crate.
Detailed steps for assembling the mower's hitch components to the tractor.
Instructions for installing the driveshaft onto the mower gearbox and tractor PTO.
Procedure for filling the gearbox with the correct gear oil.
Instructions for installing the optional chain shielding kit.
Steps for installing the optional front roller assembly.
Procedure for installing optional rear anti-scalp roller brackets and rollers.
Checklist for dealers to ensure the mower is properly assembled and ready for customer.
Checklist for dealers to review with the customer at delivery, covering operation and maintenance.
Exploded view and parts list for the mower's main frame assembly.
Detailed parts list for the mower's main frame assembly.
Exploded view of the mower's gearbox assembly for identification.
Exploded view of the mower's gearbox assembly for specific serial number range.
Exploded view of the mower's driveline assembly for identification.
Exploded view of the mower's driveline assembly for specific serial number range.
Exploded view of the mower's blade and spindle assembly for servicing.
Parts diagram for the optional rear chain shielding assembly.
Parts diagram for the optional front roller assembly.
Parts diagram for the optional rear anti-scalp roller assembly.
Parts diagram for the optional quick hitch bushing kit.
| Brand | Woods |
|---|---|
| Model | TURFKEEPER TK60.20 |
| Category | Farm Equipment |
| Language | English |


