DIGISTAT / DT20RF RECEIVER
SETTING UP THE RF LINK
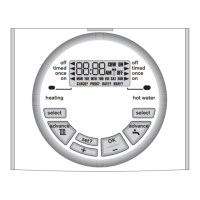
DIGISTAT
INSTALLATION
Receiver set up:
After initial start up, the colon, CH and antenna
symbols should be flashing on the display.
1. Press the set? button 4 times
2. Press the OK button once
3. Press the set? button 4 times; Lrn and OFF
should be displayed
4. Press the + button so the display shows ON and
a flashing antenna symbol. The learn mode is now
ready to receive a signal from the transmitter
during the next two minutes.
Transmitter set up:
1. Take the Digistat Programmer unit and stand near
the boiler.
2. Remove the battery cover and fit the batteries.
How to fit the batteries
Remove the battery compartment by pinching the
tabs and withdrawing down. Replace the spent
batteries with 2 x AA 1.5V alkaline batteries ensuring
correct orientation. Replace the battery compartment
pressing fully home.
3. The symbols on the receiver will stop flashing and
the display will show ‘SSI, Antenna and ON’.
4. Press ‘SET’ on the receiver and the display will
show ‘SSI and Antenna’.
5. After a few seconds the display will show ‘- - -’.
Transmitter battery compartment
DT20RF PROGRAMMER
INSTRUCTION MANUAL
8 716 115 495a (02.2009)
OPERATING & INSTALLATION
INSTRUCTIONS
21
 Loading...