Getting Started – Air Compressor
NOTE: Before operating, make sure the Air Compressor is in a well ventilated
area. On a level surface. Well away from ammable objects. Never paint in
an area without proper ventilation or near potential ignition sources.
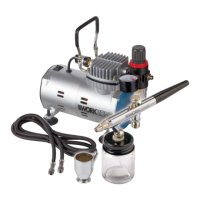
1. The fittings on each end of the braided hose (10) are the same. Connect
one of these fittings to the air outlet fitting (7) connection on the
compressor. Align the threads and tighten the fitting in a clockwise
direction finger tight till firm (Fig A).
2. Connect the remaining fitting on the braided hose (7) to the air brush
inlet fitting (24). Align the thread and screw in a clockwise direction finger
tight until firm (Fig B).
3. Make sure the on/o switch (1) is in the OFF, as indicated by an “O”
on the on/off switch (Fig C).
4. Plug the power cord (2) into a mains socket (Fig D).
5. Turn the on/o switch (1) on the compressor to the ON position as
indicated by an “I” on the on/off switch (Fig E)
NOTE: The compressor automatically runs when the pressure at the
pressure switch falls below 43.5 PSI.
When the pressure at the pressure switch reaches 57 PSI the compressor
will stop.
6. The outlet pressure is controlled by the air outlet regulator (29) which can
be adjusted up or down, from zero PSI to Max 57 PSI, depending on the
operators requirement. The pressure gauge is an indication of the outlet
pressure, and should be read with air flowing through the air brush to
indicate a true reading (Fig F).