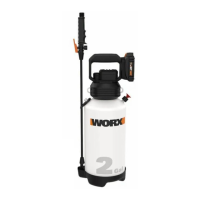
20V 2 Gallon Yard Sprayer EN
10
OPERATING INSTRUCTIONS
NOTE: Before using the tool, read the
instruction book carefully.
INTENDED USE:
This machine is intended for weed killing, pest
control, fertilizing, watering and disinfecting.
ASSEMBLY & OPERATION
ACTION FIGURE
ASSEMBLY
Assembling the shut-off assembly,
wand and nozzle
Attach the shut-off to wand, and
tighten the nut securely. Then attach
the nozzle to the end of the wand and
tighten securely.
NOTE: Both sides of the wand are of no
difference. And the location of O-ring
which are in the nut can be adjusted
according to your need.
See Fig. A
Installing and Removing the Battery
Pack
See Fig.
B1, B2
Checking the battery charge condition
NOTE: Fig. B3 only applies for the
battery pack with battery indicator light.
See Fig. B3
Charging the battery pack
NOTE:
• The batteries are shipped uncharged.
Each battery must be fully charged
before the first use.
• More details can be found in charger’s
manual.
See Fig. B4
OPERATION
Filling the Sprayer
Fill the tank to the desired level, and
you can check the filling marks on the
tank for reference.
NOTE: Before filling the sprayer, make
sure the machine is turned off (Led light
is off). When using, preparing, handling,
spraying or disposing of chemicals,
wear appropriate personal protective
equipment as directed by the chemical
manufacturer.
WARNING:
Never use flammable
or combustible liquids, caustics,
acids, or hot water in this machine.
See Fig. C
Assembling the pump
Install the pump into the tank and rotate
clockwise to tighten.
See Fig. D
Assembling the shoulder strap See Fig. E
Starting
Press the power button to turn on the
sprayer, the LED light will be green and
an audible hum will be heard, which
means the machine is working. And it
will stop once the tank is pressurized,
which may take 30 seconds to several
minutes depending on the size of the
tank and the amount of liquid inside.
See Fig. F1
Spraying
Aim the wand in the desired direction
and depress the lever to spray.
Release the lever to stop.
For continuous spraying, please
depress the lever and lock it in the
depressed position.
NOTE: When the battery power is
low, the LED light will flash green.
After usage, turn off the sprayer, then
remove any chemical and clean the
machine.
See Fig.
F2, F3
Adjustable sprayer nozzle
The nozzle is equipped with two
modes.
Tighten the nozzle nut securely, the
sprayer will spray out thin fog.
Loosen the nozzle nut properly, the
sprayer will throw a long stream of
water.
NOTE: Do not loosen the nozzle nut
overly, which may result in the water
leak.
See Fig.
G1, G2
AFTER OPERATION
After each usage, press the power
button to turn off the machine. You
must first pull up the knob of pressure
release valve to release the pressure of
tank completely. Then rotate the pump
handle counterclockwise to remove
the pump.
See Fig.
H1, H2
Storage
When not in use, store the wand as Fig.
I shown.
See Fig. I
MAINTENANCE
Before any maintenance, please depressurize
the sprayer by turn off the machine and pull of
the pressure release valve until all air pressure
is released.
Pump maintenance
Inspect the pump frequently whether any leaking
occurs around the pump seal. If leaking occurs,
please contact service center for repair.
 Loading...