13
20V Cordless Brushless Paint Sprayer EN
This tool may cause hand-arm vibration
syndrome if its use is not adequately managed.
WARNING: To be accurate, an estimation of
exposure level in the actual conditions of use
should also take account of all parts of the operating
cycle such as the times when the tool is switched off
and when it is running idle but not actually doing the
job. This may significantly reduce the exposure level
over the total working period.
Helping to minimise your vibration and noise exposure
risk.
Always use sharp chisels, drills and blades.
Maintain this tool in accordance with these
instructions and keep well lubricated (where
appropriate).
If the tool is to be used regularly then invest in anti
vibration and noise accessories.
Plan your work schedule to spread any high vibration
tool use across a number of days.
6. CONTROLS AND
FUNCTIONS
Volume knob
Set the liquid flow by
turning the volume knob
on the trigger of the
sprayer
Air flow control
The air flow can be
adjusted from 1-10 by
turning the air flow
control.
Trigger
Pull the trigger to deliver
spray liquid from the
liquid container to the
nozzle assembly, where
it is sprayed.
WIDE
NARROW
Spray Width Lever
The spray width lever
determines the width of
the spray pattern.
Air cap ear
Adjust the spray pattern
by turning the air cap
ears.
Horizontal pattern
(‘up and down’ spraying
motion)
Vertical pattern (‘side to
side’ spraying motion )
7. INTENDED USE
Interior and exterior painting and staining of decks,
outdoor furniture, fences, and walls
8. OPERATING
INSTRUCTIONS
NOTE Please read the instructions carefully
before use.
ASSEMBLY AND OPERATION
ACTION FIGURE
BEFORE OPERATION
Liquid preparation
- Stir the spraying liquid thoroughly.
- Unscrew the container .
- Fill the liquid container to desired
level when the liquid has been appropri-
ately thinned**** and strained.
See
Fig. A1,
A2,A3,A4
Turbine assembly
NOTE :Press and turn lock on/off dial
clockwise to lock on during operation.
See Fig. B1
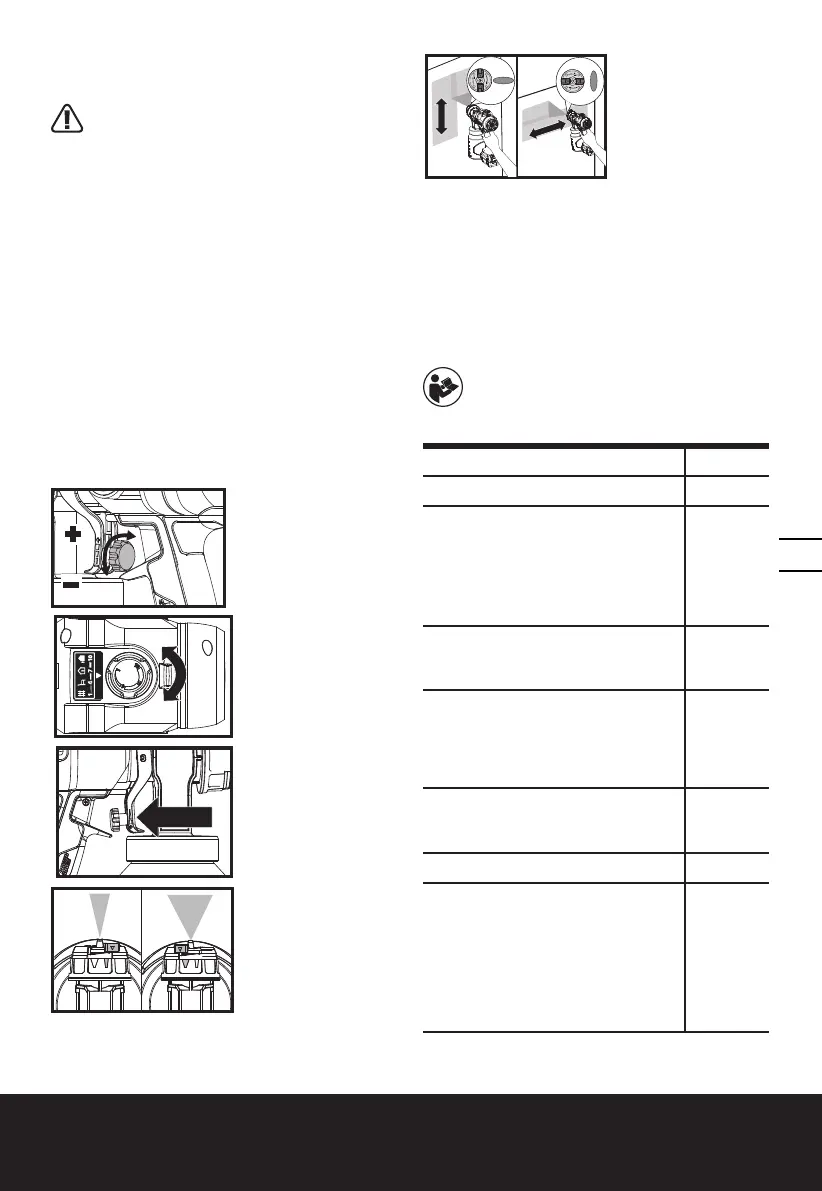
Suction tube assembly
- Tube end should be facing toward the
front of nozzle if spraying downward
- Tube end should be facing toward the
rear of nozzle if spraying upward
See Fig.
B2
Container assembly
NOTE: Make sure the container is
tightened firmly.
See Fig.
B3
Liquid Flow setting
Selecting the right nozzle according
to your work
Use the srewdriver(not supplied) to
take out the nozzle and replace it with
the right one according to your work.
NOTE The smaller the diameter of
nozzle is,the more delicate work it can
deal with.
See Fig.
C1,C2,C3
 Loading...