LOCKED-ON
Should the hydraulic torque wrench be “locked-on” after the final cycle, push down the
remote control advance button once more (to build pressure) and while maintaining this
pressure, pull back on the accuracy assurance pawl lever (located on the side of the tool).
Release the remote control advance button, while continuing to push down on the accuracy
assurance lever (this will allow the hydraulic torque wrench to be removed easily).
press down
FIG10
XLCT SERIES
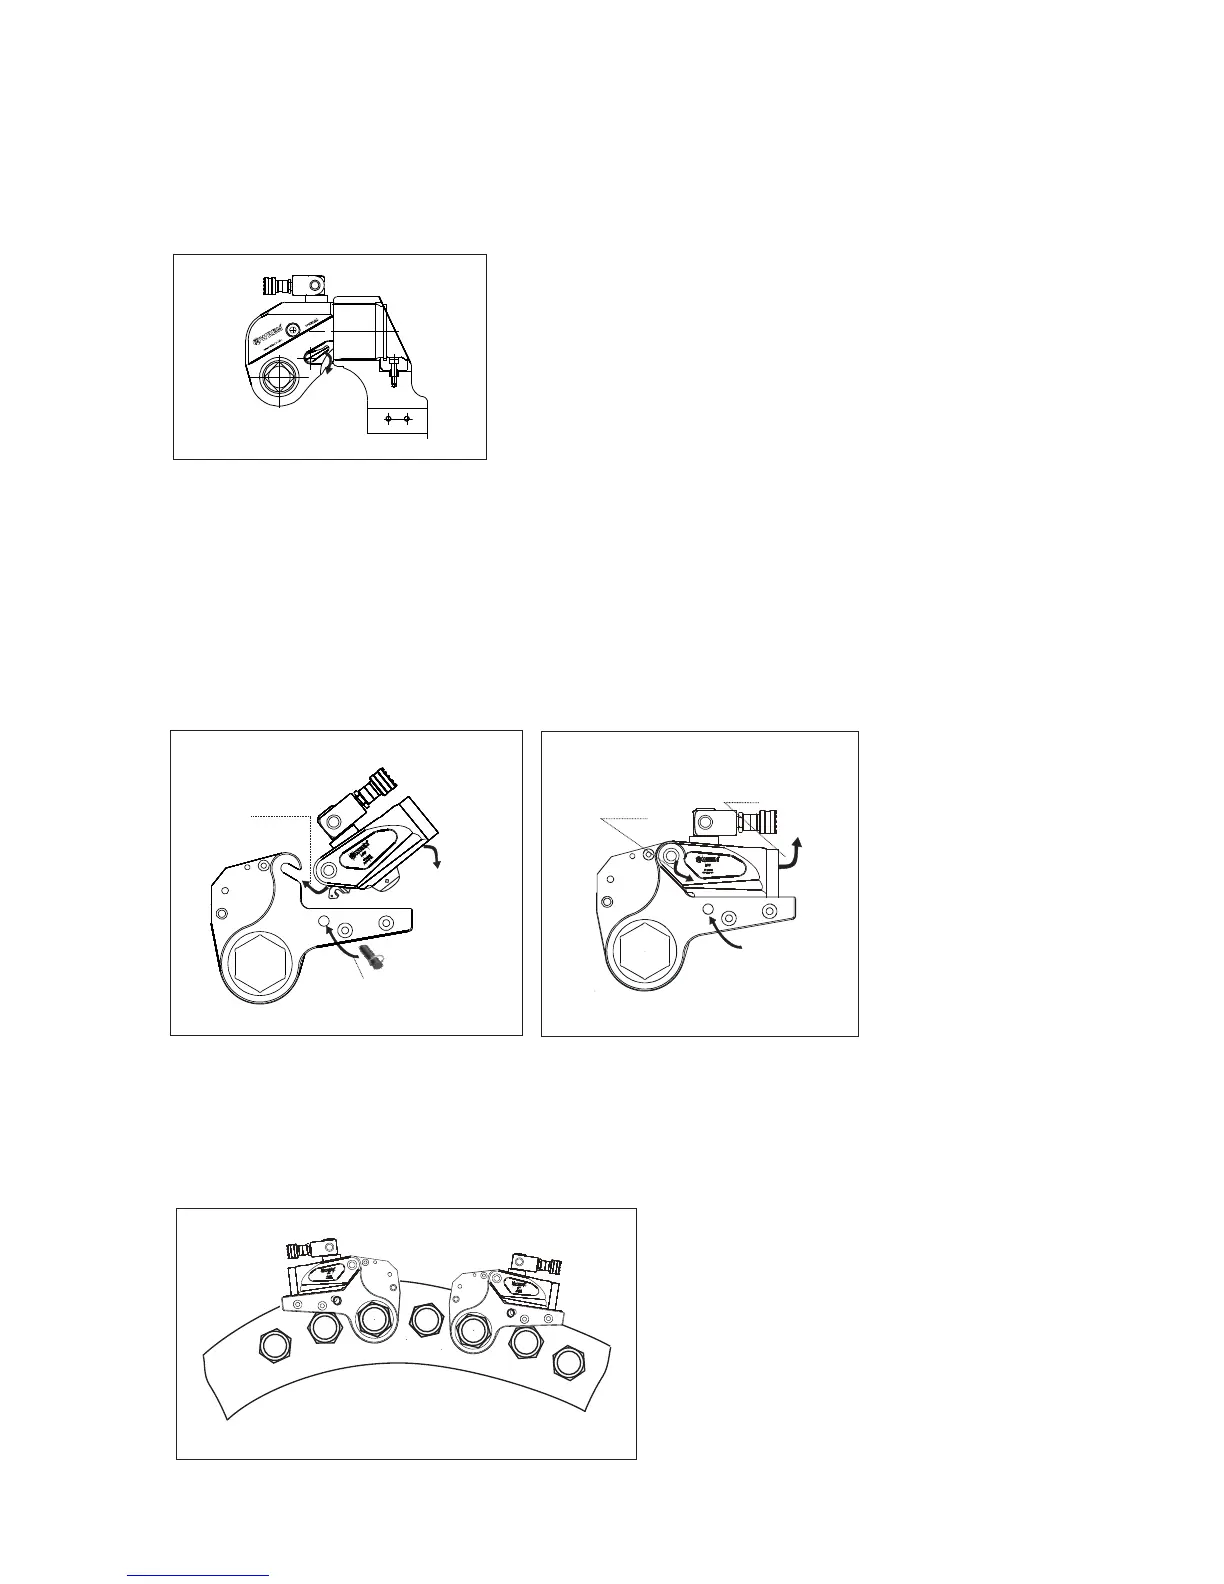
The Ratchet link and the power head assembly and disassembly
Insert the hex ratchet links. The low profile hex ratchet links are inserted and removed from
the power head as follows:
The “hook” described by the link’s drive plate is inserted around the fixed pin of the power
head and the link is swung down to rest along the base of the power head cylinder. At this
point, the link pin holes of the power head and link will align. Insert the link pin to secure.
Pull out the pin, pull up the power head, and then along the groove direction, disassembly
the power head and the ratchet link.
assembly
disassembly
1. insert direction
2. press to the end
3. insert the pin
1. pull out the
2. take the power
3. the hook groove automatic
FIG 11 FIG 12
Direction position
Setting for tightening or loosening the nut:
The position of the tool relative to the nut determines whether the action will tighten or loosen
the nut. The power stroke of the piston rod will always turn the hex ratchet toward the shroud.
FIG 13
8
The nut turns clockwise for tightening and counterclockwise for loosening.
direction
combined pin
head up
down back, separated from
the wrench
lossing
tightening
Low profile hydraulic torque
wrench direction diagram


 To Next Page