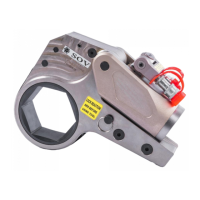
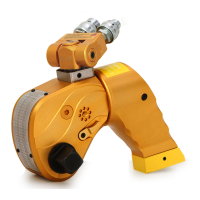
Preparation Determined the loose(tighten) nut size , select appropriated power head and
ratchet link and reducer inserts.
CONNECT THE POWER PACK
Use twin hose to Connect the high pump pressure outlet(H OR A) with the high pressure
outlet of hydraulic wrench,low pressure outlet of the pump to low pressure outlet of the
hydraulic torque wrench。Insert the quick couple sleeve into the end,then screw tighting
by no space.
Check carefully whether the twin hose joint connection is reliable, please be sure the oil in
enough.The pump power plug power supply.
WARNING No oil shortage !
TEST RUN
1. Put the wrench assembly in space, first start to finish, Check whether the rotating ratchet
normal return or not, if the rotation is not normal, Maybe the hook position does not
correspond between the power head and ratchet link,open to check.
2. Turn on the pump power switch, start the pump, then press the lock button to confirm the
pump is running normally.
3. By pushing the remote control advance button, the rear of the hydraulic torque wrench
will be pushed back until the reaction arm will make contact with the reaction point.
4. Continue to hold the advance button as the cassette turns until you hear an audible “click”
which will signify the hydraulic cylinder inside the hydraulic torque wrench is fully extended
and will not turn the socket further. Release button.
5. Continuing to hold the remote control advance button, will result in a rapid buildup of
pressure to the point where the gauge reads what the hydraulic power pack was preset to
prior to applying the hydraulic torque wrench.
IMPORTANT: The reading of full preset pressure after the cylinder is extended DOES
NOT INDICATE that this pressure (torque) is applied to the bolt/nut. It only indicates
that the cylinder is fully extended and cannot turn the socket further, until the tool
automatically resets itself.
6. Releasing the remote control button will automatically retract the cylinder. The hydraulic
torque wrench will automatically reset itself and the operator will hear an audible “click”
indicating he can again push the remote control button and the cassette will turn. Each time
the cylinder is extended and retracted, it is called a cycle. Successive cycles are made until
the tool “stalls” at the preset Torque/PSI with an accuracy of +/-3%. Repeatability is +/-1%.
Please repeat again and again, make the wrench turn without loading, observe the
wrench tightening or loosening,no abnormalities, can be put into the nut directly.
IMPORTANT: ALWAYS ATTEMPT ONE FINAL CYCLE TO INSURE THE “STALL” POINT
HAS BEEN REACHED.
REMARKS: When the hydraulic torque wrench not in use, ,you may turn off the lock button,
if long time no using the wrench, please shut off the pump motor switch.
9
OPERATION
Setting the pressure on the hydraulic power pack:
To set the pressure on the pump, follow this procedure:
Loosen the locking ring below the “T” handle on the hydraulic power pack external pressure
regulator. Then, turn the “T” handle counterclockwise until it turns freely and easily.
Turn the hydraulic power pack on. Using the hydraulic power pack remote pendant, push the
advance switch (or button on the air hydraulic power pack) and hold it.
While holding the hydraulic power pack in the advance mode, slowly turn the “T” handle
clockwise and observe the hydraulic power pack pressure gauge rise.
Note: Always adjust the regulator pressure UP - never down.
When your gauge reaches the predetermined pressure, stop turning the “T” handle and
let the gauge settle.
If the pressure continues to rise above the predetermined pressure, release the back
pressure slightly by turning the “T” handle counterclockwise. Then, depress the advance
switch on the remote and slowly bring pressure up to the predetermined pressure.


 To Next Page
 Loading...