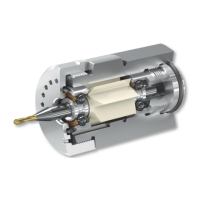
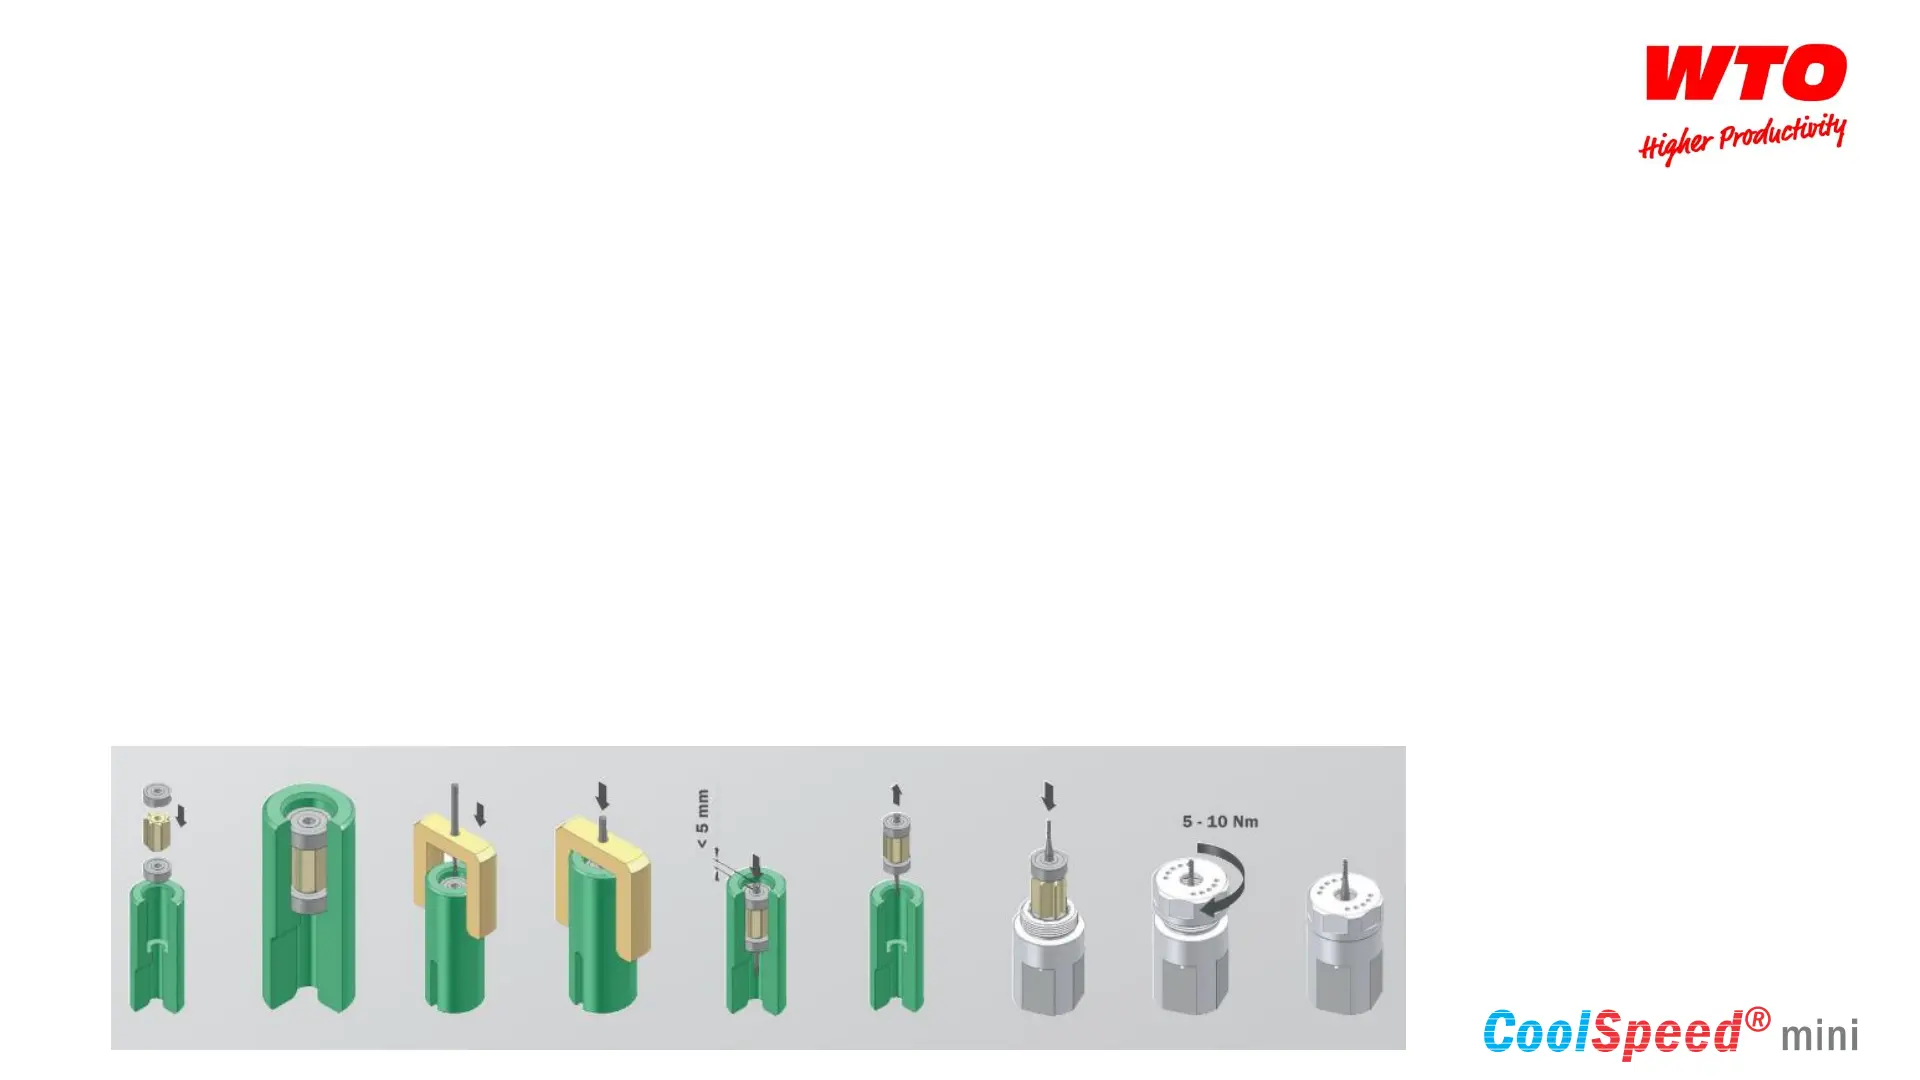
Tool replacement
• In order to replace a new tool, it is necessary to assembly a new replacement kit and change the tool, bearings and turbine
with new set.
• In order to change the replacement kit, open the front cover and remove the used replacement kit.
• In case that the rear bearing is stacked inside the CoolSpeed mini housing, it is essential to remove the CoolSpeed mini from
the tool holder and open the rear cover.
• Normally, the rear bearing may be easily removed together with the tool, turbine and front bearing.
• Push carefully the new replacement kit inside the CoolSpeed mini, and close the front cover.
• Before Front cover assembly, pay attention to the O-Ring inside the cover. Make sure that the seal in the designated slot.
• Do not use extensive force (Torque) to close the front cover. No Hammer or extensive tube is necessary.
• After front cover closing, rotate the cutting tool with your hand, make sure it turns freely. If not open and check.
 Loading...