Quick-Start Guide
Wyse
®
P Class Zero Clients, Model PxN
Product: P25
See accompanying documents in the shipping carton for License Agreement and Warranty information. To find the latest Quick-Start Guide, go to
http://www.wyse.com/manuals
and click on the name of your zero client.
Important: A printed copy of the Wyse Technology End User License Agreement is included in the shipping box and provided for your reference only.
The license at http://www.wyse.com/license
as of the purchase date is the controlling licensing agreement. By copying, using, or installing the software or
the product, you agree to be bound by those terms.
Important: If you use Wyse Device Manager Server software for managing your Wyse zero clients, download the latest version to ensure
compatibility at http://support.wyse.com/selfservice.html
.
Caution: Improper connection, mounting, or use of this product could result in component failure or undesired interference. Read Caution
Statements before setting up and operating the zero client.
The Wyse P25 zero client is for use with PC-over-IP
®
(PCoIP
®
)
protocol environments. The zero client connects to a host server
which is PCoIP capable.
Before setting up and using the zero client, you must have a properly
installed PCoIP environment that it can access. This guide will help
you to set up the zero client and establish a remote connection to your
host server using PCoIP
technology, enabling you to use applications
and desktop peripherals as if you were using them locally.
Note: PCoIP technology is designed to deliver a user desktop from a
centralized host server across standard IP networks – including full
DVI dual monitor video, complete USB 2.0 compatibility, and full-
duplex high-definition audio.
Before setting up and operating the zero client, read all Caution
Statements. Refer to the figures and proceed as follows:
1. Place the zero client on a desk; make sure the monitor and the
zero client are turned off and disconnected from AC power.
2. Make all desired connections. The monitor, keyboard with mouse,
and Ethernet network are required. Additional connections of
peripheral devices may be made at this time.
3. Connect the power adapter to the zero client power input before
connecting to a 100-240V AC, 50-60 Hz electrical outlet.
4. Press zero client Multifunction power button to apply power. The
power button will light blue; wait for the monitor to display the On
Screen Display (OSD).
LED indicators* include:
* For detailed LED indicators information, go to the Wyse Knowledge Base at
http://www.wyse.com/kb
and search for solution 22671.
Note: If the monitor does not show the OSD, check all connectors
and make sure the monitor and zero client are turned on.
Note: For more information refer to the user and administrators
guides, or contact your Wyse sales representative.
Initial Environment Setup
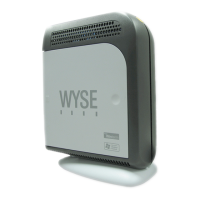
Setting Up Your Zero Client
Status LED Bi-color light for connected /not connected (green/
amber)
Power LED Single light for power on/off (blue)
Components may vary based on model and location.
1
Warning: Adjustment of the volume control or the equalizer beyond the center position may
increase the earphones/headphones output voltage and sound pressure level.
2
Not all USB devices are supported; check with Wyse or your Wyse representative to find out if a
particular device is supported on your zero client.
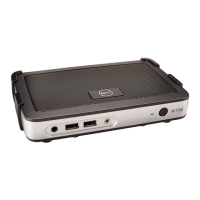
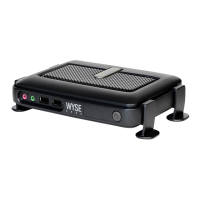
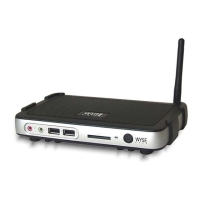
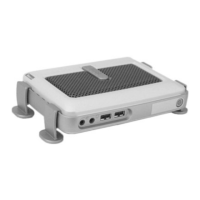
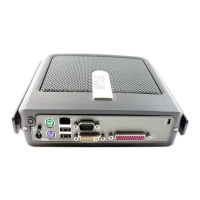
Features
1 Combination audio/microphone jack
1
8 DVI-I port
2 USB 2.0 port (2)
2
9 Product information tab
3 Line out/Speaker out
1
10 Network port, 10/100/1000Base-T
(or) SFP/Mini-GBIC slot
4 Status LED 11 +12VDC Power adapter input
5 Multifunction power button/LED 12 Kensington lock slot
6 USB 2.0 port (2)
2
13 Horizontal stand/VESA mount
7 DisplayPort connector
14 PS/2 mouse port located on
keyboard