EasyManua.ls Logo

Xantech PA435X - User Manual

Xantech PA435X
20 pages
Print Icon
To Next Page IconTo Next Page
Loading...
INSTALLATION INSTRUCTIONS
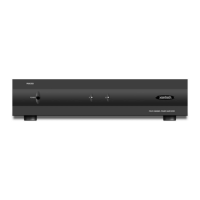
MODEL PA435X
FOUR CHANNEL POWER AMPLIFIER
TABLE OF CONTENTS
SectionTitle Page
SAFETY INSTRUCTIONS - READ BEFORE OPERATING EQUIPMENT................................................................................................................2
GENERAL INFORMATION.........................................................................................................................................................................................3
PA435X PANEL AND FEATURE DESCRIPTIONS ...................................................................................................................................................5
INSTALLATION - PHYSICAL LOCATION AND MOUNTING....................................................................................................................................8
CONNECTING THE PA435X.....................................................................................................................................................................................9
Stereo Mode Connections................................................................................................................................. 9
Speaker Phasing.............................................................................................................................................10
Mono Mode Connections .................................................................................................................................10
Bridged Mode Connections ..............................................................................................................................11
Connecting the REMOTE MASTER ON/OFF MUTE CONTROL.........................................................................12
A Multi-Zone System Diagram Using The PA435X and MRC88..........................................................................13
TROUBLE SHOOTING.............................................................................................................................................................................................15
SPECIFICATIONS ....................................................................................................................................................................................................16

Questions and Answers

  • H
    Holly GriffinJul 30, 2025
    Why does my Xantech PA435X sound cut in and out?
    • B
      blarsenJul 31, 2025
      If the sound from your Xantech Amplifier cuts in and out every 3 to 5 seconds, it might be because the speaker load impedance is less than 4-Ohms in Stereo mode, or less than 8-Ohms in Bridged mode. To resolve this, make necessary changes to your speakers to achieve a higher impedance.
  • R
    Rita FisherAug 5, 2025
    What to do if Xantech PA435X Amplifier becomes very warm and shuts off?
    • B
      Beth SolomonAug 5, 2025
      If your Xantech PA435X Amplifier becomes very warm, shuts off, and doesn't automatically turn back on, set the POWER switch to the MANUAL OFF position for 15 seconds, then back ON. If you're using the REMOTE ON/OFF jack, unplug it for 15 seconds, then plug it back in.
  • R
    Rhonda SchultzAug 11, 2025
    What to do if Xantech PA435X Amplifier does not turn off?
    • A
      Anthony WardAug 11, 2025
      If your Xantech PA435X Amplifier doesn't turn OFF even when both REMOTE input voltages go to 0 Volts and the logo remains illuminated, ensure that the Front Panel POWER switch is set to the REMOTE ON/OFF (OUT) position.
  • C
    chapmanhenryAug 17, 2025
    Why is there no sound from CH2, CH4 on my Xantech PA435X Amplifier?
    • F
      Frank ClarkAug 17, 2025
      If you're not getting any sound from CH2 and CH4 on your Xantech Amplifier when stereo operation is desired, it's likely that the BRIDGED/STEREO switch is incorrectly set to the BRIDGED position. Set the switch to the STEREO position.
  • S
    Sarah RobertsAug 23, 2025
    How to troubleshoot Xantech Amplifier when the power indicator doesn't light?
    • J
      Joann CurtisAug 25, 2025
      If the rear panel power indicator on your Xantech Amplifier doesn't light up and there's no sound, check the line cord to ensure it's making good contact in a live AC outlet. If REMOTE CI jacks are being used, verify that the applied voltage is between +5V and +30V DC with the correct polarity.

Summary

Safety Instructions

General Information

Cost and Size Efficiency

Features four 35-watt amplifiers, enabling 2-zone driving with 35-watt stereo per zone.

Output Configuration Flexibility

Amplifier pairs can be bridged for various channel and power output configurations.

Remote ON;OFF and Mute Control Jacks

3.5mm Stereo Mini Jacks for remote power ON/OFF and mute via DC voltage.

Adjustable Input Level Control

Adjustable input levels (0.2V-3V) per stereo pair for gain control.

Low Impedance Speaker Support

4-Ohm safe in stereo, 8-Ohm safe bridged, supports dual 8-Ohm speakers.

Panel and Feature Descriptions

Front Panel Overview

17" x 3.5" panel for shelf mounting, unit measures 4" high with feet.

Power and Standby Switch Operation

Front switch controls standby mode or manual power ON/OFF. Rear switch must be ON.

Status LED Indicators Explained

Indicators for each channel pair showing ON, CLIPPING (RED), or OFF/STANDBY status.

Illuminated Logo Indicator

Backlit logo indicates amplifier is ON. If LEDs are OFF but logo is ON, indicates STANDBY.

Unit Feet for Ventilation

Provides 1/2" spacing for ventilation when shelf mounted. Do not remove.

Line Input Connections

RCA-type jacks for audio inputs, marked LEFT-A/RIGHT-A, LEFT-B/RIGHT-B for stereo pairs.

Input Level Adjustment Control

Screwdriver adjustable control (0.2V-3V) for input level per stereo/bridged pair.

Mode Selection Switch

Switches amplifier pair between STEREO (35W/ch), MONO (summed input), and BRIDGED (70W).

Fuse Specification and Replacement

Specifies fuse ratings for 120V (6.25A) and 240V (3.15A) versions. Use exact replacement.

Speaker Terminal Connections

Plug-in 4-terminal connectors for speaker wire up to 12 gauge.

Grounding Screw for Noise Reduction

Provides chassis connection to earth ground for noise reduction.

Remote Master ON;OFF and Mute Control

Mini jacks for remote power ON/OFF and mute via 5-30V DC control voltage.

AC Power Cord Receptacle

Standard IEC receptacle for power cord connection.

Rear Panel Power Indicator LED

Indicates power ON/OFF status, whether remote or manually controlled.

Master AC Line Power Switch

Turns power OFF to the entire PA435X, must be ON for other functions.

Physical Location and Mounting

Convection Cooling Requirements

Relies on natural airflow through bottom and top perforations for heat dissipation.

Equipment Cabinet Installation

Requires 2 inches space above, large openings below for airflow.

Ventilation with Heat-Generating Components

Requires closer attention to ventilation when other heat sources are present.

Use of Cooling Fans

Fans can be used to ensure constant airflow if necessary.

Rack Mounting Considerations

19" rack mounting requires RU spacing and an appropriate kit.

Cable Management for Airflow

Allow strain relief and dress wires to avoid blocking airflow.

Shelf Mounting Guidelines

Designed for flat horizontal surfaces or 19" racks.

Connecting the PA435 X

Stereo Mode Connection Guide

Connect RCA cables to inputs, set MODE to STEREO, connect speakers observing polarity.

Ensuring Correct Speaker Phasing

Ensure speakers are connected 'in phase' for stable imaging and bass response.

Mono Mode Connection Guide

Connect mono output to LEFT/RIGHT input, set MODE to MONO, connect speakers.

Bridged Mode Connection Guide

Connect RCA cables to LEFT/RIGHT, set MODE to BRIDGED, connect single speaker to outer terminals.

Remote Master ON;OFF and Mute Control

Remote ON;OFF Standby Control

Uses TIP signal on stereo jack for ON/OFF or STANDBY based on voltage level.

Remote Mute Control Function

Uses RING signal on stereo jack to mute/unmute audio output based on voltage.

Multi-Zone System Diagram with MRC88

Connecting MRC88 Zones 7 & 8 Audio Inputs

Connect MRC88 Preamp Outputs for Zone 7 (A) and Zone 8 (B) to PA435X inputs.

Connecting MRC88 Remote Control Jacks

Connect MRC88 Remote Amp CO1 to CI1 and CO2 to CI2 for remote control.

Setting Input Level Adjustment for MRC88 Match

Adjust PA435X input levels to match MRC88 standard output for Zone 7 & 8.

Troubleshooting Common Issues

Troubleshooting: Rear Panel Power Indicator

Check line cord, AC outlet, and remote voltage/polarity for no power/sound.

Troubleshooting: No Sound in Stereo

Check MODE switch setting; ensure it is set to STEREO, not BRIDGED.

Troubleshooting: Intermittent Sound

Check speaker load impedance; ensure it's above 4-Ohms (stereo) or 8-Ohms (bridged).

Troubleshooting: Remote Power OFF Failure

Ensure front panel POWER switch is in OUT (REMOTE) position.

Troubleshooting: Overheating and Shutdown

Check POWER switch, reset, or unplug/re-plug if overheating causes shutdown.

Troubleshooting: Red Front Panel LED

Indicates clipping or overheating. Correct faulty condition.

Product Specifications

Power Output Ratings

Details continuous and short-term power output for stereo and bridged modes.

Frequency Response and THD

Specifies frequency response (12Hz-55kHz) and rated total harmonic distortion (<0.08%).

Damping Factor and S;N Ratio

Provides damping factor (>100) and S/N ratio (>100 dB) specifications.

Input Sensitivity and Impedance

Details input sensitivity range (0.2V-3V) and impedance (22k-70k Ohms).

Power Source and Consumption

Specifies power source (120/240VAC) and power consumption at various load levels.

Remote Control Voltage and Fuse Rating

Details remote control voltage (+5V to +30V) and line fuse ratings.

Physical Dimensions and Weight

Lists unit dimensions (17"Wx4"Hx11.5"D) and weight (20.4 lbs).

Xantech PA435X Specifications

General IconGeneral
Channels4
Power Output35W per channel
RMS Power per channel @ 4 Ohms35W
Bridged RMS Power @ 8 Ohms70W
Gain32dB
Power Consumption200W
Frequency Response20Hz - 20kHz
Output Impedance8 Ohms
Signal to Noise Ratio>90dB
Total Harmonic Distortion<0.1%
Damping Factor200
ProtectionShort circuit, Thermal

Related product manuals