Xenex Disinfection Services LLC- Confidential and Proprietary Information.
12082017 Original Instructions. 730-00009-02
xenex.com | 866-867-9799 | page 2
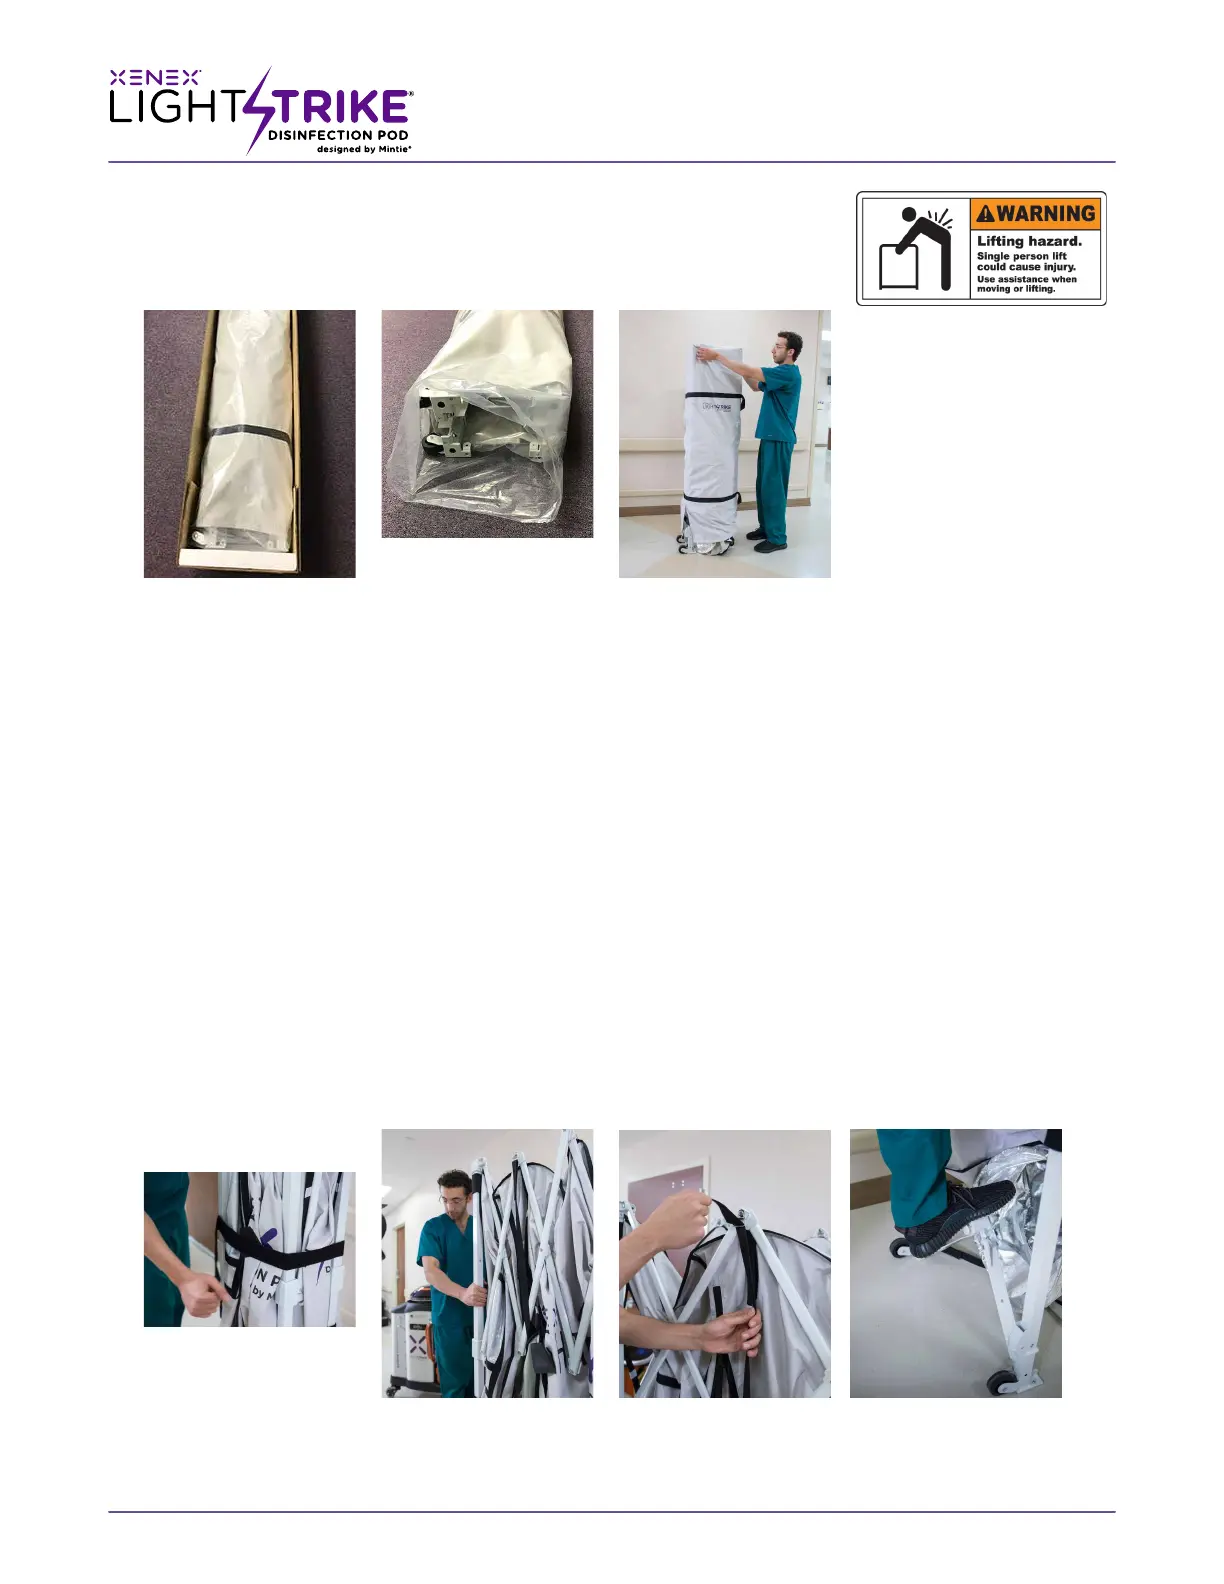
UNPACKTHEPOD / SETUP
LightStrike Disinfection Pod™ Shipping Contents
Your LightStrike Disinfection Pod™ is packaged in a single box, pre-assembled
and ready to use.
(Fig: 1)
Unpack LightStrike Disinfection Pod™
1. Release the bands that secure the shipping box and remove the lid. (Figs: 1)
2. Open the box and remove pod and plastic sleeve.
3. Set the pod upright on its wheels and remove the cloth storage cover.
Set Up: Initial Extension:
The pod envelope comes installed in the recommended storage position on the frame.
1. Remove the black velcro storage belt from the LightStrike™ pod and store it with the cover.
(Fig:1-A)
2. Stand with wheels of pod facing you, place hands on corner posts closest to you, li them slightly off the
ground and step backwards. Carefully spread open the frame.
(Fig 1-B)
3. Now release two Fig1-B Velcro suspension straps at top of pod and two Velcro straps above the locking
corners on right side
(arrows in red, Fig 1-C)
4. Press center push plate of the lower end truss on floor/ground. It is in place when it snaps flat on the
ground. Repeat this step on opposite end of the frame.
(Fig 1-D)
WARNING! CASE IS
GREATER THAN SEVENTY
FIVE (75) POUNDS
(Figs: 1)
(Fig: 1A) (Fig: 1B) (Fig: 1C) (Fig: 1D)