INSTALLING THE DRAIN ASSEMBLY
For ease of installaon we recommend that the drain assembly be installed before installing the sink into the counter
top.
1. Remove the drain assembly from the box and idenfy the following parts:
INSTALLING THE DRAIN ASSEMBLY
a. Drain Plug/Strainer Basket
b. Upper Drain Fing
c. Rubber Gasket
d. Paper Gasket
e. Locknut
f. Tailpiece
g. Threaded Coupling
Sink Boom
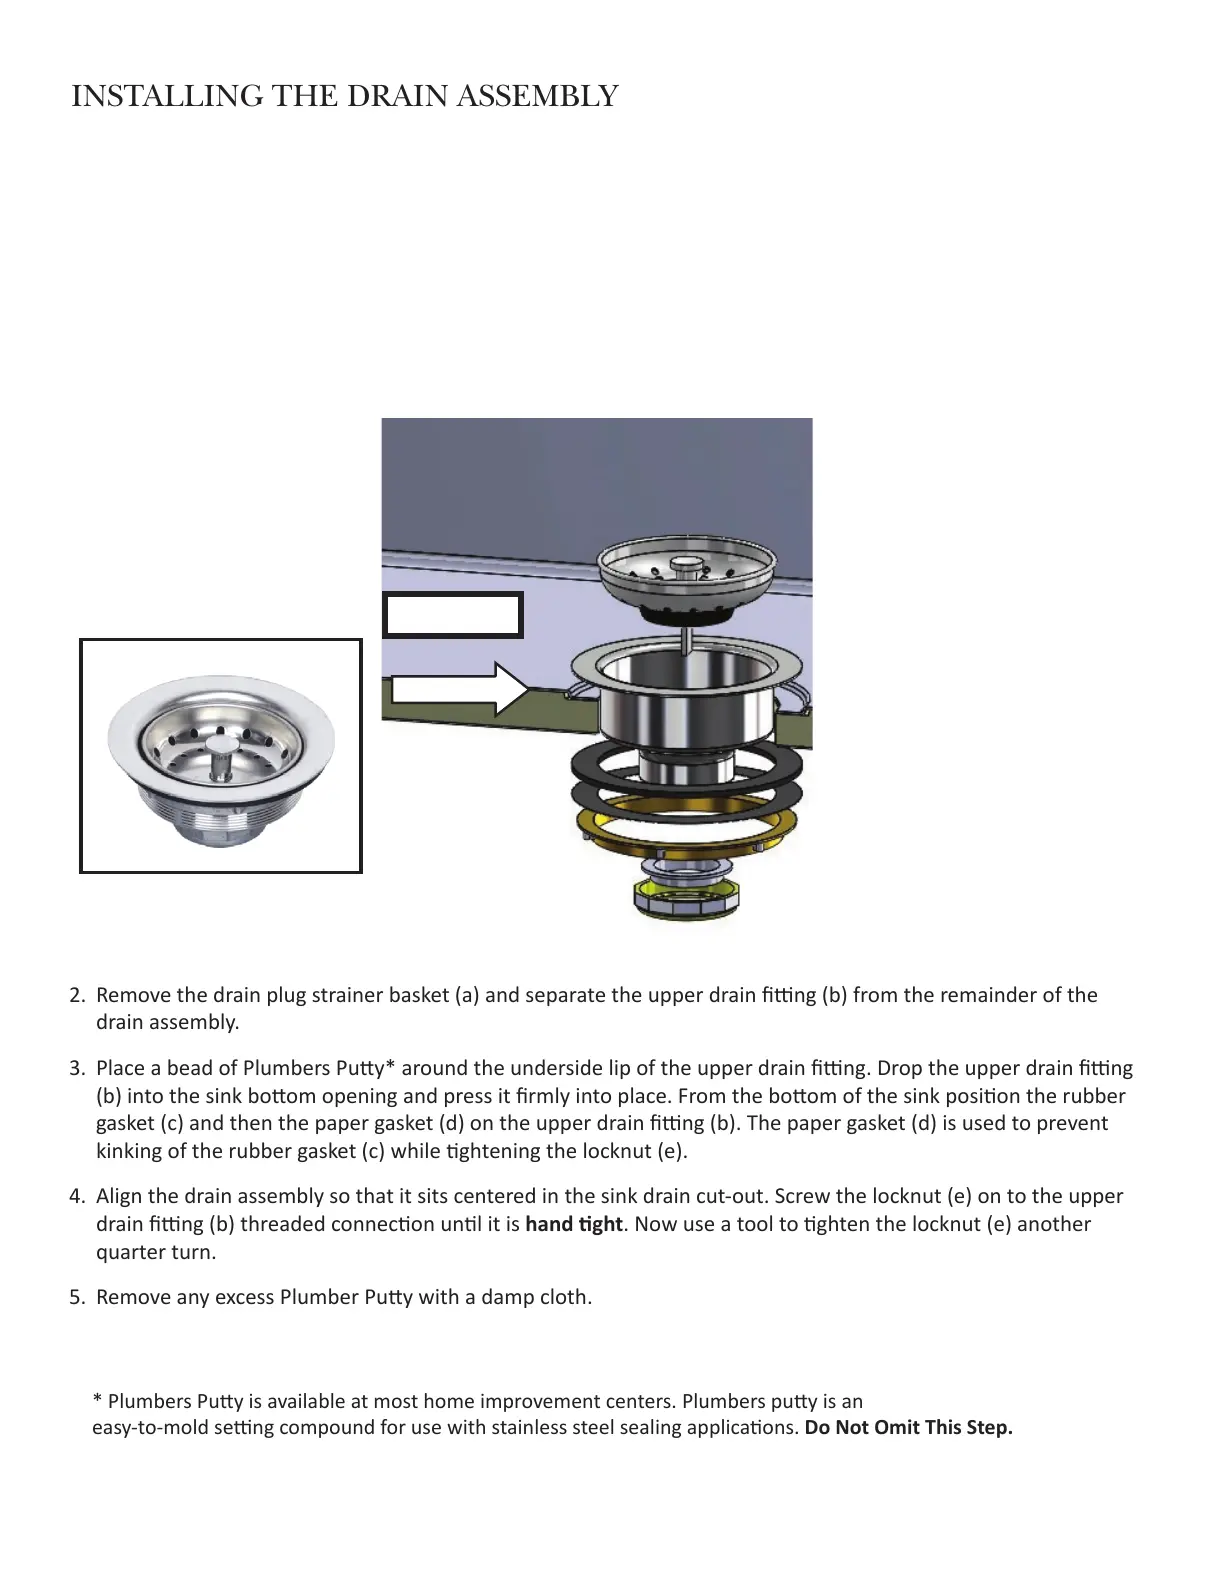
2. Remove the drain plug strainer basket (a) and separate the upper drain ng (b) from the remainder of the
drain assembly.
3. Place a bead of Plumbers Puy* around the underside lip of the upper drain ng. Drop the upper drain ng
(b) into the sink boom opening and press it rmly into place. From the boom of the sink posion the rubber
gasket (c) and then the paper gasket (d) on the upper drain ng (b). The paper gasket (d) is used to prevent
kinking of the rubber gasket (c) while ghtening the locknut (e).
4. Align the drain assembly so that it sits centered in the sink drain cut-out. Screw the locknut (e) on to the upper
drain ng (b) threaded connecon unl it is hand ght. Now use a tool to ghten the locknut (e) another
quarter turn.
5. Remove any excess Plumber Puy with a damp cloth.
* Plumbers Puy is available at most home improvement centers. Plumbers puy is an
easy-to-mold seng compound for use with stainless steel sealing applicaons. Do Not Omit This Step.
Sink Opening
1/2” NPSM
Waste Outlelet