5
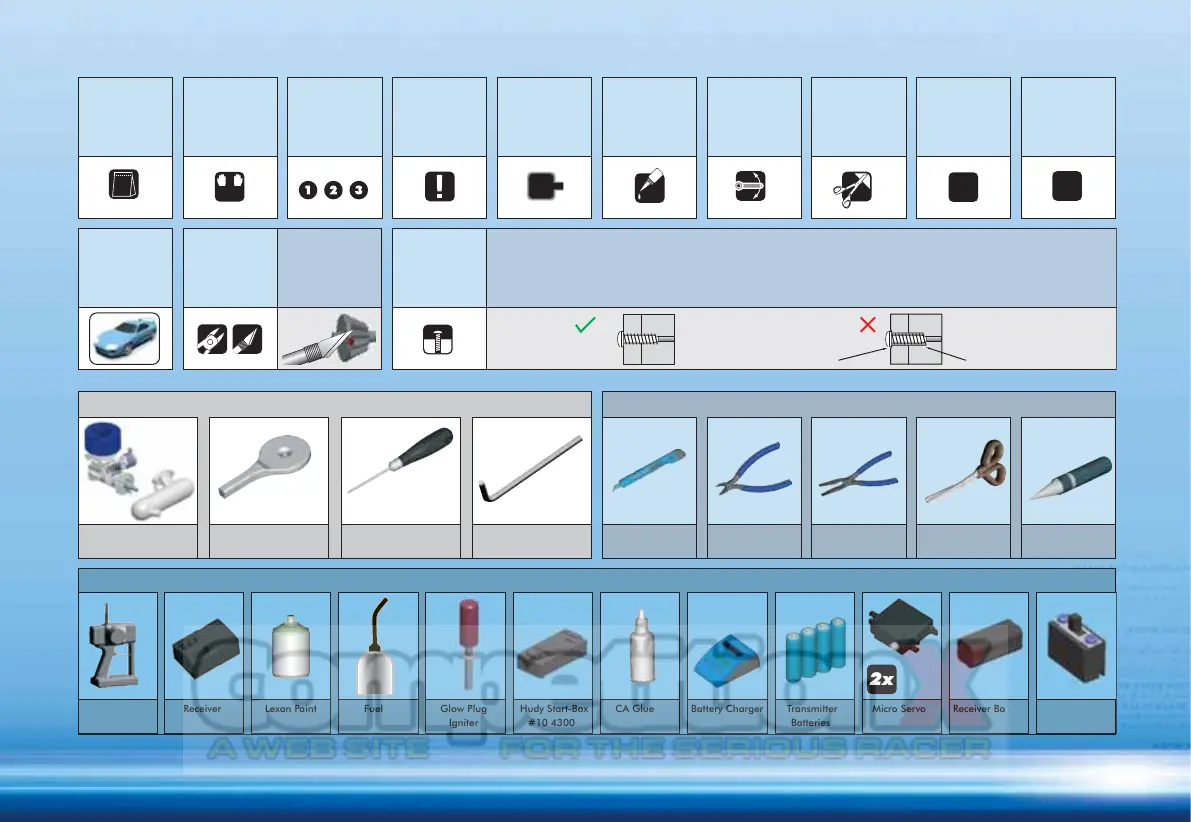
SYMBOLS USED
TOOLS REQUIRED
INCLUDED
EQUIPMENT REQUIRED
INCLUDED IN #38 0921
Hobby Knife Side Cutters Needlenose Pliers Curved Scissors Hole Reamer
1:1
L=R
1
CA
2x
C
Self-tapping screws cut threads into the parts when being tightened. Excessive force may permanently damage
parts when tightening screws. It is recommended to stop tightening when the part is attached or when some
resistance is felt after the threaded portion enters the plastic.
Overtightened
CORRECT WRONG
The threads are stripped.
Micro ServoReceiverTransmitter
Engine + Muffler
Receiver Battery Switch with
Cables
Battery Charger Transmitter
Batteries
CA GlueLexan Paint Fuel Glow Plug
Igniter
Hudy Start-Box
#10 4300
(Typically AA type)(Ni-MH
recommended)
Differential Assembly
Tool
Phillips Screwdriver 1.5mm Allen Wrench
Assemble as
many times
as specified
(here twice)
Cut off
remaining
material
Cut off
remaining
material from all
plastic parts.
Cut off
shadded
portion
Ensure smooth
non-binding
movement
Apply instant
glue
Pivot ball
type used
Pay attention
here
Assemble in
the specified
order
Assemble left
and right
sides the
same way
Part bags
used
True-to-scale
diagram
Car
orientation
Tighten screw
gently
2x