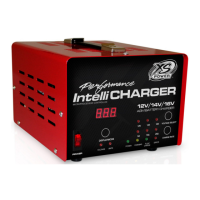
XS Power IntelliCHARGER User Guide
Chapter 2
Charging Lead-Acid Batteries
WARNING:Beforeyoustarttochargebatteriesreadthe“ImportantSafetyInstructions”onpage(1)
and take all safety precautions when working with batteries.
The IntelliCHARGER has been designed to provide fully automatic recharge of 12V, 14V and 16V AGM and
gel-cell batteries.
To charge your 12V, 14V or 16V battery:
1) If possible, disconnect all loads from the battery, by removing battery cables, opening a
disconnect switch, or switching loads off.
CAUTION!
Although this is best, in a racing environment this may not be possible. Supplemental
loads such as an electric water pump or cooling fans may be operated while charging
during stage one. Please note though that supplimental loads will reduce the amount of
amperage available to the battery. The charger detects that a battery is fully charged when
its charging current drops below a preset limit in a specific elapsed time. The presence of
electrical loads on the battery will interfere with this process. Therefore when the charger
is in stage two-absorption charging it is necessary for the battery to be isolated from loads.
The IntelliCHARGER is in stage-two when the charge rate is declining.
2) Selectthecorrectbatteryvoltage.
3) Select the correct charging rate.
(TheXSPowerPerformance16VAGMbatteryshouldbecharged
at15Awhenattheshopor25Aforrapidchargingatthetrack.)
4) Connecttheredpositive(+)clipofthechargercablestothepositive(+)terminalofthe
vehicle battery.
5) Connecttheblacknegative(–)clipofthechargercablestoasolidchassisground.Ifthisis
notpossible,connectittothenegative(–)batteryterminal.
6) FlipthepowerswitchonthefrontpaneltoON.
The microprocessors will analyze the battery and then after a short delay, the “Charging Status”
indicatoronthefrontpanelwillilluminatebeginningthethree-stagechargingsequence.During
charging, the charging current can be reset to a different charge rate if necessary.
CAUTION: Do not change the voltage type during charging. Use the correct battery type at all times.
During stage one-bulk charging, the amperage will begin at 20A. During stage two-absorption
charging, the amperage will start to fall to zero as the battery comes up to 100%. When the
charging process is complete, the Charging indicator light will go out and the Float Charge
indicator will come on. The cooling fan inside the charger will stop and the battery can be left in
this state indefinitely.
*Notethatthechargerwillautomaticallyrestartthechargingsequenceifthechargecurrentrises
above a factory preset threshold.
7) Whencomplete,flipthepowerswitchtoOFF.
8) Removetheblacknegative(–)clipandtheredpositive(+)clipfromthevehicle’sbatteryterminals.
Operation
5

 Loading...