Do you have a question about the XTM 379449 and is the answer not in the manual?
Ensure vehicle has correctly fitted roof racks before installation.
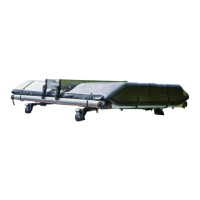
Recommended placement of the tent in the load-bearing position.
Adjust tent to roof center, ensuring rear door can open/close.
Slide M8x50 bolts into rails, 8 total.
Replace plastic covers of your roof racks.
Use plastic nuts to fix M8x50 bolts and U-shape stators at all four corners.
Open tent cover and run power cord to 12V socket.
Release all buckles around the tent base.
Release the buckle on the ladder.
Ensure power is connected, press "UP" on remote to set up.
Wait a couple of minutes for the tent to set up automatically.
Hold ladder and pull down; it will open slowly.
Pull ladder 180 degrees to lock automatically, then place on ground.
Push the hard top up from the bottom gently.
Once open, the hard top will fit to the right side automatically.
Press the hard top from up to down.
Push the ladder lock up.
Ladder unlocks and can be folded down; do not push lock when in use.
Lift up the ladder gently.
Place the ladder onto the hard top.
Ensure power is connected, press "DOWN" button on remote.
The whole tent will be folded down automatically.
Make sure the groove is cleaned before usage.
When folding down, ensure the tent is dry.
If aluminum frame has water, erect it and pour out.
Keep the rail of the motorized pushing rod clean.
Verify the power cord is correctly inserted into the 12V socket.
Ensure no objects are in the tent, check for obstructions on the motorized rod.
If tent does not open, check if the motorized pushing rod is damaged.
If damaged, install a new motorized pushing rod following instructions.
Open the plastic part on the side of the frame.
Carefully pull out the white transmission wire.
Unscrew and disconnect the waterproof joint.
Pull transmission wire from frame hole.
Use hexagon wrenches to unscrew nuts on the frame and tent pole.
Install the new motorized pushing rod (assembly is opposite to disassembly).
Details on fly, inner, and floor materials.
Specifies frame material and remote control technology.
Information on person capacity, inner tent size, and packing size.
Details on net weight and gross weight.