Do you have a question about the XtreamAIR Pro-X Series and is the answer not in the manual?
Critical safety warnings regarding fire, shock, injury, and hazardous materials.
Diagrams illustrating horizontal wall and vertical roof venting configurations.
Optional step to protect the cooking surface and set up a workspace.
Locating critical points on the wall for mounting bracket and screws.
Ensuring the electrical outlet and ductwork are ready before installation.
Securing the ceiling bracket and wall anchors for hanging the hood.
Lifting, leveling, and connecting the hood to ductwork and power.
Final securing of the hood to studs and performing a test run.
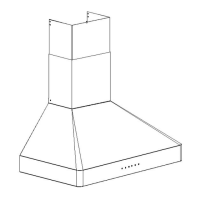
Attaching and securing the inner and outer chimneys to the mounting bracket.
Specific instructions for installing the glass canopy on the PX01 model.
How to interact with touch controls for optimal response.
Operation of blower, light, and delay timer via touch screen.
Operation of blower, light, and timer via physical buttons.
Steps to diagnose and fix non-operational issues.
Causes and solutions for hood vibration.
Reasons for reduced airflow and how to address them.
Troubleshooting poor ventilation performance.
Identifying causes of excessive noise.
Checking for issues with the control panel's responsiveness.
Methods for cleaning stainless steel and other exterior parts.
Instructions for cleaning grease filters and oil containers.
Company's limitations of liability and warranty exclusions.
| Material | Stainless Steel |
|---|---|
| Lighting | LED |
| Voltage | 120V |
| Control Type | Touch |
| Power Source | Electric |
| Installation Type | Wall Mount |