6
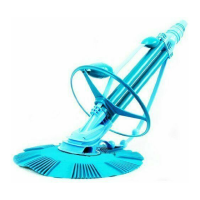
1. Hose too light: If the hose rises towards the surface at an angle greater
than 45° move the weights closer to the cleaner or move the rst two
weights closer to each other.
2. Hose Too Heavy: If the hose sags downward at an angle less than 45°,
move the weights away from the cleaner or separate the rst two weights
away from each other.
Note: Figure 9 shows only model B, a schematic diagram of the pool
balance. Model A, C and D with the same balance diagram of the pool.
Return Line Water Flow
IMPORTANT: The water ow from your return line can push the cleaner’s hose and affect its performance.
It may cause the cleaner to steer away from the end of the pool where the return line is located, or it may
cause the cleaner to remain in one section of the pool. To correct this, use the eyeball diverter included with
your cleaner.
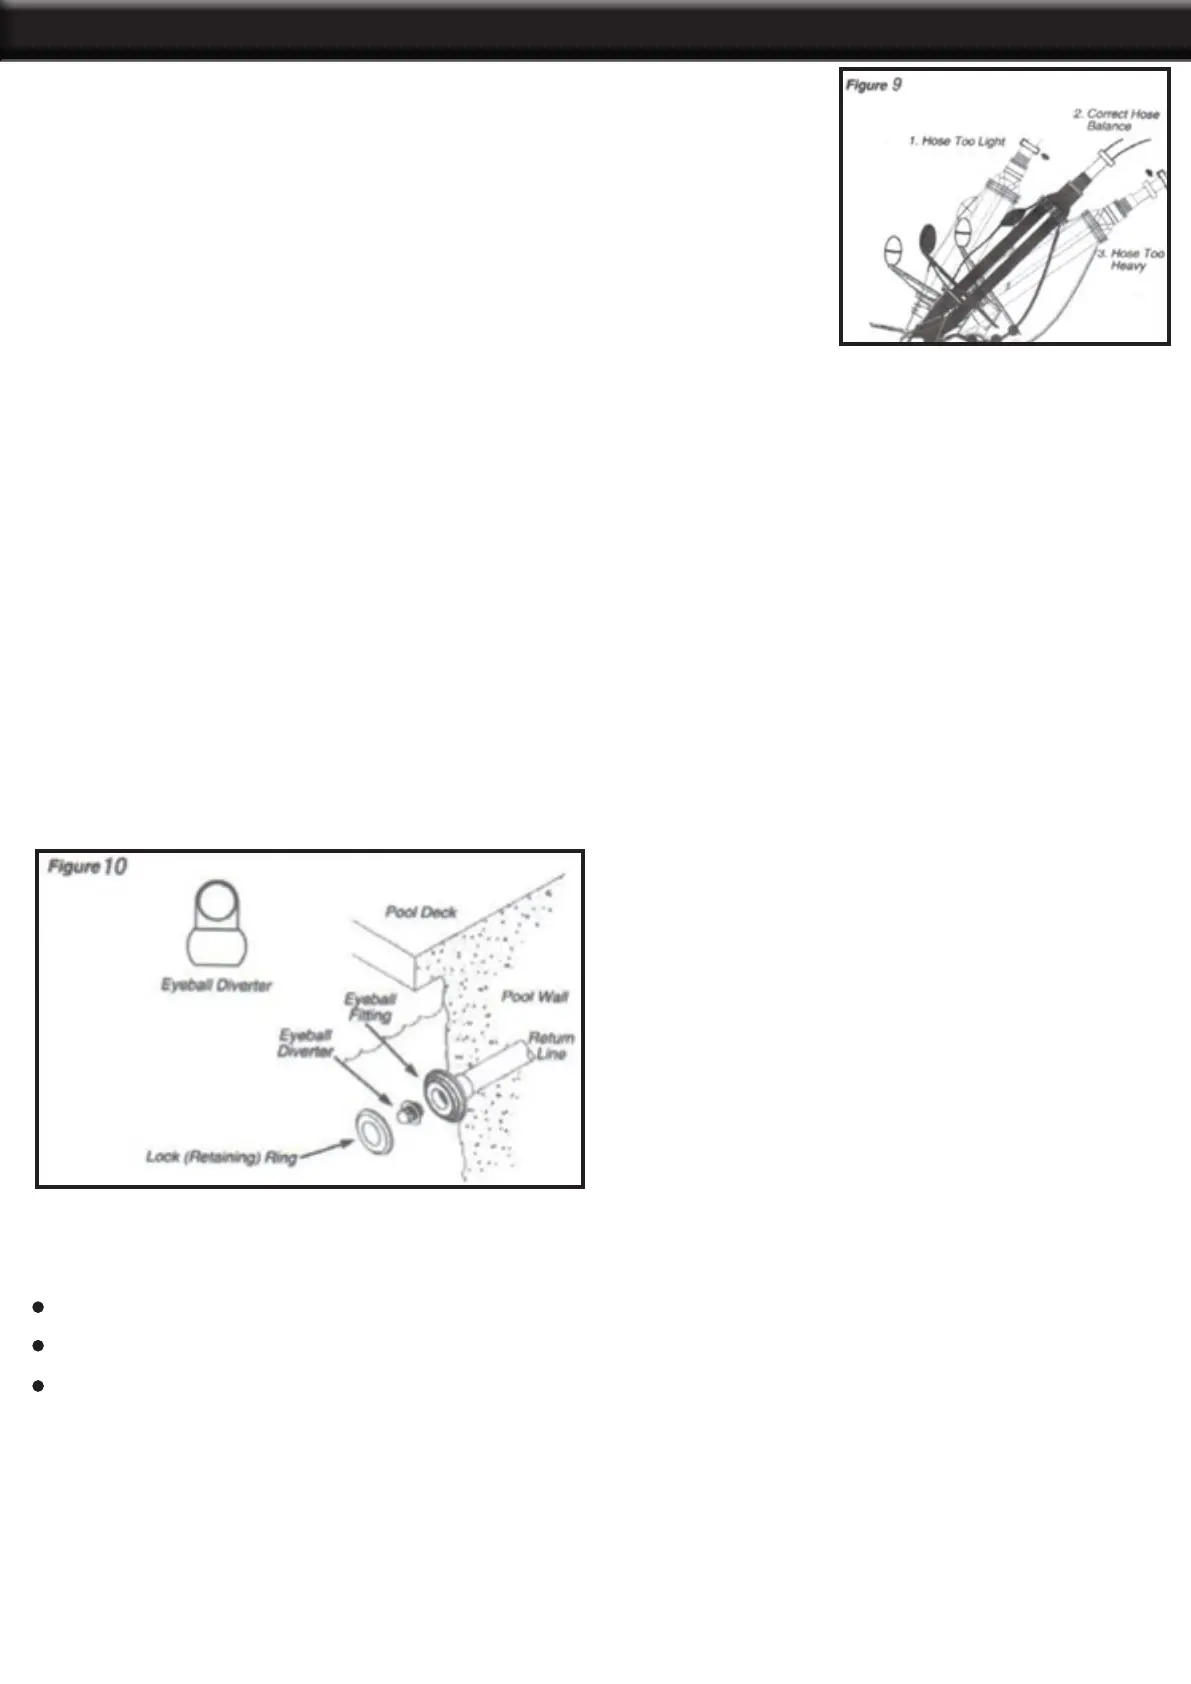
1. First make sure your pool pump is off. Remove the original eyeball from the return line in the pool by
unscrewing the lock ring.
2. Replace the original eyeball with the cleaner’s eyeball diverter.
3. Replace the lock ring and tighten. Make sure the opening of the eyeball diverter points are facing in the
proper direction before tightening fully. See Figure 10.
To Install the Eyeball Diverter:
Eyeball Diverter Positions
Position the diverter opening to redirect the return line water ow so it does not interfere with the cleaner’s
movement. Try different positions to see which works best in your pool.
Flow directed along the side of the pool (the tile line)
Flow directed downward
Flow directed against the hose will help steer the cleaner away from obstructions such as stairs and
ladders.
After installing the eyeball diverter, turn the pool pump on. The cleaner should begin moving across the pool
oor vacuuming debris in its path.
INSTALLATION
 Loading...