7
If the cleaner stays at the shallow end of the steps:
Check the return line water ow and redirect as necessary with an eyeball diverter.
Check the automatic regulator valve for its proper installation and ensure it is not clogged with debris.
Check that the hose is long enough to reach the furthest end of the pool, including the pool steps.
Check that the cleaner has proper hose balance in the shallow end.
Check to ensure the dive oat mechanism is operating freely and the dive oat restrictor is installed.
Shorten the roller bumper strap by ½ inch. Pull out the upper end of the bumper strap from the locking
end clip attached to swivel head. Cut ½ inch off then return bumper strap into locking end clip.
If the cleaner tracks in a repetitive pattern:
Check the swivel on the top of the cleaner, it should turn freely.
Check the return line water ow and redirect as necessary with an eyeball diverter.
Check the cleaner’s hose to ensure it has not become bent or kinked, it only takes a bent or kinked hose
section to hinder the cleaning coverage. One way to check for kinks in your hose is to lay each section
at on your pool’s deck or other at surface. The hose should be perfectly straight and at. Do not coil the
hose when taking your cleaner out of the pool because it will retain the coil shape, forming a bend or kink.
To remove debris from the apper:
Sometimes debris may clog the bottom of the cleaner and prevent apper movement or restrict water
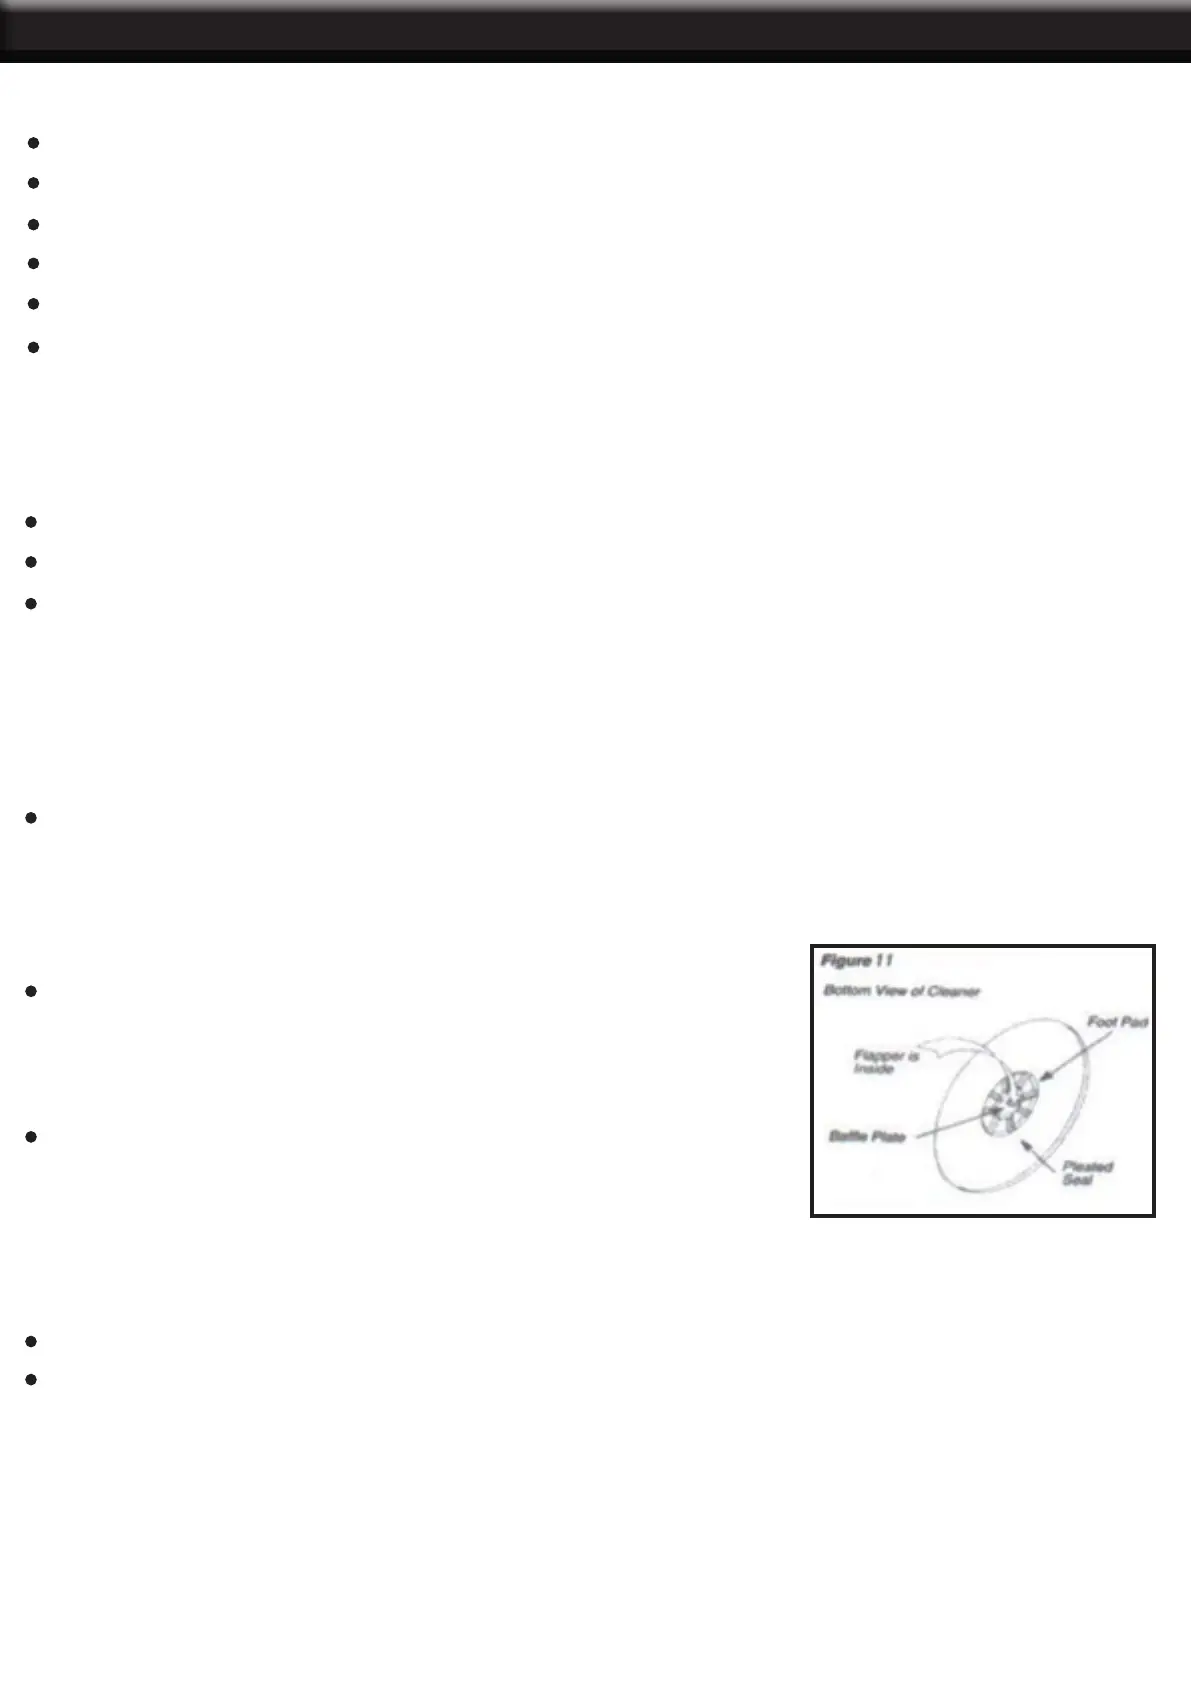
ow. The apper is located inside the main body and must always move freely. You can see the apper
through the opening in the bafe plate when you turn the cleaner upside down as shown in Figure 11.
Jiggle the apper with your nger or ush the cavity with a hose to force out any debris lodged inside the
main body.
If debris is still lodged inside, you must remove the apper. First remove
the four lids in the foot pad, unscrew it and remove it from the main
body. In succession, take out the screw from the pife plate, pull it out
and lastly, remove the apper. See Figure 12.
Once the debris is dislodged, insert the apper back into the main
body and snap the bafe plate back into position. Be sure that it is
securely in place. See Figure 12.
MAINTENANCE
Visually inspect your cleaner from time to time to make sure that:
The apper is moving freely and is not obstructed by debris.
The foot pad is not excessively worn. When the traction pads on the bottom have worn down it is time
for a replacement.
When storing the cleaner, do not coil the hose. Lay the hose at in an area protected from direct sunlight.
If hose sections are disconnected, try not to disturb the hose weight locations. The cleaner’s hose is
specically designed to ensure optimum performance from the cleaner. Should replacement be required, be
sure to get a genuine cleaner hose. Be sure to swap around the hoses every 3 months to prevent them
from getting stuck together. This can stop the cleaner from moving properly.
TROUBLESHOOTING AND MAINTENANCE
 Loading...