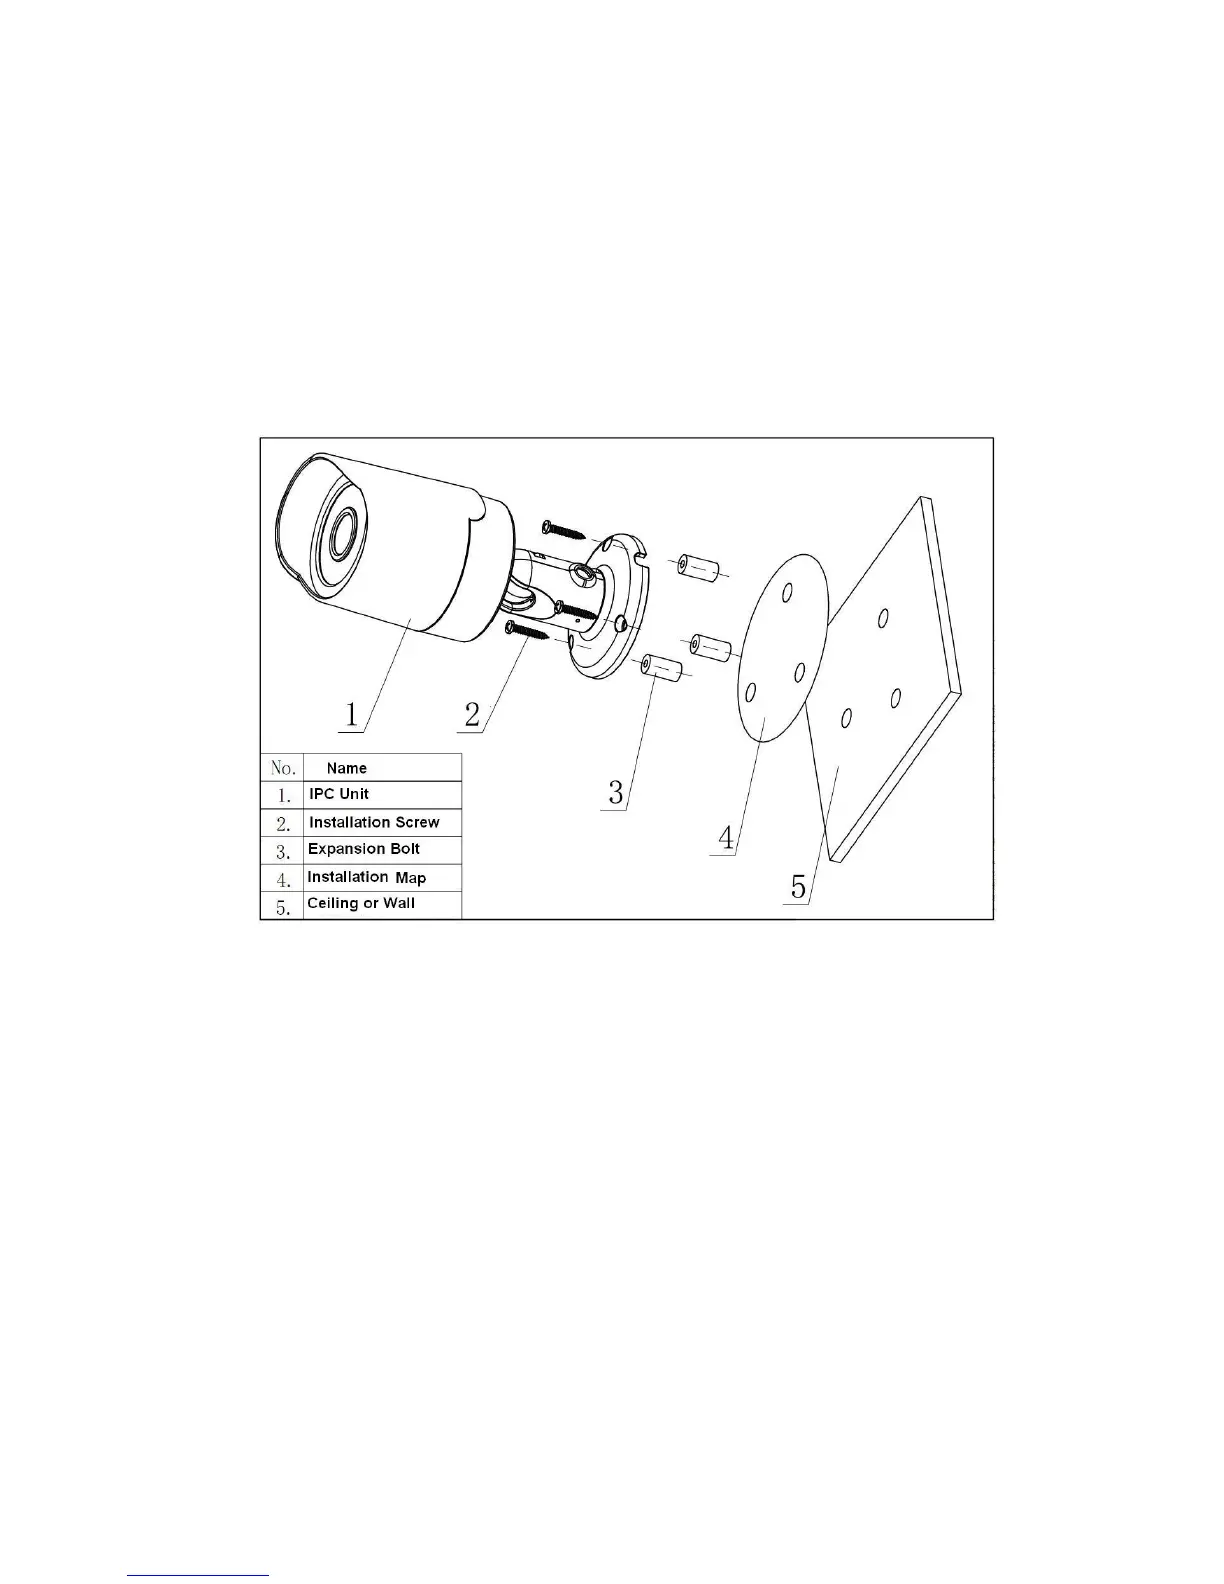
3 DeviceInstallation
Please follow the steps listed below to install the device. Please refer to Figure 3-1 and Figure 3-2
X720B for reference.
! Paste the installation map on the surface of the wall or the ceiling.
! Dig the installation holes according to the installation map.
! Open the accessories bag and then take the expansion bolt out. Insert the expansion bolt into
the installation holes.
! Take the screws from the accessories bag and then use them to secure the device on the
installation surface of the wall or the ceiling.
! Connect the corresponding cables.
Figure 3-1
! Use the cross-head screwdriver to loosen the adjust screw.
! Turn the device in different directions to make it suitable for the monitor position.
! Use the cross-head screwdriver to fix the adjust screw firmly.