01X Owner’s Manual (Supplementary Manual)
Recording/Playback/Remote Control
79
Before UsingBasics SectionAppendix Getting StartedReference
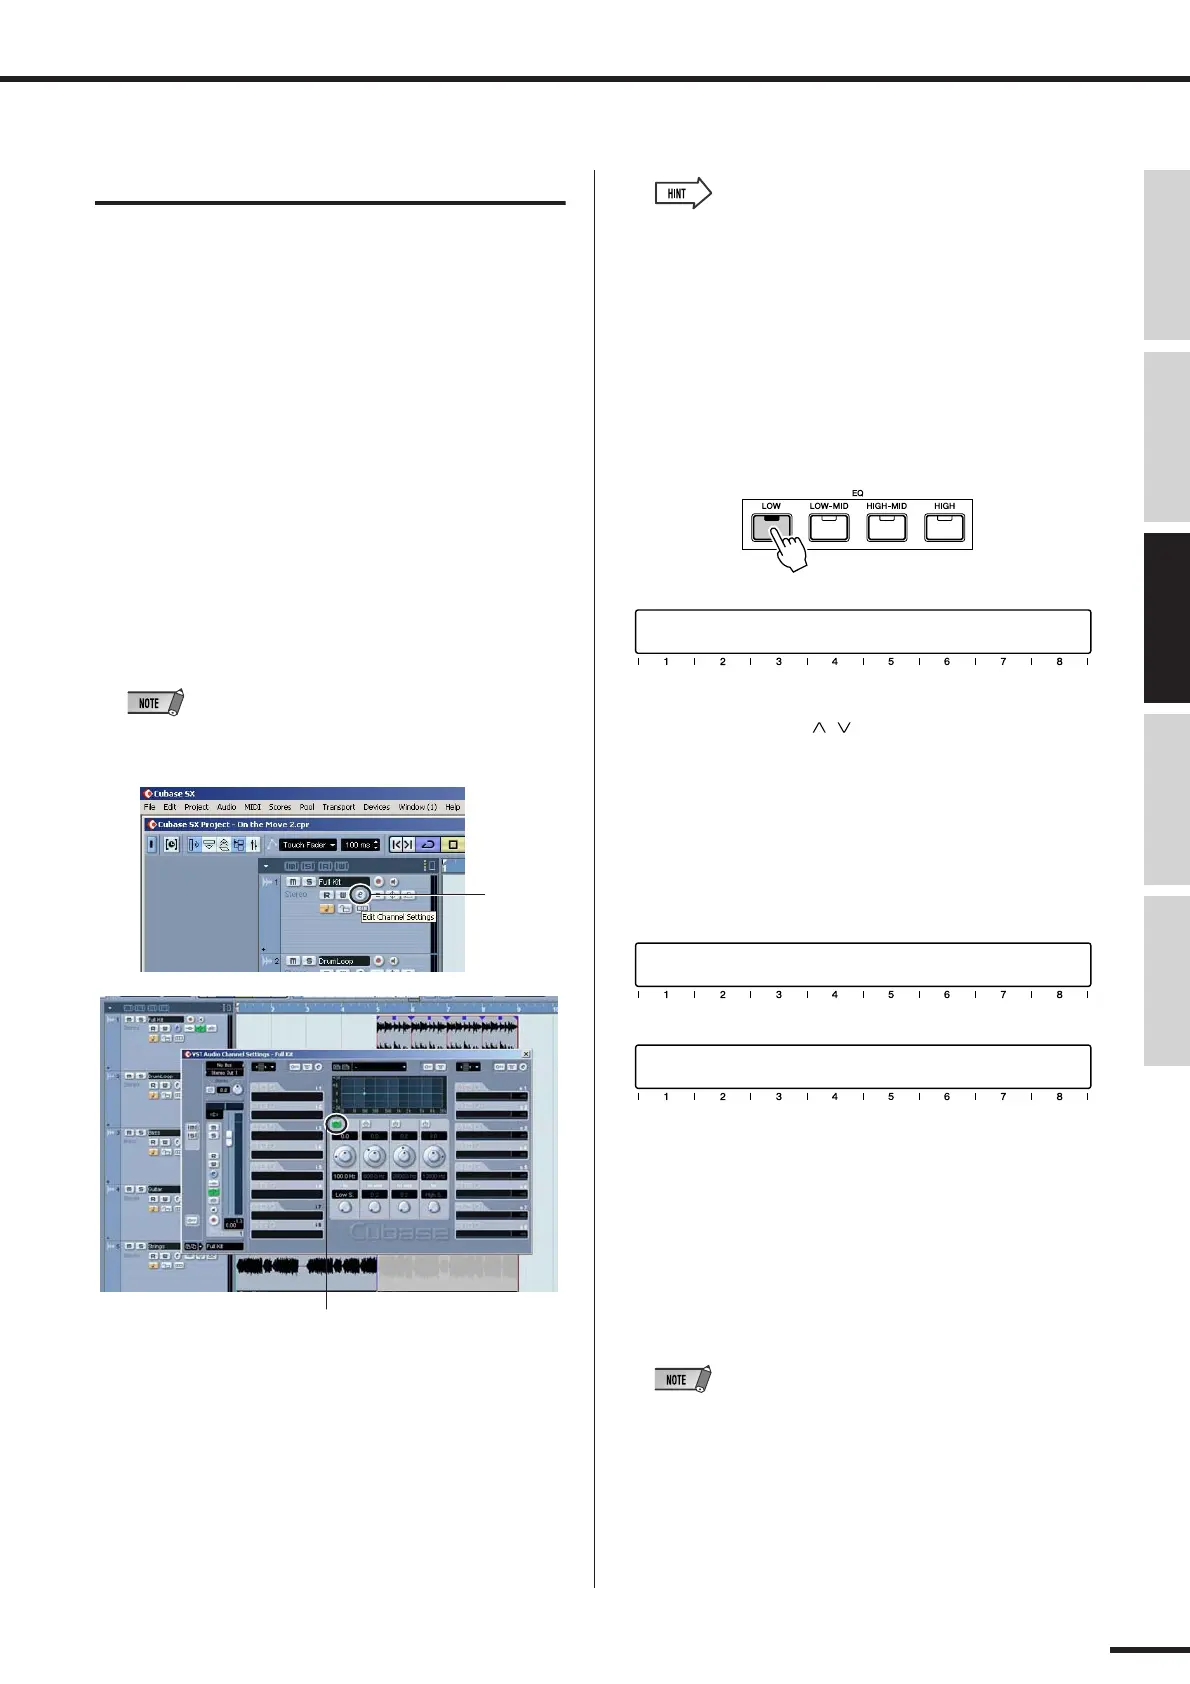
Editing EQ settings
In this section, we’ll be making edits to individual tracks
again — but this time from the Channel Settings window.
This window not only has a volume fader and pan control,
it also features a complete EQ control window, and gives
you basic controls for all your effects. Keep in mind that
EQ can only be used on audio tracks.
q Call up the Project window.
w Select the desired audio track.
Do this within Cubase SX 3 or press the [SEL] button
of the corresponding channel.
e Click on the “e” button (Edit Channel Settings) in the
selected audio track box.
This calls up the VST Audio Channel Settings window
for the channel.
• If the “e” button isn’t shown, you may need to drag the right bor-
der of Track list and widen the column until it appears.
Make sure to click on the “Power” button (shown
above) for each frequency band you want to adjust.
Naturally, you can use the corresponding fader and
knob on the 01X here to control volume and pan,
respectively.
• Notice that you can select different tracks here by pressing the
appropriate [SEL] button — without having to leave the Channel
Settings window.
•You can also select plug-in instrument channels for EQ process-
ing. (See the Hint, “Controlling effects for plug-in instruments” on
page 81.)
r Press one of the EQ buttons to call up EQ control.
Pressing any one of the EQ buttons will call up the
same menu.
t Use the DISPLAY [ / ] (Up/Down) buttons to
change display pages. You can also repeatedly press
the same EQ button (for example, [LOW]) to switch
among the display pages.
Page 1 contains the EQ controls for frequency bands 1
and 2 (lo and lo mid), while Page 2 contains the EQ
controls for bands 3 and 4 (hi mid and hi).
y Adjust the parameters.
Use the knobs to change the settings, or turn [FLIP] on
and use the faders.
Notice the EQ response curve in the window, and
watch how it mirrors the changes you make. If the
curve does not change, make sure you’ve enabled the
EQ band in the display page (or in Cubase SX 3).
•Any changes you make from your computer keyboard or mouse
will automatically be reflected in the 01X as well — in other
words, the values will change, and if FLIP is on, the faders will
move.
“e” button
EQ lo “Power” button
Gain1 Freq1 Q1 On1 Gain2 Freq2 Q2 On2
EQ+ Full Kit Page:01/02
Gain3 Freq3 Q3 On3 Gain4 Freq4 Q4 On4
EQ+ Full Kit Page:02/02
Gain1 Freq1 Q1 On1 Gain2 Freq2 Q2 On2
EQ+ Full Kit Page:01/02
 Loading...