Quick Guide
12
AUDIOGRAM 6 Owner’s Manual
Preparing to Record
1
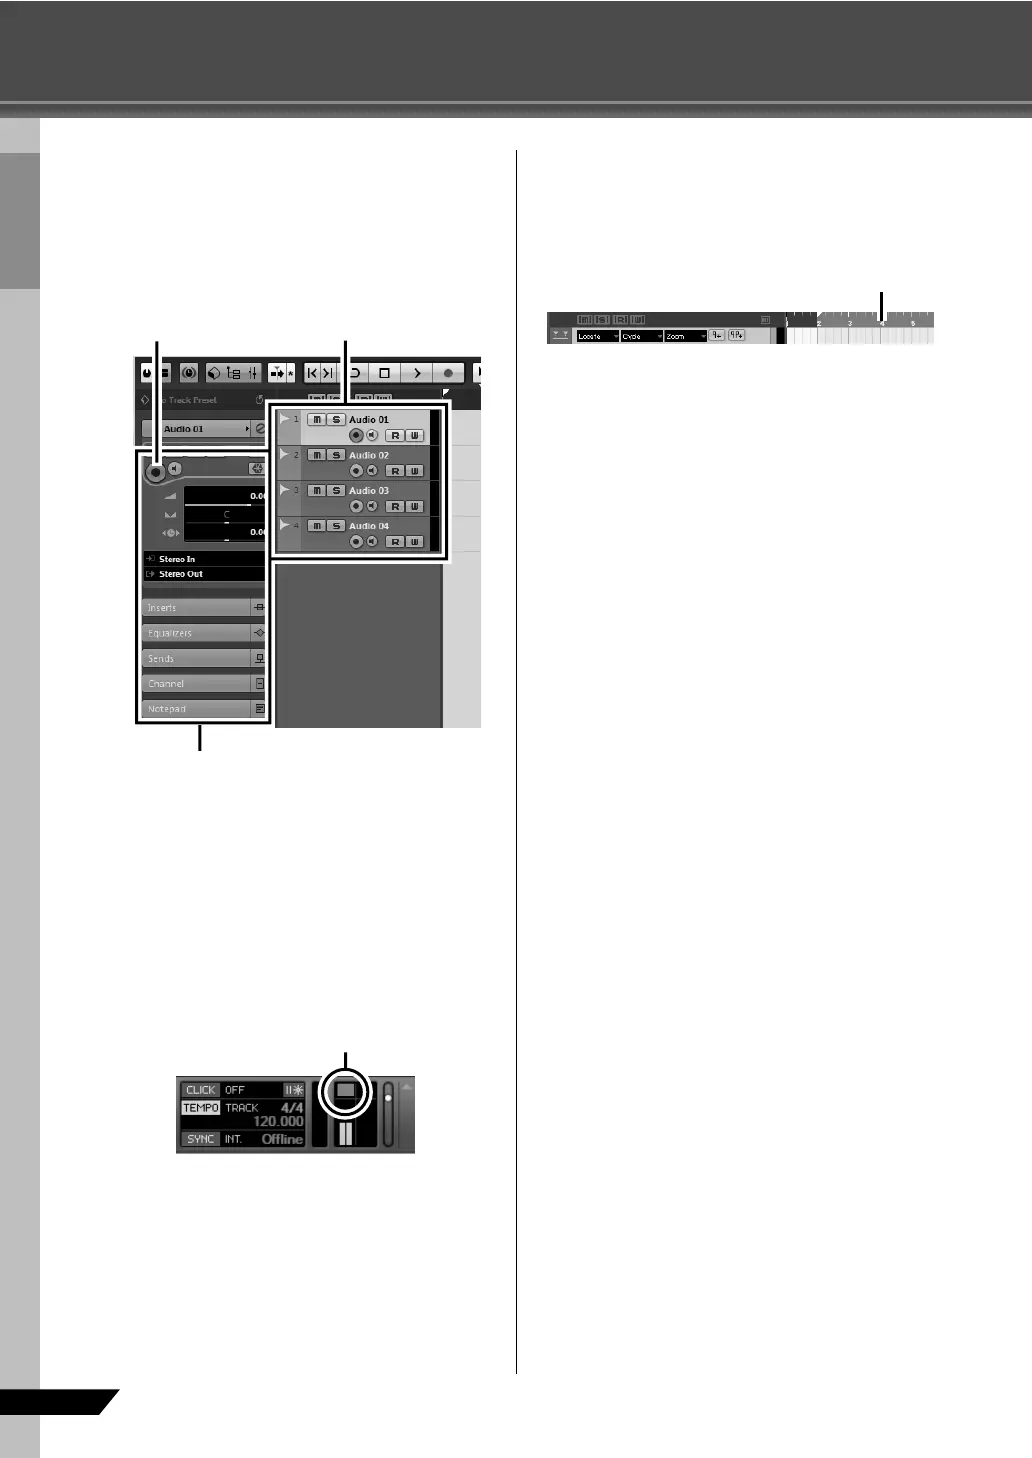
Click in the track list (the area in which the
track names are displayed) to select a track
to record on.
The various settings for the selected track are avail-
able in the Inspector on the left side of the display.
2
Make sure the [Record Enable] button for the
track to be recorded is turned on.
If the [Record Enable] button is off, click it to turn it
on.
3
Play the instrument to be recorded, and
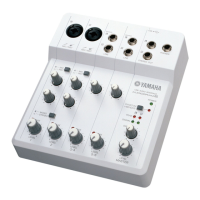
adjust the AUDIOGRAM GAIN controls and
LEVEL controls so that the Clipping indica-
tor never lights.
4
Specify the point at which you want to start
recording via the ruler at the top of the win-
dow for the project.
Click the black area of the ruler to move the project
cursor (the vertical black line) to that position.
Inspector
[Record Enable] button Track list
<Transport panel>
Clipping indicator
Ruler
 Loading...