Starting the MOXF6/MOXF8 Editor (VST version)
MOXF6/MOXF8 Editor Owner’s Manual
5
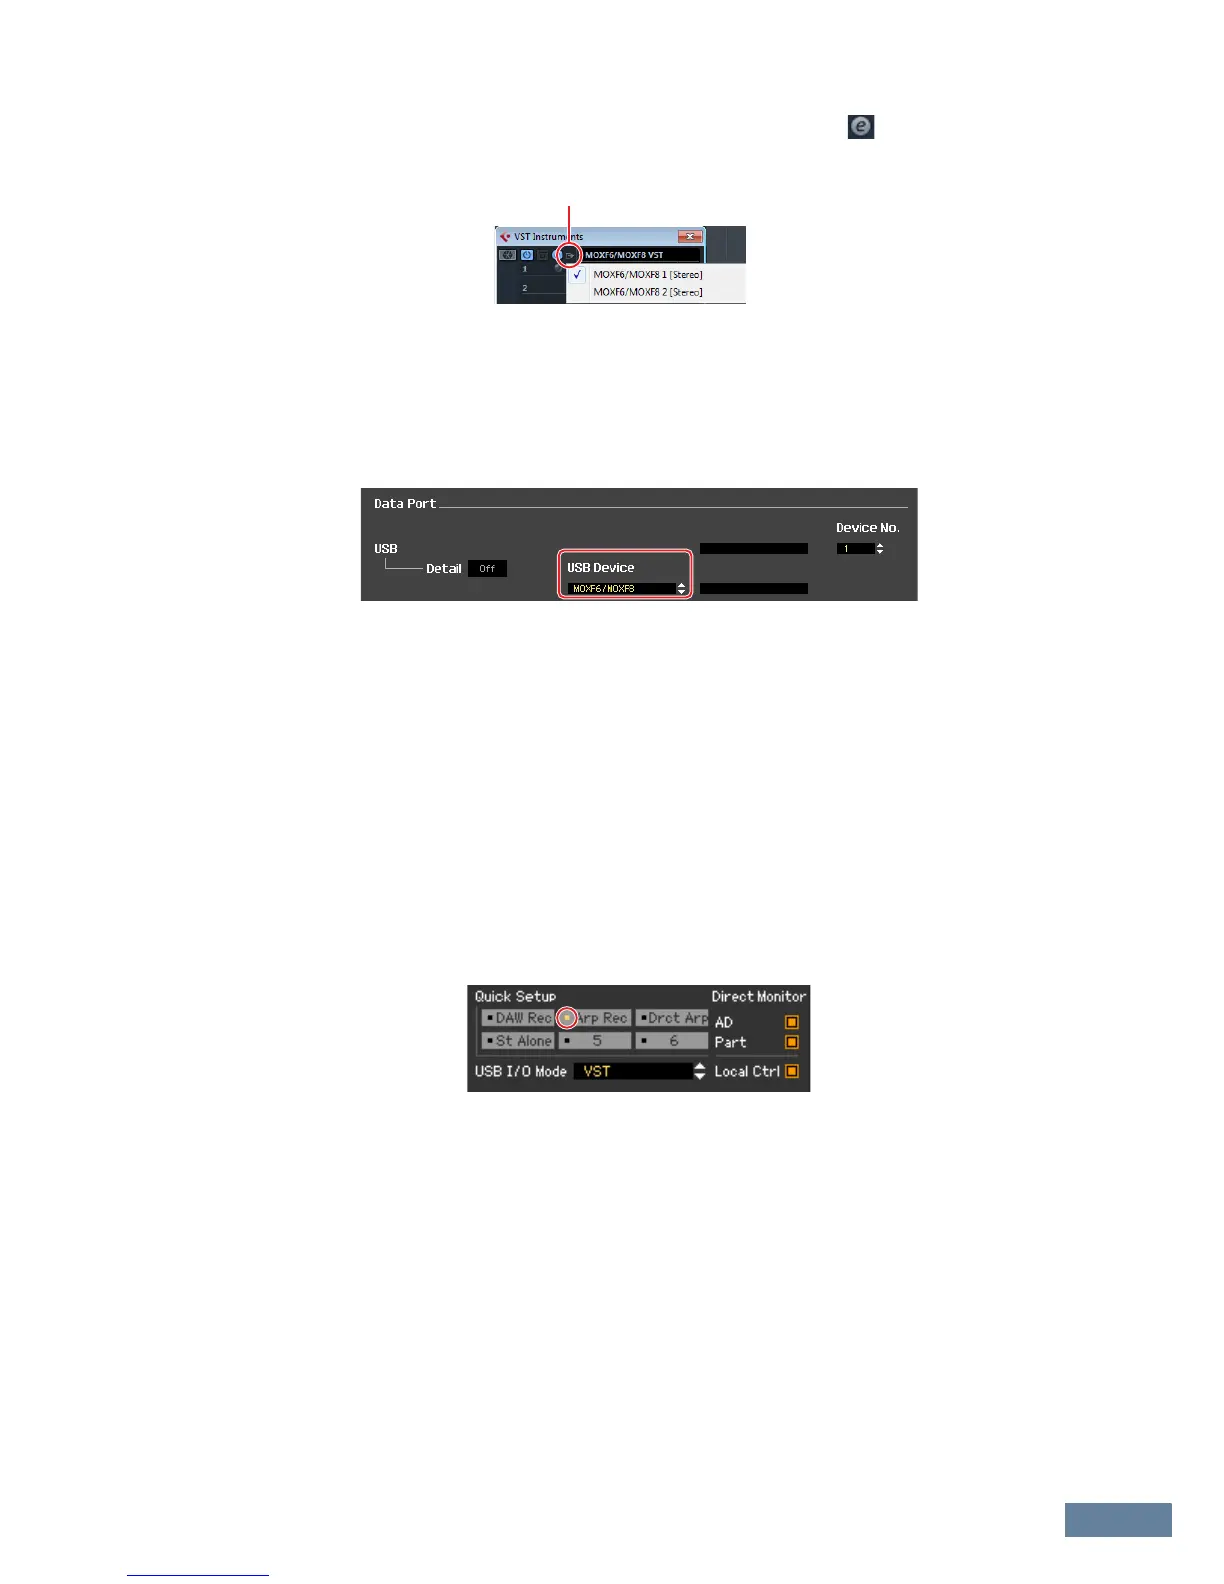
4. Click the Output Setup button at the right side of the Edit button ( ) in the VST
Instrument Rack, then select [Activate All Outputs].
After this operation, the MOXF6/MOXF8 1 – 2 Busses appear in the project window of the Cubase series.
5. Call up the Editor Setup window in the MOXF6/MOXF8 Editor VST via [File] [Editor
Setup].
6. Select “MOXF6/MOXF8” at the [USB Device] column.
7. Click [OK] button at the bottom.
8. Call up the VSTi Setup window in the MOXF6/MOXF8 Editor VST via [File] [VSTi Setup].
9. Click the [Auto] button then all the audio ports are assigned automatically.
10. Click the [OK] button at the bottom.
11. If the MOXF6/MOXF8 Editor VST is “OFFLINE,” click the [ONLINE/OFFLINE] button to
go “ONLINE.”
12. In Quick Setup, select the desired one.
n Step 5 through 10 are required when starting MOXF6/MOXF8 Editor VST for the first time. These steps are
saved in the editor and do not need to be repeated each time it is started.
n The MOXF6/MOXF8 Editor can be started also from Media Bay via the following steps. From the “Media”
menu of Cubase series, select “MediaBay” to call up the MediaBay window. Select a Voice from the
MediaBay, right-click to call up “Property,” then select “Create Track.” Press the “Edit Instrument” button on
the created Instrument track to start the MOXF6/MOXF8 Editor VST.
 Loading...