Do you have a question about the Yamaha PortaTone PSR-6300 and is the answer not in the manual?
| Brand | Yamaha |
|---|---|
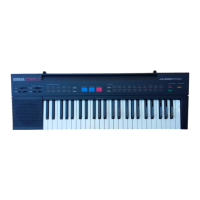
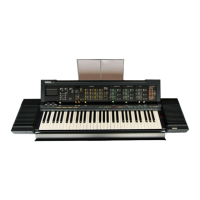
| Model | PortaTone PSR-6300 |
| Number of Keys | 61 |
| Touch Response | Yes |
| Effects | Reverb, Chorus |
| MIDI | Yes |
| Display | LCD |
| Speakers | 2 x 12W |
| Song Memory | 5 Songs |
| Power Supply | AC Adapter |
| Weight | 9.5 kg |
| Type | Electronic Keyboard |
| Connections | MIDI In/Out, Headphones |
| Tones | 100 |
Explains the meaning of graphical symbols used in the manual for user safety and product operation.
Instructions for activating and adjusting the volume for the Upper Orchestra section.
Explains how to apply the Chorus effect for a more expansive sound.
Details on using the Pitch Bend wheel and Pitch Bend Range selector for glissando effects.
Explains the Touch Sensitivity function and how to select sensitivity levels for expressive playing.
How to split the keyboard and use the Lower Orchestra section for layered sounds.
Enabling Manual Bass and Duet/Trio harmony for richer musical arrangements.
Guide to selecting and using the 16 available Solo voices for varied sound options.
Tips for creating ensemble performances using Solo and Orchestra voice combinations.
Instructions for selecting and initiating PCM rhythm patterns for accompaniment.
Using Intro/Ending for automatic starts and Synchro Start for key-triggered rhythm activation.
Adjusting rhythm volume and tempo, and understanding tempo indicators and beat lamps.
Introduction to the automatic accompaniment feature, including selector functions.
Using three or four-note chords for automatic accompaniment.
Instructions for setting up manual bass accompaniment.
Introduction to the programmer for creating original accompaniment patterns.
Guide to programming rhythm patterns in real-time using the programmer.
Instructions for programming rhythm patterns using the Step Write method.
How to program your own bass patterns using the programmer.
How to program your own chord patterns using the programmer.
How to select and change bass and chord voices within the programmer.
Steps to save and finalize your custom programmed accompaniment patterns.
Introduction to the Music Programmer and its advantages for recording music.
Instructions for recording accompaniment patterns, starting with the first part.
Using Step Write memory for recording accompaniment sequences.
How to record the main melody track using the Music Programmer.
How to record a counter melody track using Orchestra voices.
How to record your own original bass lines using the BASS track.
How to save and load data to and from the RAM Pack memory.
How to save and load data to and from a cassette tape.
Instructions for connecting headphones for private practice.
Using the foot switch jack for controlling various functions like Glide and Sustain.
Connecting a sustain pedal for controlling sustain effects.
Using tape jacks for saving and loading digital data to/from tape.
Information on connecting MIDI devices for synchronized performances.
Connecting an expression pedal for controlling overall volume.
Connecting to stereo systems via auxiliary output jacks.
Connecting the keyboard to a household power source.