Do you have a question about the Yamaha RX-V3000 and is the answer not in the manual?
Explains the meaning of hazard and warning symbols used in the manual.
Essential safety guidelines for operation, installation, and maintenance.
Guidelines for proper grounding of CATV system cable entry.
Diagram illustrating correct antenna grounding procedure.
Regulatory compliance and interference guidelines for US users.
Guidance on proper installation, ventilation, and usage to prevent damage.
Adjusting the interstation frequency spacing for tuning.
Specific electrical safety and compliance notes for Canada.
Initial setup steps, package contents, and remote control basics.
Highlights key technologies and capabilities of the AV receiver.
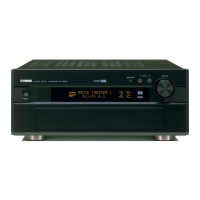
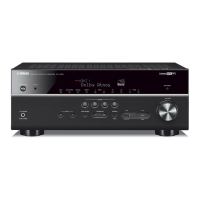
Overview of front panel, rear panel, and remote control buttons.
Description of buttons and indicators on the unit's front panel.
Explanation of various indicator lights on the front panel.
Identification and function of rear panel connection terminals.
Detailed explanation of remote control buttons and their functions.
Understanding speaker setup options for optimal sound.
Recommended setup for immersive movie sound with 7 or 8 speakers.
Configuration for Hi-Fi DSP playback, focusing on dynamic sound fields.
Standard 5.1 setup for clear dialogue and sound localization.
Basic 4-speaker setup directing effect signals to main speakers.
Connecting audio and video components to the receiver.
Using coaxial and optical connections for digital audio signals.
How to connect a turntable with MM or high output MC cartridge.
Connecting CD players via coaxial or optical digital outputs.
Connecting MD or DAT decks for recording and playback.
Connecting composite, S-video, and component video sources.
How to connect speaker wires to the unit's terminals.
Connecting LD players with RF (AC-3) output to the unit.
Connecting front and rear subwoofers for enhanced bass.
Connecting multi-channel decoders via 6CH INPUT jacks.
Connecting external amplifiers to PRE OUT/MAIN IN terminals.
Adjusting impedance selector and connecting AC power.
How to use and configure on-screen information display.
Selecting display modes for information on the video monitor.
Procedure to cycle through OSD display options.
Guidance on optimal positioning of speakers for sound quality.
Optimal positioning of left and right main speakers for the listening position.
Aligning the center speaker with the TV or monitor.
Recommended placement for surround and effect speakers.
Speaker placement considerations for projection screen setups.
Guidance on positioning front and rear subwoofers.
Configuring speaker parameters like size and type.
Overview of speaker setup parameters in the SET MENU.
Adjusting speaker volume using test tones for balanced output.
Initial setup for speaker level adjustment.
Procedure for calibrating speaker levels using Dolby Surround test tone.
Procedure for calibrating speaker levels using DSP test tone.
Powering on/off, selecting sources, and adjusting volume.
Instructions for turning the unit on and off.
How to choose and switch between different input sources.
Understanding input signal types and automatic selection.
Choosing DSP sound field programs to enhance listening experience.
Connecting antennas, tuning stations, and preset management.
Instructions for connecting indoor and optional outdoor antennas.
How to automatically scan and tune to radio stations.
How to recall and tune to pre-programmed radio stations.
Automatically storing FM stations with strong signals.
Manually tuning and storing desired radio stations.
Procedure for swapping stored radio station presets.
How to use the REC OUT function for recording.
Steps to prepare for recording audio sources.
Guidelines for recording DTS content, focusing on analog audio.
Comprehensive guide to the unit's configuration menu options.
Configuration options for speaker output modes and levels.
Adjusting subwoofer volume using low frequency test tones.
Adjusting the sound balance between left and right main speakers.
Adjusting bass and treble levels for headphone listening.
Adjusting the center speaker's tonal quality using a graphic equalizer.
Changing the names of input sources displayed on the unit.
Assigning input/output terminals to specific sources.
Selecting the default input mode for digital sources.
Resetting DSP program parameters to factory defaults.
Adjusting LFE level and dynamic range for Dolby Digital signals.
Adjusting LFE level for DTS signals.
Enabling automatic Matrix 6.1 and DTS ES decoding.
Adjusting delay time for Center and Rear Center speakers.
Configuring OSD background, shift, and dimmer settings.
Locking DSP parameters and other SET MENU settings.
Configuring Zone 2 output volume settings.
Using the remote for learning, macros, and component control.
Overview of main unit and component control areas on the remote.
Selecting components for remote control operation.
Using the OPTN area for programming extra functions.
Activating the remote control's backlight.
Controls for the tuner function via the remote.
Controls for CD playback via the remote.
Controls for MD/Tape playback via the remote.
Controls for CD-R playback via the remote.
Controls for PHONO, V-AUX, and OPTN functions.
Controls for DVD playback via the remote.
Controls for VCR playback via the remote.
Controls for Cable TV and Satellite Tuner functions.
Controls for LD player operation via the remote.
How to program the remote to control other devices.
Selecting component libraries for remote control setup.
Learning new commands from other remote controls onto this remote.
Automating sequences of operations with a single button press.
Enabling and using pre-programmed or custom macros.
Creating custom macro sequences for specific operations.
Renaming input sources for easier identification.
Removing learned functions or programmed macros from buttons.
Resetting learned functions, macros, and manufacturer codes.
Setting up multi-room audio/video distribution.
Components needed and setup for multi-room audio/video.
Limitations and procedures for sending DTS audio to Zone 2.
Using the remote control to operate Zone 2 functions from a second room.
Fine-tuning volume levels for surround and effect speakers.
Scheduling automatic turn-off of the unit.
Understanding how DSP creates immersive sound environments.
How sound fields are defined by acoustic reflections and venue characteristics.
How DSP uses effect speakers to simulate acoustic environments.
DSP programs based on reflected sound structure.
DSP programs using early reflections and digital reverberation.
Description of various Hi-Fi DSP sound field programs.
Exploring Yamaha's advanced DSP technology for movie sound.
How CINEMA-DSP enhances movie soundtracks with surround sound.
CINEMA-DSP programs designed for movie soundtracks.
Table mapping input formats to CINEMA-DSP sound field programs.
DSP programs enhancing Dolby Pro Logic for immersive sound.
DSP programs for Dolby Digital/DTS signals for theater-like sound.
DSP programs for 6.1 channel formats, adding rear center effects.
Adjusting specific sound field parameters for customization.
How to adjust DSP sound field parameters using the remote.
Explanation of individual DSP parameter functions.
Adjusts apparent distance by controlling direct sound and reflection delay.
Adjusts the apparent size of the surround sound field.
Adjusts reflectivity of virtual walls by controlling early reflection decay.
Adjusts reflectivity of virtual walls in the surround sound field.
Adjusts delay between direct sound and first reflection in rear center field.
Adjusts the apparent size of the rear center sound field.
Adjusts reflectivity of virtual walls in the rear center sound field.
Adjusts the time for dense reverberation sound to decay by 60 dB.
Adjusts time difference between direct sound and reverberation sound.
Restoring parameters to factory default settings.
Solutions for common operational problems and issues.
Common problems like unit not turning on, hum, and no sound/picture.
Troubleshooting steps for no sound from front effect speakers.
Troubleshooting steps for no sound from the center speaker.
Troubleshooting steps for no sound from rear effect speakers.
Troubleshooting steps for no sound from the subwoofer.
Diagnosing and fixing issues with poor bass output.
Troubleshooting poor FM reception and tuning issues.
Troubleshooting AM reception issues and noise.
Troubleshooting common problems with the remote control.
Technical details and performance characteristics of the unit.
Technical specifications for the unit's audio performance.
Technical specifications for video signal handling.
Technical specifications related to the FM tuner.
Technical specifications related to the AM tuner.
General specifications like power supply, consumption, and dimensions.
Details on power requirements, consumption, and AC outlets.
Physical size and weight specifications of the unit.
List of included accessories with the unit.
| Brand | Yamaha |
|---|---|
| Model | RX-V3000 |
| Category | Stereo Receiver |
| Language | English |