Periodic maintenance and adjustment
7-37
7
7. While applying the front brake,
push down hard on the handle-
bars several times to check if the
front fork compresses and re-
bounds smoothly.
8. Connect the speedometer cable.
EAU25081
Rear wheel
EAU56622
To remove the rear wheel
EWA10822
To avoid injury, securely support the
vehicle so there is no danger of it
falling over.
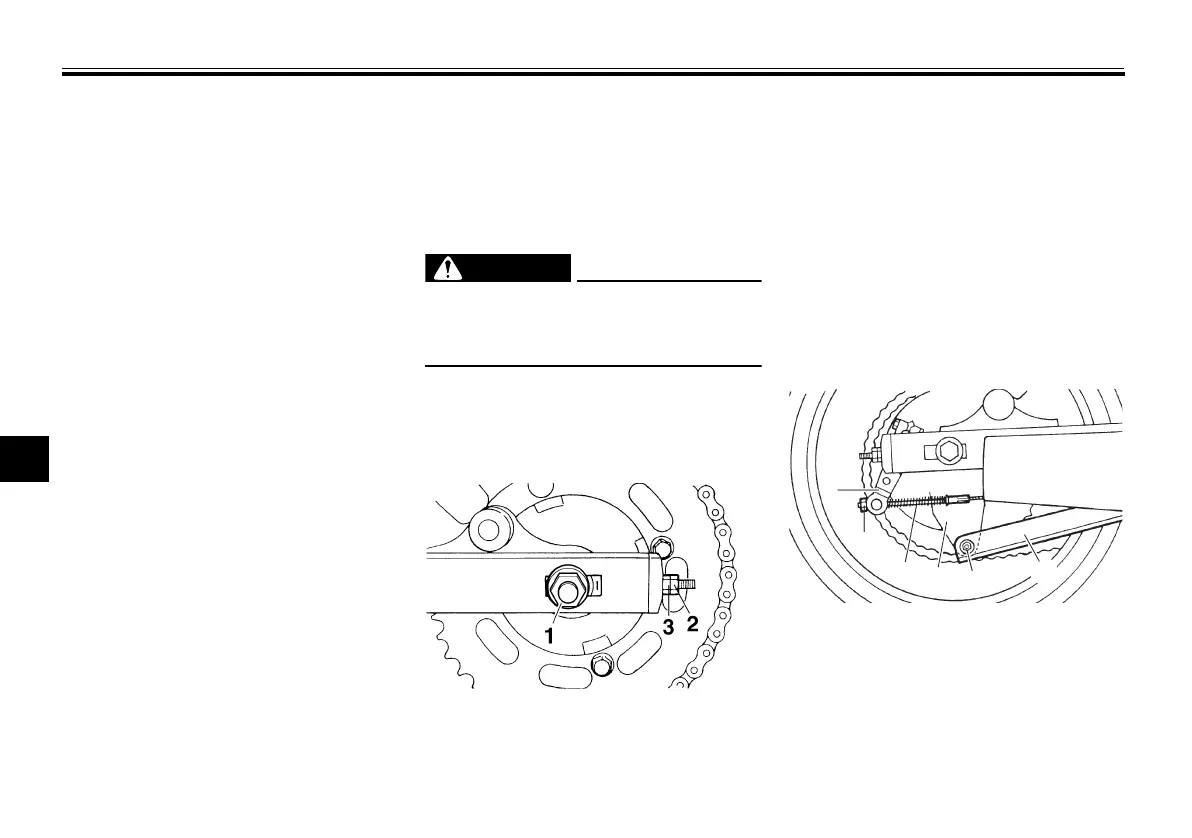
1. Fully loosen the drive chain puller
locknut and the drive chain slack
adjusting nut on both ends of the
swingarm.
2. Loosen the axle nut and the brake
torque rod nut at the brake shoe
plate.
3. Lift the rear wheel off the ground.
(See page 7-35.)
4. Remove the brake pedal free play
adjusting nut, and then discon-
nect the brake rod at the brake
camshaft lever.
5. Disconnect the brake torque rod
from the brake shoe plate by re-
moving the nut and the bolt.
1. Axle nut
2. Drive chain puller locknut
3. Drive chain slack adjusting nut
1. Brake torque rod
2. Brake torque rod bolt and nut
3. Brake shoe plate
4. Brake rod
5. Brake pedal free play adjusting nut
6. Brake camshaft lever
U46B78E0.book Page 37 Monday, July 4, 2016 2:29 PM






 To Next Page