REAR SHOCK ABSORBER ASSEMBLY
4-93
2. Check:
• Bearings
• Oil seals
Damage/pitting Replace.
3. Check:
• Collars
Damage/scratches Replace.
EAS30222
INSTALLING THE RELAY ARM
1. Lubricate:
• Collars
• Oil seals
2. Install:
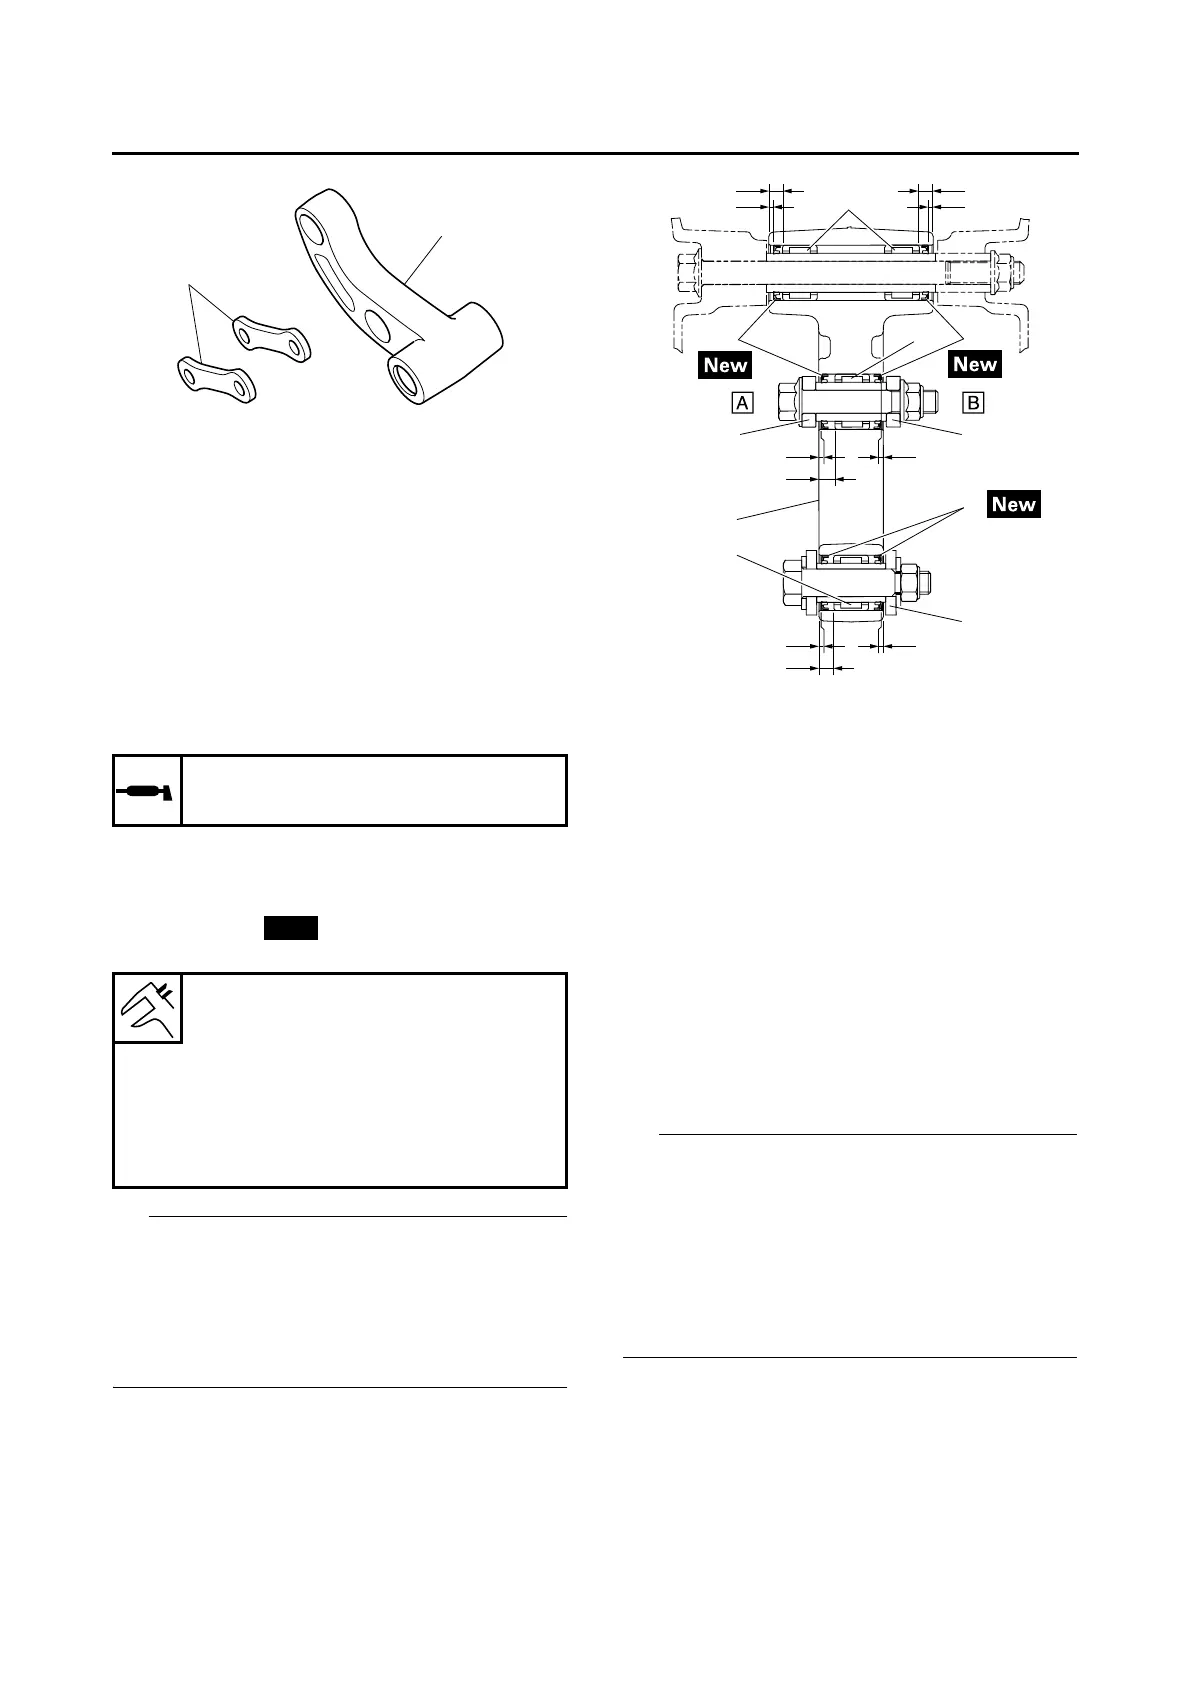
• Bearings “1”
(to the relay arm)
• Oil seals “2”
(to the relay arm)
• When installing the oil seals “2” to the relay
arm, face the character stamp of the oil seals
outside.
• When installing the connecting arms “4” to the
relay arm, face the 1RC mark of the connecting
arms outside.
EAS30225
INSTALLING THE REAR SHOCK
ABSORBER ASSEMBLY
1. Install:
• Rear shock absorber assembly
• Rear shock absorber assembly upper bolt
• Rear shock absorber assembly upper nut
• Relay arm bolt
• Relay arm nut
• Connecting arm lower bolt
• Connecting arm lower nut
• Install the rear shock absorber assembly upper
bolt, relay arm bolt and connecting arm lower
bolt from the left.
• When installing the rear shock absorber as-
sembly, lift up the swingarm.
• Install the rear shock absorber assembly with
the rebound damping adjusting screw facing
the left side of the vehicle.
2. Tighten:
• Rear shock absorber assembly upper nut
• Relay arm nut
• Connecting arm lower nut
Recommended lubricant
Lithium-soap-based grease
Installed depth “a”
6.0 mm (0.24 in)
Installed depth “b”
7.0 mm (0.28 in)
Installed depth “c”
1.5–2.5 mm (0.06–0.10 in)
Installed depth “d”
1.0–2.0 mm (0.04–0.08 in)
3. Relay arm
4. Connecting arm
5. Rear shock absorber assembly
A. Left side
B. Right side

 Loading...