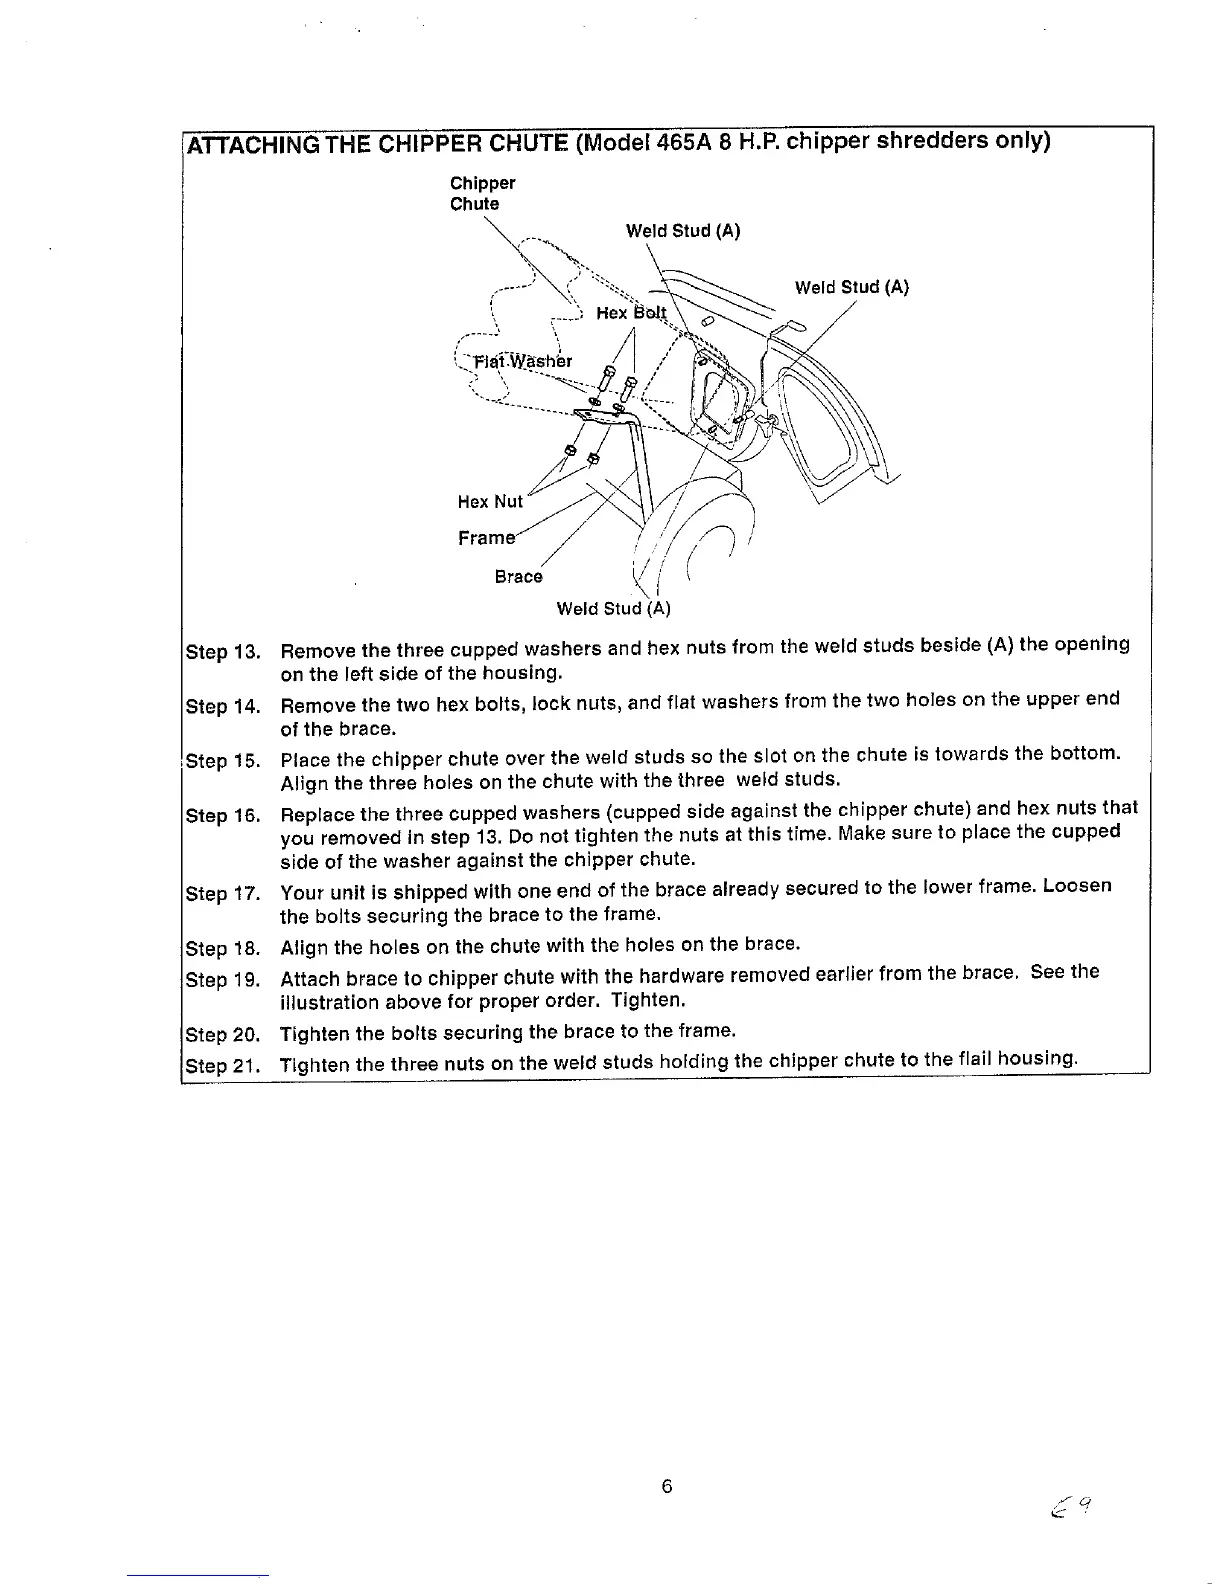
ATTACHING THE CHIPPER CHUTE (Model 465A 8 H.P. chipper shredders only)
Chipper
Chute
Weld Stud (A)
Weld Stud (A)
Hex Nut
Weld Stud (A)
_tep 13. Remove the three cupped washers and hex nuts from the weld studs beside (A) the opening
on the left side of the housing.
Step 14. Remove the two hex bolts, lock nuts, and flat washers from the two holes on the upper end
of the brace.
15. Place the chipper chute over the weld studs so the slot on the chute is towards the bottom,
Align the three holes on the chute with the three weld studs,
p 16, Replace the three cupped washers (cupped side against the chipper chute) and hex nuts that
you removed in step 13. Do not tighten the nuts at this time. Make sure to place the cupped
side of the washer against the chipper chute.
Step 17. Your unit is shipped with one end of the brace already secured to the lower frame. Loosen
the bolts securing the brace to the frame.
Step 18. Align the holes on the chute with the holes on the brace.
Step 19. Attach brace to chipper chute with the hardware removed earlier from the brace. See the
illustration above for proper order. Tighten.
Step 20. Tighten the bolts securing the brace to the frame.
Step 21, Tighten the three nuts on the weld studs holding the chipper chute to the flail housing.
6
 Loading...